
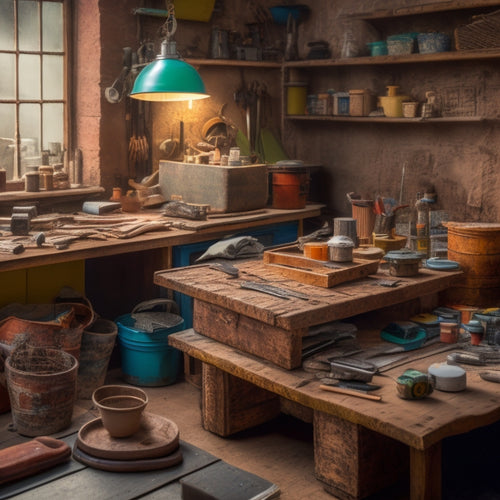
First-Time Renovator's Plastering Toolkit Checklist
As a first-time renovator, you'll need a thorough plastering toolkit to tackle your project. Start by gathering essential hand tools like a hawk, trowels, joint knife, putty knife, and plastering hammer. Don't forget mixing and measuring equipment, including a mixing bucket, paddle, digital scale, and measuring cups. Sanding and smoothing tools, such as sandpaper, sanding blocks, and sanding poles, are also vital. Additionally, invest in personal protective gear like gloves, a dust mask, goggles, and steel-toed boots. With these basics covered, you'll be well-prepared to take on your plastering project - and with further preparation, you'll be able to achieve professional-looking results.
Key Takeaways
- A hawk and various trowels are essential for applying and smoothing plaster, with options including stainless steel, carbon steel, and plastic.
- Mixing and measuring equipment, such as a mixing bucket, paddle, digital scale, and measuring cups, ensure accurate and efficient plaster preparation.
- Sanding and smoothing tools, including sandpaper, sanding blocks, and poles, help achieve a fine finish, with grit sizes ranging from 80-220.
- Edging and trimming tools, like edgers and joint knives, are necessary for creating smooth edges and corners, while taping and mudding tools aid in finishing tasks.
- Personal protective equipment (PPE), including gloves, dust masks, goggles, and steel-toed boots, is crucial for maintaining safety while working with plaster.
Essential Plastering Hand Tools
You'll need a set of vital plastering hand tools to secure a smooth and efficient plastering process, including a hawk, trowel, and joint knife. A hawk is used to hold and carry plaster, while a trowel is used to apply and spread it evenly. A joint knife is used to create a strong bond between plaster and drywall or other surfaces. Mastering the use of these tools is key to developing effective plastering techniques.
Common mistakes, such as applying too much pressure or using the wrong angle, can lead to uneven finishes and costly rework. To avoid these mistakes, it's important to understand the proper use and maintenance of each tool. For example, a trowel should be held at a 45-degree angle to achieve a smooth finish. A joint knife should be used in a gentle, sawing motion to avoid applying too much pressure.
Mixing and Measuring Equipment
With the correct plastering hand tools in place, the next step is to confirm accurate mixing and measuring of plaster to achieve ideal consistency and application results, requiring a set of specialized mixing and measuring equipment.
As a first-time renovator, it's important to invest in the right gear to guarantee precise measurements and efficient mixing.
A mixing bucket, also known as a plastering bucket, is a must-have for containing and mixing plaster. Look for a sturdy, large-capacity bucket with a non-slip handle for ease of use.
A mixing paddle or drill with a paddle attachment is necessary for efficient mixing, especially when working with large batches of plaster.
For measuring accuracy, a digital scale and measuring cups are crucial. When selecting measuring cups, opt for ones with clear graduations and a comfortable handle for easy pouring.
Additionally, consider a mixing stick or rod for scraping the sides and bottom of the bucket to promote thorough mixing.
Plastering Trowels and Edgers
When selecting plastering trowels and edgers for your toolkit, you'll need to take into account the specific tasks you'll be performing and the types of surfaces you'll be working with.
You'll want to choose a trowel that's the right size and type for the job, whether it's a finishing trowel for smooth surfaces or a jointing trowel for textured ones.
Choosing the Right Trowel
Choosing the right trowel for your plastering project is essential, as it directly affects the quality of the finish and the efficiency of the application process. You'll need to take into account the type of plaster you're using, the surface you're applying it to, and the desired finish. There are several trowel types to choose from, each with its own unique characteristics.
| Trowel Type | Description |
|---|---|
| Finishing Trowel | Used for final coats, providing a smooth finish |
| Jointing Trowel | Designed for applying and smoothing joint compound |
| Pointing Trowel | Used for filling gaps and holes in surfaces |
| Margin Trowel | Ideal for applying plaster to edges and corners |
| Notched Trowel | Used for applying adhesive and textured finishes |
When selecting a trowel, you should also take into account the material it's made from. Trowels can be made from stainless steel, carbon steel, or plastic. Stainless steel trowels are durable and resistant to corrosion, while carbon steel trowels are more flexible and suitable for detailed work. Plastic trowels are lightweight and easy to clean, but may not be as durable as metal trowels. By choosing the right trowel for your project, you'll be able to achieve a professional-looking finish and guarantee a successful plastering application.
Edging and Smoothing Techniques
You'll need to master edging and smoothing techniques to achieve a seamless finish, and the right plastering trowels and edgers are essential tools for this process.
Edging techniques involve using a trowel or edger to create a smooth, even edge along corners, ceilings, and joints. To achieve this, hold the trowel or edger at a 45-degree angle and use a gentle, sweeping motion to remove excess plaster. For external corners, use a trowel to press the plaster firmly into the corner, then use an edger to smooth out the edge.
Smoothing strategies involve using a trowel or edger to remove imperfections and create a smooth finish. Use a trowel to apply a thin layer of plaster, then use an edger to smooth out the surface. Work in small sections, using a circular motion to remove excess plaster and create a smooth finish. Use a clean, damp cloth to wipe away any excess plaster or debris.
Types of Edger Blades
With a variety of edger blades available, selecting the right one for your plastering project depends on the specific task at hand and the desired finish. You'll need to take into account the edger blade materials, as they can affect the quality of the finish.
Common materials include stainless steel, carbon steel, and high-carbon steel. Stainless steel edger blades are ideal for use with joint compounds and are resistant to corrosion. Carbon steel edger blades are suitable for most plastering applications, while high-carbon steel edger blades are best for heavy-duty use.
When choosing an edger blade, you'll also need to take into account the size. Edger blade sizes vary, typically ranging from 2 to 6 inches in width. The size of the blade you choose will depend on the specific task and the area you're working on.
A smaller blade is ideal for detail work and small areas, while a larger blade is better suited for larger areas and more extensive projects. It's crucial to choose the right size and material of edger blade to guarantee a smooth, even finish and to prevent damage to your plastering work.
Sanding and Smoothing Tools
Your plastering toolkit isn't complete without a set of sanding and smoothing tools to help refine surfaces, remove imperfections, and create a high-quality finish. As a first-time renovator, it's crucial to understand the importance of proper sanding techniques in achieving a smooth finish.
You'll need a variety of sanding tools, including sandpaper, sanding blocks, and sanding poles, to tackle different areas of your project. When choosing sandpaper, consider the grit size and type of abrasive. Coarse-grit sandpaper (about 80-100) is best for removing old plaster or joint compound, while finer grits (120-220) are better for smoothing out surfaces.
Sanding blocks and poles help you reach tight spaces and apply even pressure. Smoothing compounds, such as joint compound or spackling paste, are also necessary for filling holes and imperfections. These compounds can be sanded down to a smooth finish using your sanding tools.
PPE and Safety Gear
As you move on to the next stage of your plastering project, don't forget to gear up with the right personal protective equipment (PPE) and safety gear to protect yourself from the hazards associated with plastering, including dust, debris, and chemical exposure. You'll need to prioritize your safety by investing in an extensive range of PPE and safety gear.
First and foremost, get a good pair of gloves to prevent skin irritation and protect your hands from sharp edges and tools. A dust mask or respirator is also essential for filtering out dust and other airborne particles that can cause respiratory problems. Goggles or safety glasses with shatter-resistant lenses will shield your eyes from flying debris. Don't forget a pair of sturdy, steel-toed boots with good traction to prevent slips and falls.
In addition to these basics, familiarize yourself with relevant safety regulations and guidelines for plastering, such as proper ventilation and disposal of hazardous materials. Make sure you have a fire extinguisher nearby and that your workspace is well-lit and free from obstacles.
Ladders and Scaffolding Equipment
Selecting the right ladders and scaffolding equipment is essential for guaranteeing safe access to high areas of your plastering project, allowing you to work efficiently and effectively.
When it comes to ladders, you'll want to prioritize ladder safety above all else. Look for ladders that meet or exceed industry standards, such as those set by the American National Standards Institute (ANSI). Verify your ladder is the correct height for the job, and always maintain three points of contact with the ladder, whether it's two hands and one foot or two feet and one hand.
In addition to ladders, scaffolding types can vary depending on the project. Rolling scaffolding is ideal for large, open areas, while suspended scaffolding is better suited for high-rise projects. Supported scaffolding is a good all-around option, offering a stable platform for working at heights.
When choosing scaffolding, take into account the weight capacity, platform size, and adjustability. Always follow manufacturer instructions for assembly and use, and verify proper ladder safety precautions are in place.
Plastering Hammers and Mallets
When tackling a plastering project, it's essential to have the right hammers and mallets on hand to effectively mix, apply, and finish plaster.
As a first-time renovator, you'll need to familiarize yourself with the different types of hammers and mallets used in plastering techniques. A plastering hammer, also known as a 'plasterer's hammer,' is a versatile tool used for mixing, applying, and finishing plaster. It typically features a flat, broad head and a curved or angled claw for removing old plaster or debris.
You'll also need a mallet, which is used to tap and smooth out plaster without damaging the surface. There are two main types of mallets: a rubber mallet and a wooden mallet. A rubber mallet is ideal for delicate surfaces, while a wooden mallet is better suited for more heavy-duty applications.
Additionally, you may want to take into account a specialized hammer, such as a 'stilson' or 'rendering' hammer, which features a curved or angled head for specific plastering techniques.
Jointing and Finishing Tools
As you move on to the jointing and finishing stage of your plastering project,
you'll need to focus on creating a smooth, seamless finish.
To achieve this, you'll require a set of specialized tools designed for taping and mudding joints,
sanding and smoothing surfaces,
and edging and trimming corners.
These tools will help you eliminate imperfections,
create a uniform texture,
and produce a high-quality finish that meets your standards.
Taping and Mudding
To guarantee a smooth finish and strong joints, you'll need the right taping and mudding tools, which include a putty knife, joint knife, and taping knife. These tools are designed to handle the various stages of jointing and finishing.
When it comes to taping techniques, a putty knife is crucial for applying and smoothing out joint compound. Use it to press the tape firmly onto the surface, ensuring a strong bond.
For mudding tips, a joint knife is your go-to tool. It's used to apply and smooth out multiple layers of joint compound, feathering it out towards the edges. A taping knife, on the other hand, is used to apply and smooth out the final layer of compound, creating a seamless finish.
When working with these tools, it's important to keep them clean and dry to prevent the buildup of compound. Regularly wipe them down with a damp cloth and store them in a dry place.
Sanding and Smoothing
You've applied and smoothed out the joint compound, and now it's time to focus on sanding and smoothing the surface to achieve a flawless finish, which requires a different set of tools and techniques.
For this stage, you'll need to employ specific sanding techniques to remove imperfections and bumps. Start by using a sanding block with a coarse-grit sandpaper (about 120-150 grit) to sand the entire surface, feathering the edges to blend with the surrounding area.
As you progress, switch to higher grit sandpaper (220-240 grit) for a finer finish. Use a sanding sponge or a small, handheld sanding pad to get into tight spaces and corners.
It's important to work with the light, using it to inspect the surface for any remaining imperfections. Smoothing finishes is critical at this stage, and you may need to apply additional coats of joint compound to achieve a smooth surface.
Remember to wipe away any dust or debris with a damp cloth between sanding sessions to guarantee a smooth finish. By following these steps and using the right tools, you'll be able to achieve a professional-looking finish that's smooth to the touch.
Edging and Trimming
Finishing the edges and trimming the joints requires a specialized set of tools, including a joint knife, taping knife, and a putty knife, each designed for precision and control. As you work on your plastering project, you'll need to master various edging techniques and trimming styles to achieve a professional finish.
When choosing your edging and trimming tools, consider the specific tasks you'll be performing. For example, a joint knife is ideal for applying and smoothing out joint compound, while a taping knife is better suited for pressing tape into place. A putty knife, on the other hand, is perfect for filling small holes and imperfections.
Here's a summary of the key edging and trimming tools you'll need:
| Tool | Description |
|---|---|
| Joint Knife | Applies and smooths out joint compound |
| Taping Knife | Presses tape into place |
| Putty Knife | Fills small holes and imperfections |
To achieve a seamless finish, it is crucial to select the right tool for the job and use it correctly. Practice different edging techniques and trimming styles to develop your skills and confidence. With the right tools and techniques, you'll be able to create a professional-looking finish that will elevate your plastering project.
Measuring and Marking Devices
Measuring and marking devices are important tools in your plastering toolkit, allowing you to accurately gauge and indicate the dimensions of your work area.
As a first-time renovator, it's imperative to have the right measuring and marking devices to guarantee precise measurements and accurate placement of plaster.
A measuring tape is a must-have in your toolkit, enabling you to measure lengths, widths, and heights of walls, ceilings, and corners. Look for a sturdy, 3-meter-long tape with clear markings and a robust clip.
Marking chalk is another significant tool for marking cut lines, drill holes, and other important references on your work surface. It's important to use high-quality marking chalk that's easy to read and resistant to smudging.
When choosing a marking chalk, opt for a water-resistant and non-toxic option that won't damage your surfaces. Additionally, consider a chalk reel or snap line for marking long, straight lines quickly and accurately.
Cleaning and Storage Supplies
Several essential cleaning and storage supplies are necessary to maintain a clean and organized workspace, protect your tools, and secure a successful plastering project.
As a first-time renovator, you'll need to stock up on cleaning supplies, including a dustpan and brush, a vacuum cleaner with a dust collection feature, and a pressure washer for removing stubborn dirt and grime from surfaces. Don't forget a supply of cleaning solutions, such as trisodium phosphate (TSP) or a mild dish soap, and plenty of clean water.
Proper storage solutions are also vital to maintaining an organized workspace and prolonging the life of your tools. You'll need a toolbox or chest to store your plastering tools, such as trowels, hammers, and knives. A storage rack or pegboard can help keep frequently used items, like ladders and step stools, within easy reach.
Label each storage container and shelf to make sure you can quickly locate the supplies you need. Finally, invest in a sturdy bucket or container with a lid to store your mixing supplies, such as sand, cement, and lime.
With these cleaning and storage supplies, you'll be well on your way to a successful plastering project.
Frequently Asked Questions
How Often Should I Clean My Plastering Tools?
When it comes to cleaning your plastering tools, you should establish a regular cleaning frequency to maintain their effectiveness and longevity.
You'll want to clean your tools after each use to prevent plaster from drying and hardening on the surfaces. Daily cleaning will also help prevent rust and corrosion on metal tools.
Additionally, set aside time for more thorough cleaning and maintenance every week to guarantee your tools remain in good condition.
What Is the Best Way to Store Plastering Trowels?
When storing plastering trowels, you'll want to prioritize tool maintenance to extend their lifespan.
You should clean and dry your trowels after each use, then store them in a dry, secure location.
Consider using a trowel storage rack or case to keep them organized and protected from damage. This will help prevent rust and maintain the trowel's edge, ensuring it remains effective for future projects.
Regularly inspect your trowels for wear and tear.
Can I Use Household Items for Mixing Plaster?
As you begin the plastering journey, you're likely to find yourself in a sea of unfamiliar tools and techniques.
Don't get lost in the undertow of uncertainty.
When it comes to mixing plaster, you might wonder if household items can be used as substitutes. You can use a drill with a paddle attachment or a large bucket as household alternatives for mixing plaster.
Experiment with different mixing techniques to achieve the perfect consistency, but be aware that results may vary.
Do I Need a Separate Room for Plastering Projects?
When tackling plastering projects, you'll want to guarantee a safe and efficient workspace setup.
You don't necessarily need a separate room, but it's essential to contain the mess. Designate a specific area for plastering, covering floors and surfaces with drop cloths or plastic sheets. This will minimize cleanup and prevent damage.
Adequate ventilation is also important for plastering safety. You'll need good airflow to remove dust and prevent inhalation of harmful particles.
How Do I Dispose of Leftover Plastering Materials?
As you finish your plastering project, the excitement of transforming a space contrasts sharply with the intimidating task of disposing of leftover materials.
You have a responsibility to handle plaster disposal methods in an environmentally conscious manner. Fortunately, there are eco-friendly options available.
Consider recycling or repurposing leftover plaster for future projects, or look into local facilities that accept plaster waste.
Conclusion
As you prepare to take on your first plastering project, don't be caught with a bag of cement and a prayer - having the right toolkit is the foundation of a job well done.
Think of this checklist as your 'recipe for success' - follow it to the letter and you'll be 'wiping the wall clean' of imperfections in no time.
Now, get ready to lay the groundwork for a smooth, professional finish.
Related Posts
-
Budget-Friendly Materials for Your Home Renovation Project
As you plan your home renovation project, finding budget-friendly materials is key to turning your design vision into...
-

5-Step Subfloor Prep Checklist for a Smooth Renovation
You can guarantee a smooth renovation by following a 5-step subfloor prep checklist. First, assess the current subflo...
-

3 Best DIY Home Renovation Timelines for Success
As you tackle your DIY home renovation project, create a solid timeline by breaking it down into three phases. First,...


