Finishing Tools for Your Home Renovation Project
Share
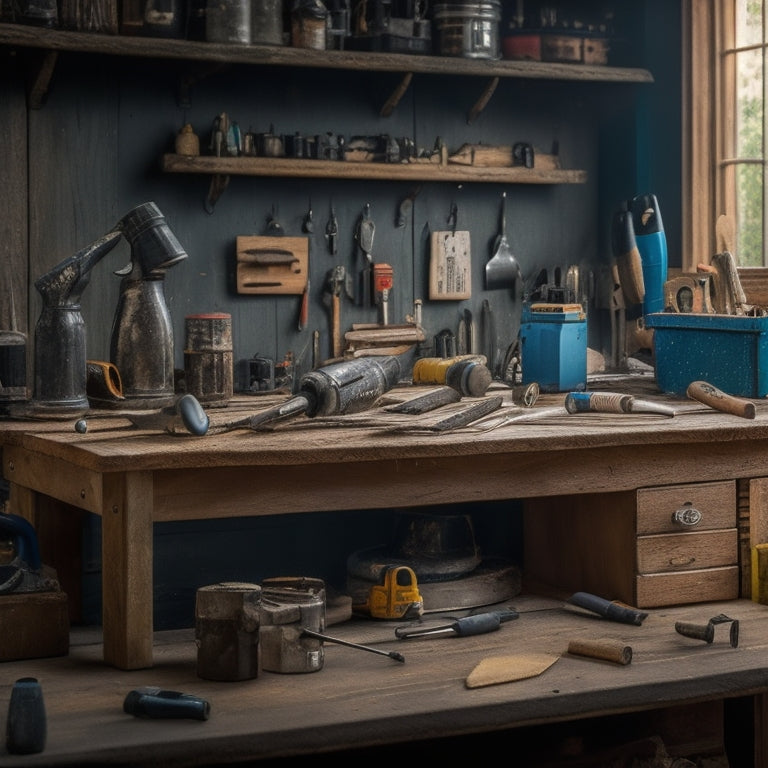
When tackling a home renovation project, you'll need to choose the right concrete finishing tools to achieve professional-looking results. The selection of tools greatly impacts the final texture and appearance of concrete, with different tools producing specific finishes like smooth, glossy, or textured. Essential tools include trowels, edgers, floats, brooms, and grinders, and it's important to match them to the concrete type. Proper tool selection enhances efficiency and quality, while incorrect tool selection can lead to subpar results and wasted time. By understanding the tools and techniques involved, you'll be well on your way to achieving the desired finish for your renovation project, and exploring further will reveal even more possibilities.
Key Takeaways
• Choosing the right concrete finishing tools is crucial, as they significantly impact the final texture and appearance of your renovation project.
• Assess your project's scope and required finishes before renting equipment to ensure you get the right tools for the job.
• Regular maintenance of tools is essential for optimal performance, and neglecting it can lead to poor results and tool damage.
• Safety gear, such as gloves, helmets, and safety glasses, is vital to protect yourself from chemicals, dust, and debris during the finishing process.
• Proper surface preparation, including cleaning and repairing, is necessary to ensure strong bonding and high-quality finishes in your home renovation project.
Choosing the Right Concrete Finishing Tools
When preparing to finish a concrete surface, you need to select the right concrete finishing tools to achieve the desired texture, pattern, and overall appearance. This decision is critical, as it directly impacts the final result of your home renovation project.
With numerous concrete texture choices available, it's important to reflect on the type of finish you want to achieve. Do you want a smooth, glossy surface or a textured, broom-finished look? Different tools are designed to produce specific textures, so it's crucial to choose the right ones for your project.
In addition to selecting the right tools, you must also prioritize finishing tool maintenance. Regular cleaning and lubrication can extend the lifespan of your tools and guarantee they continue to perform at their best.
Neglecting maintenance can lead to subpar results and even damage to your tools. By investing time in tool maintenance, you'll be able to achieve professional-grade results and take pride in your finished concrete surface.
Tips for Renting Concrete Finishing Equipment
You'll likely need to rent concrete finishing equipment to get the job done efficiently, especially if you're working on a large-scale project or need specialized tools for a specific finish.
When considering equipment rental, think about the scope of your project and the type of finish you want to achieve. Make a list of the tools you need, and research rental companies that offer the equipment you require.
Cost considerations are essential when renting concrete finishing equipment. Calculate the total cost of rental, including delivery, fuel, and operator costs. Compare prices among rental companies to guarantee you're getting the best deal. Be aware of any additional fees, such as equipment damage or late return fees.
Before finalizing a rental agreement, inspect the equipment to confirm it's in good working condition. Check the maintenance records and ask about the equipment's operating procedures. Clarify the rental period, and plan your project timeline accordingly.
Essential Concrete Wall Finishing Tools
By investing in the right concrete wall finishing tools, you can achieve a smooth, even finish that meets your project's specifications. Whether you're a seasoned pro or a DIY enthusiast, having the right tools can make all the difference in achieving the desired surface textures and finishing techniques.
Here are some essential concrete wall finishing tools you should consider:
| Tool | Description |
|---|---|
| Trowel | Used for applying and smoothing out concrete, available in various sizes and shapes |
| Edger | Used to create a clean, defined edge along walls and corners |
| Float | Used to smooth out and flatten the concrete surface |
| Broom | Used to create a textured finish, available in various bristle lengths and materials |
| Grinder | Used to polish and refine the concrete surface, available in various grit levels |
These tools will help you achieve a professional-looking finish, whether you're going for a smooth, glossy surface or a more textured, industrial look. By mastering these essential tools and techniques, you'll be able to take your concrete wall finishing skills to the next level.
Safety Precautions for Concrete Finishing
When you're working on concrete finishing, you're exposed to a range of hazards that can put your health and safety at risk.
To avoid injuries and guarantee a successful project, you'll need to prioritize protective gear, take personal safety measures, and control workspace hazards.
Protective Gear Essentials
Wearing protective gear is essential for concrete finishing, as it shields you from harsh chemicals, heavy dust, and flying debris that can cause serious injuries. When it comes to gloves selection, you'll want to choose a pair that provides dexterity, grip, and protection from abrasion. Look for gloves with a durable palm material, such as synthetic or natural rubber, and a breathable back to prevent moisture buildup.
For head protection, you'll need a helmet that can withstand impact and penetration. There are two primary helmet types: hard hats and bump caps. Hard hats provide superior protection and are recommended for concrete finishing, while bump caps offer lighter protection and are suitable for tasks with minimal risk.
Here's a summary of the essential protective gear you'll need:
| Protective Gear | Description | Recommended Type |
|---|---|---|
| Gloves | Protect hands from abrasion, cuts, and chemicals | Durable palm material, breathable back |
| Helmet | Protect head from impact, penetration, and falling objects | Hard hat for superior protection |
| Safety Glasses | Protect eyes from flying debris and chemicals | Anti-fog, scratch-resistant lenses |
| Dust Mask | Protect respiratory system from heavy dust and particles | Filter rating: N95 or higher |
Personal Safety Measures
To prevent accidents and guarantee a safe working environment, you must take personal safety measures to mitigate the risks associated with concrete finishing.
As you initiate your home renovation project, it's essential to identify potential hazards and develop risk assessment strategies to minimize them.
Start by wearing personal protective equipment (PPE) such as gloves, safety glasses, and a dust mask to shield yourself from flying debris and harmful particles.
Verify your PPE is in good condition and properly fitted to maximize its effectiveness.
Next, conduct a thorough risk assessment to identify potential hazards, such as uneven flooring, slippery surfaces, and falling objects.
Develop strategies to mitigate these risks, like installing handrails, securing loose materials, and maintaining a clean workspace.
By taking these proactive measures, you'll greatly reduce the risk of accidents and create a safer working environment.
Workspace Hazard Control
You'll need to control hazards in your workspace by designating a concrete finishing zone, where you can restrict access to authorized personnel and prevent accidental entry by children, pets, or unauthorized individuals. This zone should be clearly marked with warning signs and barriers to prevent accidental entry.
Inside the zone, maintain a clean and organized workspace to reduce tripping hazards and slips. Guarantee good lighting and ventilation to prevent eye and respiratory irritation. Implement a system for disposing of waste materials, and keep essential tools and equipment within easy reach.
As you work, maintain hazard awareness by regularly inspecting your workspace for potential hazards, such as uneven surfaces, electrical cords, and sharp objects. Take corrective action immediately to mitigate these hazards.
Proper workspace organization is key to preventing accidents and guaranteeing a successful concrete finishing project. By controlling hazards and maintaining a safe workspace, you'll be able to focus on achieving professional-grade results without compromising your safety or the safety of others.
Common Concrete Finishing Tool Mistakes
When you're working on a concrete finishing project, it's easy to overlook critical steps that can make all the difference in the final result.
You might be tempted to grab the wrong tool for the job or rush through surface preparation, but these mistakes can lead to costly rework or even structural issues.
Incorrect Tool Selection
Selecting the wrong finishing tools for your concrete renovation project can lead to subpar results, wasted time, and unnecessary expenses. You might be tempted to choose tools based on price or brand name, but that's a recipe for disaster. Instead, consider the specific tasks you need to accomplish and the type of concrete you're working with. For instance, if you're working with a high-strength concrete, you'll need tools that can handle the increased density.
Tool compatibility is essential for task efficiency. Using the wrong tool for the job can lead to slow progress, uneven finishes, and even damage to the tool itself. Take the time to research and understand the specifications of each tool, including the type of concrete it's designed for, the intended application, and the recommended techniques.
Don't assume that a tool will work for your project just because it worked for someone else's. By choosing the right tools for your specific needs, you'll be able to work more efficiently, produce higher-quality results, and avoid costly mistakes.
Poor Surface Preparation
Before applying finishing tools, verify the concrete surface is thoroughly prepared by cleaning, repairing, and profiling it to the recommended specification, as even minor imperfections can lead to uneven finishes and tool damage.
You'll want to identify and address common surface flaws, such as cracks, spalls, and unevenness, to guarantee a smooth finish. Surface preparation techniques, such as grinding and shot blasting, can help remove imperfections and create a uniform surface.
When preparing the surface, remember to remove any dirt, oil, or old adhesives that may affect the bonding of your finishing tools. Failing to do so can lead to poor adhesion, delamination, or even tool failure.
Take the time to inspect the surface for any defects, and make necessary repairs before moving forward. By investing in proper surface preparation, you'll guarantee a strong bond between the finishing tools and the concrete, resulting in a high-quality finish that will last.
Don't skip this vital step – it's essential for achieving professional-grade results in your home renovation project.
Inadequate Curing Time
You'll also need to confirm the concrete has reached the required strength and moisture levels by allowing adequate curing time, as rushing this process can lead to weakened bonds between the finishing tools and the substrate.
Inadequate curing time is a common mistake that can compromise the integrity of your home renovation project. To avoid this, you must select the right curing methods based on the specific drying conditions of your concrete.
For instance, you may need to use a combination of curing compounds, misting, or covering to maintain ideal moisture levels. It's important to monitor the temperature, humidity, and wind conditions to adjust your curing methods accordingly.
Additionally, you should follow the manufacturer's instructions for the recommended curing time, which can range from a few hours to several days or even weeks, depending on the type of concrete and finishing tools used.
Advanced Concrete Finishing Techniques
Achieving a high-gloss finish or intricate design on your concrete surfaces requires mastering advanced concrete finishing techniques, including stamping, stenciling, and micro-topping. These techniques can elevate your polished concrete to a whole new level, giving you a durable and visually stunning result.
To take your concrete finishing skills to the next level, consider the following advanced techniques:
-
Texture and pattern creation: Use specialized tools and materials to create unique textures and patterns on your concrete surface.
-
Color application: Master the art of applying colors, stains, and dyes to achieve the desired effect on your decorative overlays.
-
Stamping and stenciling: Learn how to use stamping mats and stencils to create intricate designs and patterns on your concrete surface.
- Micro-topping and overlay installation: Discover the techniques for installing thin, decorative overlays on top of existing concrete surfaces.
Frequently Asked Questions
Can I Use Concrete Finishing Tools on Epoxy or Polyurethane Floors?
When working with epoxy or polyurethane floors, you're likely wondering if you can use concrete finishing tools. The answer is, it depends.
You can use certain concrete tools, like trowels, on epoxy floors if you're experienced with epoxy application techniques.
However, polyurethane surface preparation requires more specialized tools to avoid damaging the surface.
Be cautious when selecting tools to guarantee a successful, high-gloss finish.
How Do I Clean and Maintain My Concrete Finishing Tools?
When you're done with your project, you'll want to clean and maintain your concrete finishing tools to guarantee they last.
Start by wiping them down with a solvent-based cleaner to remove any residue. Then, use a wire brush to scrub off stubborn materials.
Dry your tools thoroughly and store them in a dry place, like a tool storage container.
Regularly inspect and sharpen your tools to keep them in top condition.
Proper cleaning techniques will extend their lifespan and keep them performing at their best.
Are Concrete Finishing Tools Suitable for DIY Projects or Just Professionals?
As you walk onto a job site, you notice both DIY enthusiasts and professionals wielding concrete finishing tools. Coincidence? Not quite.
While DIYers can achieve impressive results with concrete finishing tools, they often lack the finesse and expertise to match professional techniques.
With practice and patience, you can master DIY concrete projects, but for complex, high-stakes jobs, it's best to leave it to the pros who've honed their skills.
What Is the Difference Between a Trowel and a Float?
When you're working with concrete, you'll often reach for a trowel or a float. But do you know the difference?
A trowel is a handheld tool with a flat, curved, or notched blade, used to apply and smooth out concrete. You'll find various trowel types, like pointing or finishing trowels, each suited for specific tasks.
A float, on the other hand, is a larger, flat tool made from materials like magnesium, aluminum, or wood, used to level and smooth the surface.
Can I Use Concrete Finishing Tools on Existing, Old Concrete Surfaces?
When you're dealing with old concrete surfaces, you're probably wondering if your concrete finishing tools can still get the job done.
The short answer is yes, but with some prep work. You'll need to focus on concrete surface preparation, which may involve cleaning, patching, and profiling the surface.
Then, you can use your tools for old concrete resurfacing, but be prepared for a more challenging process.
Conclusion
As you put the finishing touches on your home renovation project, remember that the right concrete finishing tools can make all the difference between a mediocre makeover and a masterpiece.
Don't let your hard work crumble like a poorly finished sidewalk - invest in the right gear and techniques to give your space a polished, professional look that will stand the test of time.
Related Posts
-

Why Use Concrete Blocks in Home Renovation
You're considering using concrete blocks in your home renovation, and for good reason: they offer a unique combinatio...
-

Streamlining Your Exterior Renovation Timeline
To streamline your exterior renovation timeline, start by identifying your project goals and objectives, and prioriti...
-

Why Tool Exchange Matters in Home Renovation
You rely on a well-maintained tool belt to complete home renovation projects efficiently, and having access to the ri...


