Essential Tools for Successful Home Renovation Repair
Share
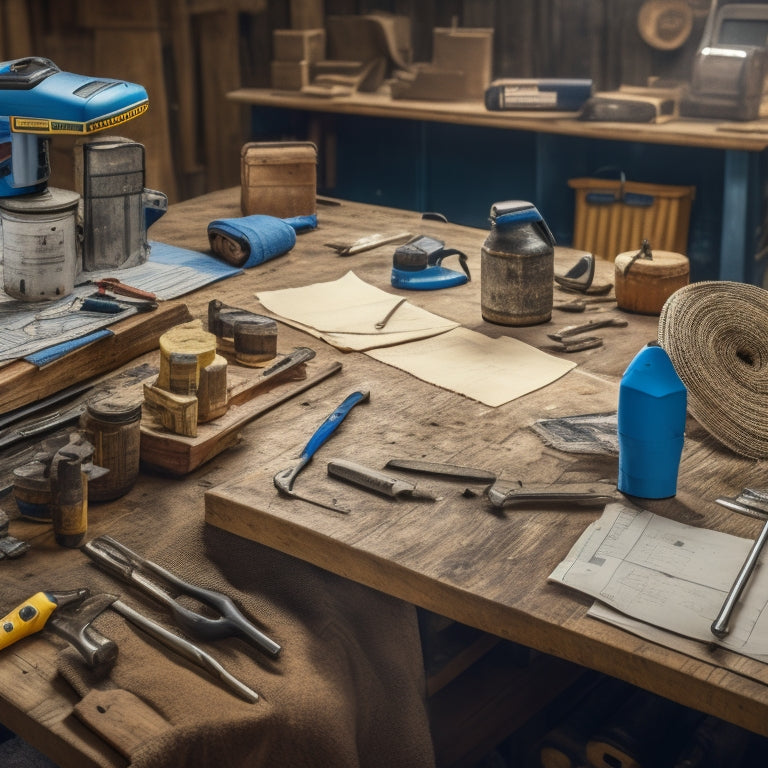
As you prepare for your home renovation repair project, having the right tools is vital to getting the job done efficiently and effectively. You'll need a putty knife, wire brush, and vacuum cleaner for surface preparation, as well as a hammer, chisel, and trowel for repair work. Don't forget essential drilling and mixing tools, like a reliable cordless drill and mixing paddle. Safety equipment, such as hard hats and safety glasses, is also a must. Additionally, you'll need measuring and leveling devices, cutting and grinding tools, and finishing and smoothing tools to get the job done. From there, you'll be ready to tackle the specifics of your project and guarantee a successful renovation.
Key Takeaways
• A well-planned project requires essential tools and materials, including surface preparation, repair, drilling, and mixing tools for a lasting repair.
• Safety equipment like hard hats, safety glasses, dust masks, and gloves are crucial for protecting yourself from hazards during renovation work.
• Measuring and leveling devices, such as measuring tapes, laser levels, and leveling equipment, ensure accuracy and precision in renovation projects.
• Specialized tools, including cutting, grinding, and finishing tools, are necessary for unique tasks and achieving professional-looking results.
• Proper cleaning and debris removal tools, including dust barriers, air quality control systems, and waste management strategies, maintain a clean and safe work environment.
Preparing for Concrete Wall Repair
Before tackling a concrete wall repair, gather essential tools and materials to secure a successful and efficient project. You'll want to identify the common wall issues you're dealing with, such as cracks, holes, or crumbling sections, to determine the best repair techniques. For instance, if you're dealing with minor cracks, you might use a patching compound, whereas more extensive damage may require replacing entire sections of the wall.
Understanding the underlying cause of the issue is vital to selecting the right repair technique. Are you dealing with structural damage, water damage, or simply wear and tear? Once you've diagnosed the problem, you can develop a plan of attack.
Research different repair techniques, such as injecting epoxy or using a concrete patching mix, to find the best solution for your specific situation. By taking the time to prepare and plan, you'll secure a successful repair that lasts for years to come.
Tools Needed for Concrete Wall Repair
Gather the following essential tools to guarantee a smooth and efficient concrete wall repair process:
A putty knife or scraper for removing loose debris,
A wire brush for cleaning the surface,
And a vacuum cleaner or blower to remove dust and dirt.
You'll also need a hammer and chisel to break away damaged concrete,
And a trowel or float to apply and smooth out repair compounds.
Additionally, have a level and straightedge on hand to verify the wall surface is even and plumb.
To achieve a strong bond between old and new concrete, use a bonding agent and follow the manufacturer's instructions.
Don't forget safety gear, including gloves, safety glasses, and a dust mask, to protect yourself from the physical demands of concrete repair techniques and the dust generated during wall surface preparation.
With these tools, you'll be well-equipped to tackle your concrete wall repair project with confidence.
Essential Drilling and Mixing Tools
You'll need a reliable drill and suitable mixing tools to effectively prepare and apply repair compounds, grouts, or epoxies in your home renovation project. A cordless drill with adjustable torque settings will give you the control you need for various drilling techniques. Additionally, consider investing in a drill bit set that includes bits specifically designed for mixing and applying repair materials.
When it comes to mixing, it's essential to get the ratios right. A mixing paddle or mixing stick will help you achieve the correct consistency and avoid lumps. Be certain to follow the manufacturer's instructions for mixing ratios to guarantee the best results. A mixing bucket with measurement markings will also come in handy for accurately measuring and mixing your materials.
Remember to always read and follow the instructions on the product label, and take necessary precautions to avoid overmixing or undermixing. With the right drilling and mixing tools, you'll be well on your way to successful repairs and a beautifully renovated home.
Safety Equipment for Renovation Work
As you prepare to tackle the hands-on aspects of your home renovation project, make certain you're equipped with the necessary safety gear to protect yourself from potential hazards. Renovation work can be dangerous, and it's crucial to prioritize your safety above all else.
To guarantee your well-being, invest in the following vital safety equipment:
-
Hard hat: A sturdy hard hat will protect your head from falling objects and debris.
-
Safety glasses: Safety glasses or goggles will shield your eyes from dust, flying particles, and chemical splashes.
-
Dust mask: A dust mask will prevent you from inhaling harmful particles and dust.
- Steel-toed boots: Steel-toed boots will protect your feet from heavy objects and sharp edges.
Measuring and Leveling Devices
Accurate measurements and leveling are crucial to a successful home renovation, so it's important that you have the right devices to guarantee precision and accuracy in your work.
A measuring tape is a must-have tool for any renovation project. It allows you to take precise measurements of rooms, walls, and materials, assuring that your calculations are spot on. Look for a tape that's durable, easy to read, and has a sturdy hook that can grab onto surfaces securely.
In addition to a measuring tape, a laser level is another essential tool for achieving accurate leveling. This device projects a level line or dot onto a surface, allowing you to verify that your floors, cabinets, and countertops are perfectly horizontal or vertical.
Laser levels are especially useful when working with large surfaces or installing flooring, as they provide a precise reference point. By investing in a high-quality measuring tape and laser level, you'll be able to tackle your renovation project with confidence, knowing that your measurements and leveling are precise and reliable.
Cutting and Grinding Tools Required
When tackling a home renovation project, having the right cutting and grinding tools at your disposal is essential for efficiently and effectively making precise cuts and preparing surfaces for finishing.
These tools will help you master various cutting techniques, from making straight cuts to complex curved cuts.
To guarantee you're well-equipped, you'll need the following cutting and grinding tools:
-
Circular saw: for making straight cuts in wood, metal, or masonry.
-
Reciprocating saw: for demo work, pruning, and making curved cuts.
-
Angle grinder: for grinding and polishing metal, and removing old mortar.
- Jigsaw: for curved cuts in wood, metal, or drywall.
Finishing and Smoothing Tools
As you move on to the finishing stages of your home renovation project, you'll need the right tools to get the job done.
You'll be working with surfaces that require a smooth finish, and that's where finishing and smoothing tools come in.
You'll be using sanding and scraping tools, drywall taping knives, and putty and filling blades to achieve a professional-looking result.
Sanding and Scraping Tools
You'll likely spend a significant amount of time on sanding and scraping tasks during your home renovation project, since smooth finishes and surfaces require meticulous attention to detail. To master these tasks, you'll need to develop effective sanding techniques and scraping methods.
When it comes to sanding, having the right tools is essential. Here are some essentials to add to your toolkit:
-
Orbital sander: ideal for smoothing out large surfaces
-
Belt sander: perfect for removing old finishes and sanding down rough wood
-
Detail sander: great for getting into tight spaces and corners
- Hand sandpaper: for those areas that require a more gentle touch
Drywall Taping Knives
Moving on to finishing and smoothing tools, drywall taping knives are a must-have for achieving a seamless joint between drywall panels. You'll need them to apply and smooth out joint compound, creating a flawless finish.
When choosing a drywall taping knife, consider the size and flexibility you need for your project. A 6-inch or 10-inch knife is ideal for most drywall repair tips, but you may need a smaller or larger one depending on the area you're working on.
To get the most out of your drywall taping knife, master the basic drywall texture techniques. Hold the knife at a 45-degree angle and apply gentle pressure, feathering the compound outwards from the joint. This will help you attain a smooth, even finish.
Remember to clean your knife regularly to prevent compound buildup and guarantee a smooth application. With practice and patience, you'll be able to create professional-looking joints that will make your drywall repair tips stand out.
Putty and Filling Blades
When it comes to filling imperfections and small holes in your drywall, putty and filling blades are essential finishing and smoothing tools that help you achieve a smooth, blemish-free surface. As you work on your home renovation, you'll likely encounter small holes and imperfections that need to be filled and smoothed out. That's where putty and filling blades come in.
To get the best results, it's important to choose the right type of putty and filling blade for the job. Here are some key considerations to keep in mind:
-
Putty type: Choose a putty that's suitable for your drywall type, such as lightweight or heavy-duty putty.
-
Filling blade type: Select a filling blade that matches your putty application technique, such as a flexible blade for smooth finishes or a stiff blade for heavy filling.
-
Blade size: Pick a blade size that fits comfortably in your hand and suits the size of the imperfection you're filling.
- Putty application techniques: Experiment with different techniques, such as applying putty in thin layers or using a 'push-pull' motion to fill holes.
Cleaning and Debris Removal Tools
When you're in the midst of a home renovation, cleaning and debris removal are essential steps that can't be overlooked.
You'll need to figure out how to contain dust and dispose of debris efficiently, and that's where the right tools come in.
Dust Containment Systems
You'll need to invest in a reliable dust containment system to prevent airborne particles from spreading throughout your home and making a mess during renovation projects. This is essential to maintaining a clean and safe work environment. Effective dust containment systems not only keep your home clean but also reduce the risk of respiratory problems and other health issues associated with inhaling dust and debris.
Here are some key components of a reliable dust containment system:
-
Dust barrier techniques: Use plastic sheets or tarps to seal off areas where renovation work is taking place.
-
Air filtration systems: Install HEPA-filter equipped air purifiers to capture 99.97% of particles as small as 0.3 microns.
-
Vacuum systems: Utilize vacuum systems with HEPA filters to capture dust and debris at the source.
- Containment bags: Use containment bags to enclose power tools and equipment to prevent dust from spreading.
Debris Disposal Methods
Effective debris disposal methods are essential to maintaining a safe and organized work site, allowing you to focus on the renovation project at hand.
As you demolish and reconstruct, you'll generate a substantial amount of waste, which can quickly clutter your workspace and hinder progress. To avoid this, it's vital to develop a waste management strategy that's both efficient and environmentally friendly.
One approach is to sort debris into categories, separating recyclable materials from non-recyclable waste. This allows you to take advantage of debris recycling options, reducing the amount of waste sent to landfills and minimizing your project's environmental impact.
Consider renting a dumpster or waste container specifically designed for renovation projects, which can help keep your site clean and organized. Additionally, designate a specific area for debris collection, making it easier to transport materials to a recycling facility or disposal site.
Specialized Tools for Unique Tasks
Tackling unique tasks during a home renovation often requires specialized tools that can help you achieve professional-looking results and avoid costly mistakes.
As you immerse yourself in renovation techniques, you'll encounter situations that demand more than just your standard toolkit. That's where specialized equipment comes in.
For instance, when working with curved or irregular surfaces, you'll need tools that can adapt to these unique shapes.
Here are some examples of specialized tools you may need:
-
Jigsaws with curved blades for cutting complex shapes in wood or metal.
-
Flexible sanding blocks for smoothing out curved or rounded surfaces.
-
Tile nippers for precision cutting of irregularly-shaped tiles.
- Drywall routers for creating custom holes and shapes in drywall.
Frequently Asked Questions
How Do I Handle Unexpected Renovation Costs and Stay on Budget?
When unexpected renovation costs arise, you'll be prepared with contingency planning, having set aside 10-20% of your budget for surprises. Implement budgeting strategies like prioritizing must-haves, negotiating with contractors, and making adjustments to stay on track.
Can I Reuse Old Materials From the Original Construction?
"When life gives you lemons, make lemonade" - you can breathe new life into old materials by preserving and creatively repurposing them, reducing waste and saving money, but first, assess their condition and potential for reuse.
What Is the Best Way to Manage Renovation Waste Disposal?
You'll want to manage renovation waste disposal by implementing a thorough waste sorting system, identifying recyclable materials, and exploring local recycling options to minimize landfill waste and reduce your environmental impact.
How Do I Ensure Compliance With Local Building Codes and Regulations?
You guarantee compliance with local building codes and regulations by obtaining necessary building permits and undergoing a thorough inspection process, which helps you avoid costly rework and penalties down the line.
Can I Complete a Home Renovation Project Without Professional Help?
You can complete a home renovation project without professional help, but it's essential to develop DIY strategies and realistic renovation timelines to avoid costly mistakes and guarantee a successful outcome.
Conclusion
As you stand back to admire your newly renovated space, remember that a successful home renovation is like maneuvering through a treacherous obstacle course.
You've dodged the hurdles of concrete wall repair, drilling, and mixing, and crossed the finish line of cutting, grinding, and finishing.
But, without the right tools, you'd have stumbled and fallen.
Now, you've emerged victorious, your renovated home shining like a trophy, a proof of your perseverance and preparedness.
Related Posts
-

Why Do Cinder Block Wall Renovations Cost So Much
You're likely surprised by the high cost estimate for your cinder block wall renovation project, but it's driven by s...
-

3 Beginner-Friendly Tools for Plaster Renovation Success
You'll be glad to know that the three essential tools you need for a successful plaster renovation are the same ones ...
-

Budget-Friendly Materials for Your Home Renovation Needs
As you initiate your home renovation, you're enthusiastic to find budget-friendly materials that fit your vision with...


