
Essential Tools for Smooth Home Facade Renovation
As you prepare for your home facade renovation, having the right tools is essential to achieving a smooth, professional-looking finish. You'll need fundamental plastering tools like a hawk, trowel, and putty knife to achieve a smooth finish. Don't forget preparation tools like a mixing bucket, drill, and mixing paddle, as well as precision tools like a level and straightedge for accurate leveling. Safety gear, including a dust mask, safety glasses, and a clean water source, is also critical. With these tools in hand, you'll be well-equipped to tackle your renovation - and with a deeper exploration into the process, you'll reveal the secrets to a flawless facade.
Key Takeaways
• A hawk, trowel, and putty knife are essential tools for achieving a smooth finish in exterior wall plastering.
• A mixing bucket, drill, and mixing paddle are necessary for preparing plaster, ensuring the right consistency and mix.
• A level and straightedge are crucial for accurate leveling and ensuring a uniform surface.
• Safety gear, including a dust mask, safety glasses, and clean water source, is vital for protecting workers during the renovation process.
• Regular cleaning of tools is important to prevent rust and ensure longevity, maintaining their effectiveness throughout the project.
Understanding Exterior Wall Plastering
As you prepare to tackle your home facade renovation, you'll need to grasp the fundamentals of exterior wall plastering, which involves applying a durable, weather-resistant layer of plaster to the exterior surface of your walls.
Exterior wall plastering is a vital step in protecting your home from the elements and enhancing its curb appeal. There are several types of plaster to choose from, including lime-based, cement-based, and acrylic-based plasters, each with its own unique benefits and characteristics. When selecting a plaster type, consider factors such as climate, wall substrate, and desired finish.
Proper application techniques are just as important as choosing the right plaster type. You'll need to prepare the wall surface by cleaning and repairing any cracks or damage. Then, apply a bonding agent to guarantee a strong bond between the plaster and the wall.
Next, apply the plaster in thin layers, allowing each layer to dry before applying the next. Finally, finish the surface with a coat of paint or sealant to protect the plaster and enhance its appearance.
Buying Guide for Exterior Wall
With your exterior wall plastering skills honed, you're now ready to select the ideal materials for your home facade renovation. Start with the right exterior wall products that meet your project's specific needs and budget.
When choosing exterior wall materials, consider factors such as durability, weather resistance, and aesthetics. Popular options include brick, stucco, vinyl siding, and fiber-cement boards. Each material has its unique characteristics, so it's important to research and compare their benefits and drawbacks.
Insulation options are also vital in exterior wall construction. You can opt for foam board insulation, fiberglass batts, or radiant barrier insulation, depending on your climate and energy efficiency goals.
Confirm the insulation material is compatible with your chosen exterior wall material and meets local building codes. Additionally, consider factors such as R-value, moisture resistance, and installation requirements.
Detailed Tool Checklist for Plastering
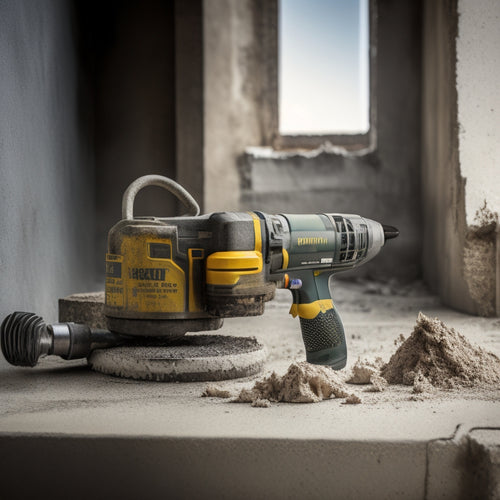
You'll need an arsenal of specialized tools to tackle the plastering process, including a hawk, trowel, and putty knife, which will help you achieve a smooth, even finish.
These tools will allow you to master various plastering techniques, from applying scratch coats to finishing layers. A hawk is vital for holding and carrying plaster, while a trowel is used for spreading and smoothing it. A putty knife comes in handy for scraping off excess plaster and creating a clean surface.
In addition to these must-haves, you'll also need a mixing bucket, drill, and mixing paddle for preparing the plaster mixture. A level and straightedge will guarantee your work is precise and level.
Don't forget to include a dust mask, safety glasses, and a clean water source in your toolkit as well. Proper tool maintenance is essential to extending the life of your tools and achieving professional-looking results. Regularly clean and dry your tools to prevent rust and corrosion.
Essential Safety Gear for Workers
When you're working on a home facade renovation, you're exposed to a range of hazards that can put your safety at risk.
You'll need to gear up with essential safety equipment to prevent accidents and injuries.
As you start your project, make sure you have hard hats, fall prevention gear, and protective eyewear to safeguard yourself from potential dangers.
Hard Hat Protection
Hard hats serve as the first line of defense against falling objects, debris, and other hazards on the job site, protecting your head from devastating injuries. As a homeowner, you want to guarantee that your renovation team is equipped with the right gear to get the job done safely. That's why hard hats are a must-have on any construction site.
The hard hat benefits are clear: they provide a tough outer shell that can withstand impact, absorb shock, and distribute force evenly. They also offer excellent protection from electrical hazards, with some models featuring insulation that prevents electrical shock.
Here are just a few scenarios where hard hats have proven their worth:
-
A heavy tool falls from a scaffolding, but your hard hat absorbs the impact, saving your skull from fracture.
-
A piece of debris flies through the air, but your hard hat deflects it, protecting your face and eyes.
-
An electrical wire sparks, but your hard hat's insulation prevents a deadly shock.
When choosing a hard hat, make sure it meets the hard hat standards set by organizations like OSHA and ANSI. With the right hard hat, you can rest easy that your team is protected from the unexpected dangers that come with home facade renovation.
Fall Prevention Equipment
Fall prevention equipment, such as harnesses and safety nets, serves as a critical safeguard against gravity's deadly pull. This equipment allows workers to focus on the task at hand without fearing a fatal tumble.
When you're working at heights, it's important to have the right gear to prevent falls. A well-fitting harness, for instance, can be a lifesaver. Make certain you know how to properly wear and adjust it to guarantee a secure fit.
Ladder safety is also essential, as slippery rungs and uneven surfaces can lead to accidents. Always maintain three points of contact with the ladder, and never lean over the side rails.
Proper harness usage is important when working from heights. You should always be anchored to a secure point, such as a roof anchor or a beam, to prevent falls. Safety nets can also provide an extra layer of protection, catching you if you do happen to fall.
By investing in high-quality fall prevention equipment and following proper safety protocols, you can greatly reduce the risk of accidents and guarantee a smooth home facade renovation process.
Protective Eye Wear
As you prepare for the façade renovation, donning protective eye wear is an essential step in safeguarding your vision from debris, dust, and other hazardous materials that can be kicked up during the process.
You wouldn't want to risk permanent eye damage or vision impairment due to neglecting this vital safety measure.
When choosing the right protective eye wear, remember:
-
Lens clarity matters: Opt for lenses with high optical clarity to guarantee you can see clearly while working.
-
Frame comfort is key: Select frames that fit snugly and comfortably, allowing you to focus on the task at hand.
-
Impact resistance is essential: Look for eye wear with impact-resistant lenses and frames that can withstand the rigors of renovation work.
Preparing the Site and Surface
You'll need to clear the area around your home's facade of any obstacles, including furniture, plants, and debris, to create a safe and accessible workspace. This is essential for a site assessment, where you'll evaluate the condition of your facade and identify areas that require repair or replacement. As you assess the site, take note of any cracks, damage, or signs of wear on the surface.
Next, focus on surface preparation, which involves cleaning and preparing the facade for renovation. Power wash the surface to remove dirt, grime, and old adhesives, taking care not to damage the underlying material. Use a scraper or wire brush to remove loose paint, rust, or corrosion. For more stubborn stains or deposits, apply a suitable cleaning solution and let it sit before rinsing off.
Make sure the surface is dry and free of any debris before proceeding with the renovation. A thorough site assessment and surface preparation will set the stage for a successful and long-lasting facade renovation.
Applying and Finishing Plaster
As you move on to applying and finishing plaster, you'll need to guarantee the surface is properly prepared, free of dust and debris, and slightly dampened to create an ideal bond.
Next, you'll focus on finishing techniques, such as floating, troweling, and scraping, to achieve a smooth, even finish.
Preparing the Surface
Before applying fresh plaster, scrape off old, crumbling layers to expose a solid, stable base that will guarantee a strong bond between the new plaster and the underlying surface.
You'll need to get rid of any weakened or damaged areas, ensuring a smooth and even application.
As you prepare the surface, remember these essential steps:
-
Use a putty knife or scraper to remove loose debris, taking care not to gouge the underlying surface.
-
Employ surface cleaning techniques, such as wire brushing or sanding, to remove dirt, grime, and old adhesive residue.
-
Apply a bonding agent to the prepared surface, following the manufacturer's instructions, to create a superior bond between the old and new plaster.
Finishing Techniques
Finishing Techniques
With the surface prepared, apply a layer of fresh plaster, holding the trowel at a 20- to 30-degree angle to achieve an even, scratch-free coat. As you work, maintain a consistent pressure and motion to avoid creating air pockets or unevenness.
For a smooth finish, use a steel trowel to remove excess plaster and create a uniform surface. Once dry, you can move on to texturing techniques, such as knocking down or knocking up, to create the desired pattern.
| Finishing Technique | Description |
|---|---|
| Knocking Down | Use a trowel to flatten raised areas, creating a subtle texture |
| Knocking Up | Use a trowel to create raised patterns, adding visual interest |
| Polishing | Use a specialized tool to create a high-gloss finish, ideal for accent walls |
Remember to contemplate color selection when choosing a finishing technique. A bold, bright color can make a statement, while a more muted tone can create a soothing atmosphere. By combining the right finishing technique with your chosen color, you'll achieve a stunning facade that complements your home's unique style.
Post-Project Cleanup and Touch-ups
You'll wrap up your home facade renovation by tackling post-project cleanup and touch-ups, making certain every detail meets your expectations. This final stage is essential, as it can make or break the overall appearance of your newly renovated facade.
To guarantee a flawless finish, you'll need to employ effective cleanup methods and touch-up techniques. Here are a few essentials to keep in mind:
-
Remove all debris, dust, and dirt from the renovation area, using a combination of brooms, vacuum cleaners, and damp cloths.
-
Inspect the facade for any minor imperfections, such as scratches or dents, and address them promptly using specialized touch-up tools.
-
Apply a fresh coat of sealant or paint to any areas that require it, blending the new application seamlessly with the surrounding surface.
Frequently Asked Questions
Can I Reuse Old Exterior Wall Plaster for Renovation?
You'll likely need to remove old exterior wall plaster, as reusing it can lead to uneven surfaces. Instead, focus on proper plaster preparation, ensuring a solid base for new plaster application, resulting in a smooth, durable finish.
How Do I Handle Mold or Mildew on the Exterior Wall?
When tackling mold or mildew on your exterior wall, you'll need to identify and address the moisture source first, then scrub the area with a solution of bleach and water, and finally, apply a mold prevention coating to guarantee it doesn't come back.
Will a Home Facade Renovation Increase My Property Value?
You'll likely see a boost in property value after a renovation, as a fresh facade can sway a property appraisal in your favor, highlighting the renovation benefits that increase your home's curb appeal and overall desirability.
Do I Need a Permit for a Home Facade Renovation Project?
'Don't assume you can skip the paperwork, but yes, you might not need a permit for a cosmetic home facade renovation. Check local permit requirements and renovation regulations, as they vary, to guarantee you're compliant and avoid costly delays.'
Can I Renovate My Home Facade During the Winter Season?
You can renovate your home facade during winter, but be prepared to tackle winter renovation challenges, like icy weather and frozen grounds. Don't forget to prioritize insulation considerations to guarantee a cozy and energy-efficient home.
Conclusion
You've crossed the finish line!
As the old adage goes, 'well begun is half done,' and with these essential tools and steps, you've set yourself up for a successful home facade renovation.
Remember, a smooth exterior wall plastering job requires attention to detail, precision, and patience.
By following this guide, you've guaranteed a strong foundation for your project.
Now, take a step back, admire your handiwork, and get ready to enjoy your beautifully renovated home!
Related Posts
-
Top Drill for Concrete Wall Renovation
When choosing the top drill for your concrete wall renovation, you'll want to prioritize key features like drill powe...
-

Why Renovation Waste Disposal Harms the Environment
When you undertake a renovation project, you're contributing to a staggering problem: renovation waste disposal, whic...
-

Why Inspect Stucco Repair Equipment Before Renovation
When starting a stucco repair renovation, you need to inspect your equipment to prevent accidents, save time and mone...


