
Essential Power Tools for Plaster Wall Renovation
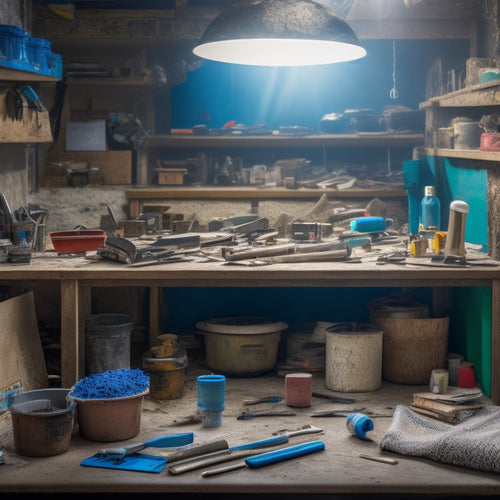
When tackling a plaster wall renovation, you'll need a strategic arsenal of essential power tools to cover demolition, surface preparation, sanding, mixing, applying, finishing, and polishing stages. You'll require demolition tools like pry bars, hammers, and reciprocating saws to break down plaster, followed by surface preparation tools like orbital sanders and belt sanders to achieve a smooth base. Next, you'll need mixing and applying tools like drills with mixing paddles and plaster hawks to guarantee a smooth, lump-free consistency. As you progress, discover the importance of dust management, precision measuring, and finishing tools to achieve a professional-looking finish, and find out how the right tools and techniques can make all the difference in your project's success.
Key Takeaways
- Essential power tools for plaster wall renovation include a reciprocating saw, demo hammer, orbital sander, belt sander, and drill with mixing paddle.
- Safety equipment like dust masks, safety glasses, and gloves are crucial for protecting yourself from debris and dust during renovation.
- Demolition tools like pry bars, hammers, and wrecking bars are necessary for dismantling plaster walls and removing old plaster.
- Sanding tools like orbital sanders, detail sanders, and belt sanders help achieve a smooth surface for new finishes, and dust management tools minimize mess.
- Mixing and application tools like plaster hawks, trowels, and putty knives ensure a smooth, lump-free plaster application and a professional-looking finish.
Demolition and Removal Essentials
Tackling demolition and removal is the first critical step in your plaster wall renovation project. This stage can be messy and hazardous, so don't even think about skipping the safety equipment.
You'll need a dust mask, safety glasses, gloves, and a hard hat to protect yourself from debris and dust.
Next, gather your demolition tools, including a pry bar, hammer, and wrecking bar. These will help you dismantle the old plaster wall, taking care not to damage surrounding structures.
As you tear down the wall, be mindful of waste disposal. You'll need to bag up the debris and haul it away, making sure to follow local regulations.
Surface Preparation Power Tools
You'll need to remove old, damaged plaster and sand rough surfaces to create a smooth base for renovation.
This is where surface preparation power tools come in, designed to efficiently strip away old plaster and smooth out rough spots.
With the right tools, you'll be able to achieve a uniform surface, ensuring a strong bond between the new finish and the existing wall.
Remove Old Plaster
Your renovation project's success hinges on properly removing old plaster, a crucial step in surface preparation. You can't just slap new plaster over the old stuff and expect it to hold up. No, you've got to get down to business and remove that old, crumbling mess. This is where plaster removal techniques come in.
You'll need a few power tools to get the job done efficiently and safely. First, don a pair of safety goggles and a dust mask to protect yourself from debris and dust. Then, grab your trusty reciprocating saw or demo hammer to break up the old plaster.
Be prepared for a mess, because this step is going to get ugly. Use a pry bar to remove the broken pieces, taking care not to gouge the underlying wall. Safety equipment is key here, so don't skimp on the gear.
Once you've removed the old plaster, you'll be left with a clean slate (or at least, a clean wall) ready for the next steps in your renovation project.
Sand Rough Surfaces
With the old plaster removed, you're left with a surface that's likely rough and uneven.
It's time to break out the sanding tools to smooth things out. Sanding is an essential step in preparing your surface for new plaster or finishing coats.
To achieve a silky smooth finish, master these sanding techniques:
-
Start coarse, finish fine: Begin with a coarse grit sandpaper (about 80-100) to remove major imperfections, then progress to finer grits (120-220) for a smooth finish.
-
Work in sections: Divide the wall into manageable areas to maintain even sanding and avoid scratches.
-
Don't forget dust management: Use a dust mask, safety goggles, and a vacuum with a HEPA filter to minimize dust inhalation and keep your workspace clean.
- Feather your edges: Use a sanding block to blend edges and corners, ensuring a seamless finish.
Mixing and Applying Tools
You'll need the right tools to mix plaster to perfection and apply it with precision.
A powerful drill with a mixing paddle attachment is essential for combining plaster ingredients thoroughly and efficiently.
With the right application tools, such as a plaster hawk and trowel, you'll be able to smooth out the plaster and achieve a professional-looking finish.
Mixing Plaster to Perfection
Mixing plaster to perfection requires attention to detail and the right tools for the job.
You're not just slapping some mud on the wall, you're creating a work of art (or at least, a smooth surface). To get it just right, you'll need to master the art of mixing.
Here are the essentials for achieving the perfect plaster consistency:
-
Drill with a mixing paddle: This combo is the dynamic duo of plaster mixing. The drill provides the power, and the paddle guarantees everything gets mixed to a smooth, lump-free consistency.
-
Measuring cups and buckets: Accuracy is key when mixing plaster. Measure your water and plaster powder carefully to avoid a mix that's too runny or too thick.
-
Mixing stick or trowel: For those hard-to-reach areas or when you need to scrape the sides of the bucket, a trusty mixing stick or trowel is your best friend.
- Clean water: Don't even think about using dirty or contaminated water – it'll ruin your mix and your reputation as a master plasterer.
Applying With Precision
Now that your plaster mix is perfect, it's time to focus on applying it with precision. You've got the right consistency, now it's all about getting it on the wall smoothly and evenly. For this, you'll need the right tools.
Invest in a high-quality plaster hawk, which allows you to scoop and hold a generous amount of plaster, giving you better control over your application. A putty knife or trowel is a must-have for smoothing out the plaster and eliminating air pockets.
When it comes to plaster application techniques, precision is key. Use precision measuring tools to guarantee your layers are even and your joints are perfectly aligned. A laser level can help you achieve a perfectly straight line, while a spirit level ensures your walls are plumb.
Don't forget to clean your tools regularly to prevent plaster from drying on them, making them useless. With the right tools and a bit of practice, you'll be applying plaster like a pro in no time.
Sanding and Smoothening Tools
During plaster wall renovation, achieving a smooth finish requires meticulous attention to sanding and smoothening.
You'll need to invest time and effort into refining the surface to get that flawless look. Don't worry, it's worth it! A smooth finish is vital for a professional-looking result.
To master sanding techniques and achieve smoothening finishes, you'll need the right tools. Here are the essentials:
- Orbital Sander: Perfect for large, flat areas, this tool helps you sand quickly and efficiently.
- Detail Sander: Get into tight spaces and corners with this handy tool, ideal for smoothening out small imperfections.
- Belt Sander: Use this powerful tool to remove old plaster, sand down rough surfaces, and achieve a smooth finish.
- Sandpaper and Sanding Blocks: Don't forget these important accessories! They help you refine your sanding techniques and achieve a flawless finish.
Cutting and Shaping Tools
By tackling cutting and shaping tasks with precision, you'll guarantee a successful plaster wall renovation.
When it comes to cutting through plaster, you'll need a reliable plaster saw. These specialized saws are designed to navigate the dense, brittle material without crumbling or breaking. Opt for a saw with a sturdy blade and a comfortable grip to minimize fatigue.
For more intricate cuts or when working in tight spaces, consider using a reciprocating saw with a specialized plaster-cutting blade.
Shaping knives are another essential tool for plaster wall renovation. These handheld wonders allow you to refine and smooth out rough edges, creating a seamless finish.
Look for knives with durable, rust-resistant blades and ergonomic handles that fit comfortably in your hand.
With the right cutting and shaping tools, you'll be able to tackle even the most complex plaster wall renovation projects with confidence.
Finishing and Polishing Tools
You've successfully cut and shaped your plaster walls, and now it's time to focus on achieving a flawless finish. This is where the magic happens, and your hard work pays off. Finishing and polishing tools are essential for creating a smooth, even surface that's ready for painting or decorating.
To get the job done, you'll need the following finishing and polishing tools:
-
Sander: A high-quality sander is essential for smoothing out rough surfaces and removing imperfections. Choose from belt sanders, orbital sanders, or detail sanders, depending on the specific task.
-
Polishing compound: A good polishing compound can make all the difference in achieving a high-gloss finish. Look for products specifically designed for plaster walls and follow the manufacturer's instructions.
-
Trowel: A trowel is perfect for applying and smoothing out joint compound or plaster. Invest in a high-quality, stainless steel trowel for best results.
- Dustless sanding system: A dustless sanding system is a game-changer for reducing mess and improving air quality. These systems collect dust and debris, making cleanup a breeze.
Frequently Asked Questions
Can I Reuse Old Plaster or Do I Need New Materials?
You're wondering if you can reuse old plaster, but don't risk it - inspect the plaster quality first. If it's still good, check material compatibility, but if it's crumbling, it's time to buy new stuff and avoid a renovation headache!
How Do I Protect Adjacent Areas From Dust and Debris?
Coincidentally, you're about to become a dust-containment master! You'll need to seal off adjacent areas with plastic sheets, tape, and a vacuum with a HEPA filter to manage debris, ensuring a dust-free zone for a successful renovation.
What Safety Gear Is Necessary for Plaster Wall Renovation?
When tackling plaster wall renovation, you'll need safety gear to save your skin - literally! Wear safety goggles to shield those peepers and a dust mask to breathe easy, or you'll be coughing up plaster for days, trust us!
Can I DIY Plaster Wall Renovation or Hire a Professional?
Imagine your DIY plaster wall renovation turning into a messy, time-consuming nightmare, like Sarah's infamous 'plaster-pocalypse' incident. To avoid this, weigh DIY techniques against professional benefits: precision, efficiency, and a stress-free experience - is your sanity worth the cost?
How Long Does a Typical Plaster Wall Renovation Project Take?
You're wondering how long your plaster wall renovation project will take, right? Well, the timeline depends on various factors, including the project's scope, your DIY skills, and the number of project phases - prep, demo, repair, and finishing touches.
Conclusion
You've made it to the finish line! With these essential power tools in your arsenal, your plaster wall renovation will be a masterpiece. Think of them as the brushstrokes on a canvas, each one adding depth and detail to your project. Now, it's time to put them to work and create a smooth, flawless surface that's a work of art.
Related Posts
-

5-Step Subfloor Prep Checklist for a Smooth Renovation
You can guarantee a smooth renovation by following a 5-step subfloor prep checklist. First, assess the current subflo...
-

Why Do Cinder Block Wall Renovations Cost So Much
You're likely surprised by the high cost estimate for your cinder block wall renovation project, but it's driven by s...
-
Get Discounted Plastering Tool Sets for DIY Renovations
You can find discounted plastering tool sets online, at local hardware stores, and thrift stores, offering a range of...


