
DIY Plastering Tool Kits for Home Renovation Success
You'll need a well-curated DIY plastering tool kit to achieve professional-looking results in your home renovation project. Essential tools include mixing buckets, trowels, finishing tools, and accessories like mixing sticks, hawks, and putty knives. Choosing the right trowel size is vital, as it impacts efficiency and evenness of application. Additionally, you'll need to master mixing and applying plaster techniques, as well as smoothing and finishing tools like plaster floats and sanding blocks. Don't forget protective gear, including dust masks, safety goggles, and gloves. With the right tools and skills, you'll be well on your way to a successful DIY plastering project that yields impressive results - and there's more to learn to guarantee your success.
Key Takeaways
- Invest in high-quality mixing buckets, trowels, and finishing tools for professional-looking results and efficient DIY plastering.
- Choose the right trowel size for your project, considering factors like interior or exterior, plaster thickness, and area to be covered.
- Master the ideal plaster consistency and application techniques, including holding the trowel at a 20- to 30-degree angle and using moderate pressure.
- Essential smoothing and finishing tools include a putty knife, plaster float, sanding blocks, and a damp sponge or cloth for a polished finish.
- Don't forget protective gear like a dust mask, safety goggles, gloves, and protective clothing to ensure a safe and successful DIY plastering experience.
Essential Plastering Tool Accessories
What's in your toolbox? As a DIY enthusiast, you know that having the right tools is essential for achieving professional-looking results in your plastering projects.
When it comes to vital plastering tool accessories, you can't afford to skimp on quality. Invest in a set of high-quality mixing buckets, trowels, and finishing tools to guarantee your plastering techniques are on point.
A mixing stick, hawk, and putty knife are also must-haves for any serious DIYer. Don't forget to include a level, straightedge, and pencil for accurate measurements and markings.
Proper tool maintenance is equally important. Regularly clean and store your tools to prevent rust and damage.
A well-maintained tool set won't only last longer but also perform better, allowing you to achieve smoother finishes and sharper edges.
Choosing the Right Trowel Size
You're about to apply a fresh coat of plaster, and your trusty trowel is ready to go. But before you start, make sure you're using the right trowel size for the job. A trowel that's too small will leave you working overtime, while one that's too large can lead to uneven application and waste.
When choosing a trowel, consider the type of plaster you're working with and the surface area you need to cover. For most interior plastering jobs, a 12-inch or 14-inch trowel is a good starting point. However, if you're working with thicker plasters or covering large areas, you may need a larger trowel up to 18 inches.
Don't forget to think about trowel materials too. Stainless steel and carbon steel trowels are durable and resistant to rust, while fiberglass and plastic trowels are lightweight and easy to maneuver.
There are also specialized trowel types, such as pointing trowels for small areas and finishing trowels for smooth finishes. With the right trowel size and material, you'll be well on your way to a professional-looking finish.
Mixing and Applying Plaster Efficiently
Since you've selected the right trowel for the job, it's time to focus on mixing and applying plaster efficiently. Achieving the ideal plaster consistency is vital for a successful application. You want a mix that's not too runny, not too thick, but just right. Aim for a consistency similar to thick cream or paint.
If you're using a pre-mixed plaster, follow the manufacturer's instructions for mixing. For a custom mix, start with a 1:3 ratio of lime putty to sand, and adjust as needed.
When applying plaster, use the right application techniques to guarantee a smooth, even coat. Hold your trowel at a 20- to 30-degree angle and apply gentle to moderate pressure. Work in small sections, about 2 square feet at a time, and apply the plaster in a sweeping motion, holding the trowel almost flat.
Use long, smooth strokes to spread the plaster evenly, feathering it out towards the edges. Avoid applying too much pressure, which can cause the plaster to squeeze out beyond the edges of your trowel.
Smoothing and Finishing Tools Needed
With your plaster successfully applied, it's now essential to focus on smoothing and finishing the surface to achieve a flawless finish. You'll need the right tools to accomplish this. A putty knife or trowel is necessary for initial smoothing, removing excess plaster and creating a uniform surface.
For finer smoothing techniques, a plaster float or darby will help you achieve a glass-like finish. These tools allow you to apply even pressure, feathering out imperfections and creating a seamless joint.
To add the final finishing touches, you'll need a set of sanding blocks or sandpaper in various grits. Start with a coarse grit to remove any remaining imperfections, then progress to finer grits for a polished finish.
A damp sponge or cloth can also be used to remove excess dust and debris, ensuring a clean surface for painting or further finishing. With these tools in your DIY plastering kit, you'll be well-equipped to achieve a professional-looking finish that will impress.
Protective Gear and Safety Essentials
Gear up with essential protective gear to safeguard yourself from the hazards of plastering. As you work with plaster, you'll be exposed to dust, debris, and potential eye irritants. Don't risk your health and safety – invest in the right gear to get the job done confidently.
Start with a high-quality dust mask, which provides effective dust control and filtration. This will prevent you from inhaling harmful particles that can cause respiratory issues.
Next, grab a pair of safety goggles to protect your eyes from stray plaster particles, dust, and other debris. Make sure they're ANSI-approved and have an anti-fog coating to guarantee clear visibility.
Don't forget gloves, which will protect your hands from abrasions, cuts, and dryness caused by plaster exposure. Opt for durable, water-resistant gloves with grip to maintain control while handling tools.
Finally, wear a long-sleeved shirt, pants, and closed-toe shoes to prevent skin irritation and exposure to potential allergens.
With these essentials, you'll be well-equipped to tackle your DIY plastering project with confidence and safety.
Frequently Asked Questions
Can I Use a Drill to Mix Plaster or Is It Not Recommended?
You shouldn't use a standard drill to mix plaster, as it can create air pockets and uneven consistency. Instead, opt for a powerful, high-torque drill with a mixing paddle attachment, employing slow, controlled mixing techniques to achieve a smooth, lump-free mix.
How Do I Clean Dried Plaster From My Tools and Equipment?
You'll master plaster removal techniques by soaking tools in warm water, then scrubbing with a wire brush or scraper to prevent damage; regular tool maintenance tips include drying and oiling to maintain their effectiveness.
What Is the Ideal Room Temperature for Plastering a Wall?
As you prepare to release your plastering skills, remember that the ideal room temperature for mastering the art is between 50°F and 70°F, where temperature effects on plastering techniques are minimal, ensuring a smooth, strong finish that's the envy of the pros.
Can I Plaster Over Existing Paint or Wallpaper?
You'll need to verify proper wall preparation methods before plastering over existing paint or wallpaper, as poor adhesion can lead to cracks; apply primer and scrape off loose material to secure strong plaster adhesion techniques.
How Long Does It Take for Plaster to Fully Dry and Set?
As you meticulously apply the plaster, you're enthusiastic to know when it'll fully dry and set; the plaster drying time depends on factors like temperature, humidity, and thickness, typically taking 24-48 hours, but it can take up to a week in ideal conditions.
Conclusion
You've made it to the finish line! With your DIY plastering tool kit assembled, you're ready to tackle that home renovation project. Don't let the fear of imperfections hold you back - remember, practice makes perfect. And, if you're worried about the mess, consider it a small price to pay for the satisfaction of a job well done. Now, get out there and start plastering - your newly renovated space is waiting!
Related Posts
-
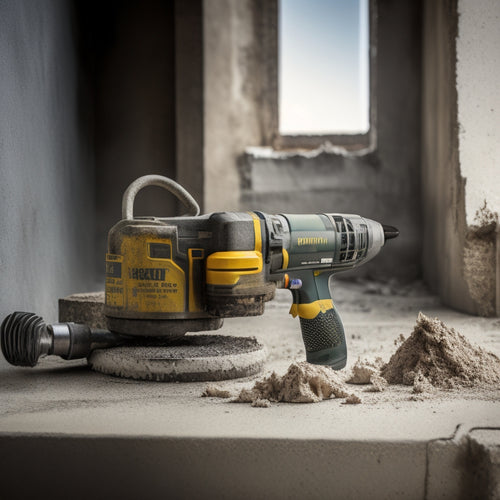
Top Drill for Concrete Wall Renovation
When choosing the top drill for your concrete wall renovation, you'll want to prioritize key features like drill powe...
-

Why Use Concrete Blocks in Home Renovation
You're considering using concrete blocks in your home renovation, and for good reason: they offer a unique combinatio...
-

3 Best DIY Home Renovation Timelines for Success
As you tackle your DIY home renovation project, create a solid timeline by breaking it down into three phases. First,...


