Crack Repair Equipment Checklist for Safe Renovations
Share
You'll need a thorough checklist of crack repair equipment to guarantee a safe and successful renovation. Start by gathering essential personal protective gear, such as safety glasses, gloves, and dust masks. Next, assemble cleaning and preparation tools, including surface cleaning agents, debris removal systems, and surface preparation machinery. Epoxy injection equipment, like pumps and mixing systems, is also vital. Don't forget crack filling and sealing tools, as well as safety and access accessories like ladders and aerial lifts. With this equipment in hand, you'll be well-prepared to tackle your project - and it's just the beginning of what you'll need to know to get the job done right.
Key Takeaways
• Ensure personal protective gear, including safety glasses, gloves, and dust masks, to prevent injuries during crack repair projects.
• Select the right cleaning and preparation tools, such as brushes, brooms, and scrubbers, based on surface type and contamination level.
• Choose the appropriate epoxy resin type, considering factors like viscosity, pot life, and temperature resistance, for effective and long-lasting repairs.
• Use specialized equipment, including injection pumps, mixing and metering systems, and crack filling tools, to ensure accurate and precise application of epoxy.
• Prioritize safety and access accessories, such as ladders, scaffolding, and personal protective equipment, to prevent accidents and ensure a safe working environment.
Personal Protective Gear Essentials
Wear personal protective gear, including safety glasses, gloves, and a dust mask, to safeguard yourself against chemical splashes, skin irritation, and respiratory problems when operating crack repair equipment. This gear is essential to preventing injuries and guaranteeing a safe working environment.
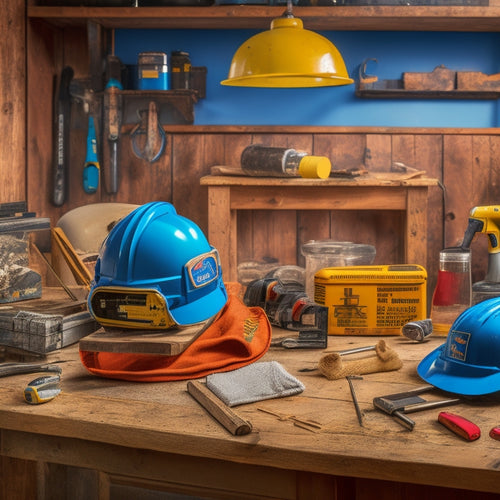
When selecting a helmet, consider the type that best suits your needs. Hard hats, bump caps, and respirator helmets are popular options, each designed for specific hazards. For instance, respirator helmets provide additional protection against airborne contaminants.
Your gloves are another important component of your protective gear. Choose glove materials that resist chemicals, abrasion, and punctures. Nitrile, neoprene, and PVC gloves are popular choices for crack repair work. Confirm your gloves fit comfortably and allow for dexterity, as you'll need to handle equipment and materials with precision.
Don't overlook the importance of dust masks, which filter out airborne particles and debris. By wearing the right personal protective gear, you'll be well-prepared to tackle crack repair projects with confidence and safety.
Cleaning and Preparation Tools
When preparing to repair cracks, you'll need to guarantee the surface is free from dirt, oil, and other contaminants that can compromise the bonding process.
To do this, you'll require a set of surface cleaning tools and effective debris removal methods.
In this section, we'll outline the essential cleaning and preparation tools you should have in your arsenal to get the job done right.
Surface Cleaning Tools
You'll need a range of surface cleaning tools to effectively remove dirt, grime, and other substances that can compromise the bond between the crack repair material and the surface. These tools are essential for guaranteeing a strong, long-lasting bond.
For effective surface cleaning, you'll require brushes, brooms, and scrubbers that can tackle tough dirt and grime. Wire brushes, in particular, are great for removing rust and corrosion.
Additionally, you'll need effective cleaning agents, such as solvents, detergents, and degreasers, to break down and remove stubborn substances. When selecting cleaning agents, consider the type of surface you're working with and the level of dirt and grime present.
Always follow the manufacturer's instructions for surface cleaning techniques to avoid damaging the surface or compromising the bond.
Debris Removal Methods
Once the surface is clean, removing loose debris and dust is the next critical step in preparing the area for crack repair, and this is where debris removal methods come into play.
You'll need to employ effective debris disposal techniques to guarantee a safe and efficient renovation process.
When selecting debris removal methods, consider the following factors:
-
Vacuum cleaners with HEPA filters: ideal for capturing fine dust and particles, reducing airborne contaminants.
-
Dustless blasting systems: utilize compressed air to remove debris, minimizing dust and preventing damage to surrounding surfaces.
-
Debris nets or containment systems: prevent debris from spreading to other areas, making cleanup easier and reducing environmental impact.
- Waste management plans: develop a strategy for responsible debris disposal, taking into account environmental considerations and local regulations.
Epoxy Injection Equipment Needs
When it comes to epoxy injection equipment needs, you'll need to carefully consider a few critical components to guarantee a successful crack repair.
You'll have to select the right epoxy resin for the job, which is why you'll need an epoxy resin selection guide to help you make an informed decision.
Next, you'll require an injection pump system and a reliable mixing and metering process to accurately dispense the epoxy resin into the crack.
Epoxy Resin Selection Guide
Choosing the appropriate epoxy resin for your crack repair project is crucial, as it directly affects the effectiveness and longevity of the repair. Therefore, it's important to take into account several key factors during the selection process. You'll need to consider the type of epoxy resin, its adhesive properties, and its compatibility with the substrate material.
When selecting an epoxy resin, reflect on the following key factors:
-
Epoxy types: Determine whether you need a flexible, semi-rigid, or rigid epoxy, depending on the nature of the crack and the surrounding material.
-
Viscosity: Choose an epoxy with a viscosity that suits your application, taking into account the size and complexity of the crack.
-
Pot life: Confirm the epoxy's pot life aligns with your project's timeline, as this affects the working time and curing process.
- Temperature and environmental resistance: Select an epoxy that can withstand the environmental conditions and temperatures your project will be exposed to.
Injection Pump Systems
You'll need to select the right injection pump system to effectively deliver the chosen epoxy resin into the crack, guaranteeing a successful repair that meets your project's requirements. This equipment is vital for achieving the desired outcome, as it directly affects the injection techniques used and the overall quality of the repair.
When choosing an injection pump system, consider factors such as pressure capacity, flow rate, and precision control. These factors will enable you to accurately dispense the epoxy resin, assuring proper fill rates and minimizing waste.
Regular pump maintenance is also essential to prevent equipment failure and maintain consistent performance. This includes routine cleaning, lubrication, and replacing worn-out parts. A well-maintained pump system will help you achieve consistent results and reduce the risk of repairs not meeting project specifications.
Mixing and Metering
Two significant components of epoxy injection equipment needs are mixing and metering systems, which work in tandem to accurately blend and dispense the epoxy resin. As you prepare for your crack repair project, it's vital to understand the importance of these systems in achieving ideal results.
When it comes to mixing, you'll need to take into account the techniques that guarantee a thorough blend of the resin and hardener. This is fundamental to achieve the desired strength and durability of the repaired crack.
To confirm metering accuracy, you'll need to invest in a system that can precisely measure and dispense the epoxy. This is imperative to prevent over- or under-injection, which can lead to subpar results.
Some key factors for your mixing and metering systems include:
-
Pump ratio accuracy: Verify your metering system can accurately dispense the correct ratio of resin to hardener.
-
Mixing chamber design: Opt for a design that minimizes air entrapment and guarantees thorough blending.
-
Material compatibility: Confirm that your mixing and metering systems are compatible with the specific epoxy resin you're using.
- Calibration and maintenance: Regularly calibrate and maintain your systems to uphold ongoing accuracy and precision.
Crack Filling and Sealing Tools
Your crack repair arsenal should include a range of crack filling and sealing tools capable of handling various crack widths, depths, and orientations.
You'll need tools that can tackle different crack types, such as hairline cracks, wide cracks, and corner cracks. For instance, you may require a low-viscosity epoxy injector for hairline cracks or a high-flow sealant for wider cracks.
When it comes to application techniques, you'll want to take into account the type of crack you're dealing with and the desired outcome. For example, you may use a gravity-fed injection system for vertical cracks or a manual injection system for horizontal cracks.
Additionally, you may need to use specialized tools like crack spoons or injection nozzles to guarantee precise application.
Remember to choose tools that are compatible with your chosen sealant or filler material. You should also take into account the environmental conditions of the repair site, such as temperature and humidity, when selecting your tools.
Surface Preparation Machinery
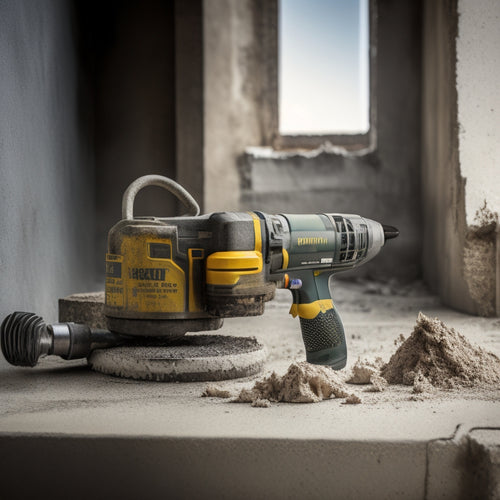
Before applying crack filling and sealing tools, guarantee the surface is clean and free of debris by utilizing surface preparation machinery, such as scrapers, grinders, or power washers, to prevent bond failure.
This vital step guarantees a strong bond between the repair material and the substrate. Surface preparation machinery helps remove dirt, oil, and other contaminants that can compromise the repair.
To achieve ideal results, consider the following surface preparation machinery:
-
Scrapers: Remove loose material, dirt, and debris from the surface.
-
Grinders: Perform surface profiling to create a rough texture for better bonding.
-
Power washers: Clean the surface thoroughly, removing dirt, oil, and other substances.
- Substrate evaluation tools: Assess the substrate's condition, identifying potential issues that may affect the repair.
Safety and Access Accessories
Essential to guaranteeing a successful crack repair operation, you must have the right safety and access accessories to protect yourself and facilitate efficient access to the repair area. These accessories are vital in preventing accidents and making sure you can reach the area safely.
When it comes to safety protocols, you'll need personal protective equipment (PPE) such as hard hats, safety glasses, and respirators to shield yourself from hazardous materials and debris. Additionally, consider investing in fall protection gear, like harnesses and lanyards, if you'll be working at heights.
For access solutions, you'll require ladders, scaffolding, or aerial lifts to reach the repair area. Confirm these access solutions are sturdy, well-maintained, and comply with industry standards. Don't forget to inspect the equipment regularly to prevent accidents.
Frequently Asked Questions
What Is the Ideal Temperature for Epoxy Injection and Crack Filling?
When you're preparing for epoxy injection and crack filling, you need to take into account the ideal temperature.
You'll want to aim for a range between 60°F to 80°F (15°C to 27°C) to achieve the best epoxy viscosity.
Temperature effects can greatly impact the outcome, so it's essential to monitor it closely.
If it's too hot or cold, the epoxy may become too runny or thick, affecting its ability to effectively fill and bond with the crack.
Can I Use a Single Epoxy Product for All Crack Types?
You're trying to find a silver bullet for all your crack repair needs, but can you really rely on a single epoxy product to tackle every crack type?
While it's tempting to seek versatility, the truth is that different cracks require distinct epoxy properties.
For instance, thin hairline cracks demand a low-viscosity epoxy, whereas thicker cracks need a more robust, high-strength formula.
It's crucial to choose the right product for the job to guarantee a successful repair.
How Long Does It Take for Epoxy to Fully Cure and Harden?
You're wondering how long it takes for epoxy to fully cure and harden. The answer depends on various epoxy hardening factors, such as temperature, humidity, and the specific product used.
Generally, epoxy curing times range from a few hours to several days. For example, a fast-curing epoxy might harden within 15-30 minutes, while a slow-curing one might take 24-48 hours.
Always follow the manufacturer's instructions for best results.
Are There Any Specific Certifications for Crack Repair Technicians?
You're wondering if there are specific certifications for crack repair technicians. Indeed, there are.
To confirm mastery, look for technicians with certifications from organizations like the International Concrete Repair Institute (ICRI) or the American Concrete Institute (ACI).
These certifications guarantee the technician has undergone rigorous training and meets stringent certification requirements.
With proper technician training, you can trust the repair job will be done right, confirming a safe and durable outcome.
Can I Rent Crack Repair Equipment Instead of Buying It?
You're considering renting crack repair equipment instead of buying it, and that's a smart move.
Renting offers several benefits, including lower upfront costs and reduced storage needs.
When comparing costs, factor in the rental period, equipment usage, and maintenance requirements.
Weigh these against the purchase price and ongoing expenses.
Conclusion
You've made it to the final checklist for your crack repair equipment - the holy grail of safe renovations!
With this exhaustive list, you'll be armed to the teeth with everything you need to tackle even the most intimidating crack repair projects.
Don't even think about starting without these essentials, or you'll be stuck in a never-ending nightmare of safety hazards and subpar results.
Related Posts
-

Top Drill for Concrete Wall Renovation
When choosing the top drill for your concrete wall renovation, you'll want to prioritize key features like drill powe...
-

Top 3 Safety Essentials for DIY Renovations
When tackling a DIY renovation, you'll want to prioritize three essential safety items to protect yourself from poten...
-

Get Discounted Plastering Tool Sets for DIY Renovations
You can find discounted plastering tool sets online, at local hardware stores, and thrift stores, offering a range of...


