
Care and Maintenance for Your Home Renovation Tools
You've invested in high-quality home renovation tools, now it's crucial to prioritize their care and maintenance to guarantee peak performance and prolong their lifespan. Before starting a project, inspect your tools for wear, rust, or damage, and organize them in a designated area for easy access. Regularly clean and lubricate your tools to prevent damage and corrosion, and store them in a dry, clean environment. Conduct regular inspections to catch minor issues early, and make immediate repairs to prevent escalation. By following these critical care and maintenance tips, you'll be well on your way to getting the most out of your tools, and discovering the secrets to maximizing their potential.
Key Takeaways
• Inspect tools before use, discarding or repairing those that are worn, rusty, or damaged to ensure safety and effectiveness.
• Store tools in a dry area, cleaning and lubricating them regularly to prevent rust and corrosion and maintain performance.
• Organize tools by function or type, labeling and categorizing them for easy retrieval and preventing loss or damage.
• Establish a regular inspection schedule to catch minor issues early, making repairs promptly to prevent escalation.
• Maintain a record of inspections and repairs to track tool condition and plan for future maintenance or replacement.
Pre-Renovation Tool Preparation
Before diving into your home renovation project, take the time to thoroughly inspect and prepare your tools to confirm they're in good working condition. This vital step will save you time, money, and frustration in the long run.
Start by gathering all your tools and checking for signs of wear and tear, rust, or damage. Discard or repair any tools that are beyond repair.
Next, follow tool selection tips to guarantee you have the right tools for the job. This includes choosing the appropriate safety equipment, such as gloves, goggles, and a dust mask, to protect yourself from hazards.
Organize your tools in a designated area, making it easy to access what you need when you need it. A well-maintained and organized toolset is essential for a successful renovation project.
DIY Masonry Tool Care
Your DIY masonry project's success hinges on the proper care and maintenance of your tools, which is vital for achieving precise cuts, clean joints, and a professional finish. A well-maintained set of masonry tools guarantees that you're working efficiently and effectively, reducing the risk of errors and costly rework.
When it comes to masonry tool selection, it's important to choose tools that are appropriate for the task at hand. For example, a diamond blade saw is ideal for cutting through concrete and stone, while a jointer is better suited for creating clean, precise joints.
To get the most out of your masonry tools, follow these best practices:
-
Store your tools in a dry, protected area to prevent rust and corrosion.
-
Regularly inspect your tools for signs of wear and tear, and replace them as needed.
-
Use the correct masonry tool usage techniques to avoid damaging your tools or injuring yourself.
-
Keep your tools organized and easily accessible to reduce downtime and increase productivity.
-
Consider investing in a tool sharpener to keep your blades and bits in top condition.
Cleaning and Lubricating Tools
By incorporating a regular cleaning and lubrication routine into your tool maintenance schedule, you'll greatly extend the lifespan of your masonry tools and guarantee they continue to perform at peak levels.
Regular tool cleaning is essential in removing dirt, grime, and debris that can accumulate and cause damage. Use a soft-bristled brush or cloth to wipe down tools, paying particular attention to moving parts and crevices. For more thorough cleaning, mix a solution of mild detergent and warm water, and use a toothbrush to scrub away stubborn grime. Rinse tools thoroughly and dry with a clean towel to prevent rust.
After cleaning, apply a lubricant to moving parts to reduce friction and wear. Choose a lubricant specifically designed for tool maintenance, and apply a thin, even coat using a cloth or brush. Pay attention to hinges, pivot points, and other areas where parts move together.
Proper lubricant application will make certain your tools operate smoothly and efficiently, reducing the risk of breakdowns and prolonging their lifespan. By following these simple steps, you'll keep your masonry tools in top condition, ensuring they continue to deliver professional-grade results.
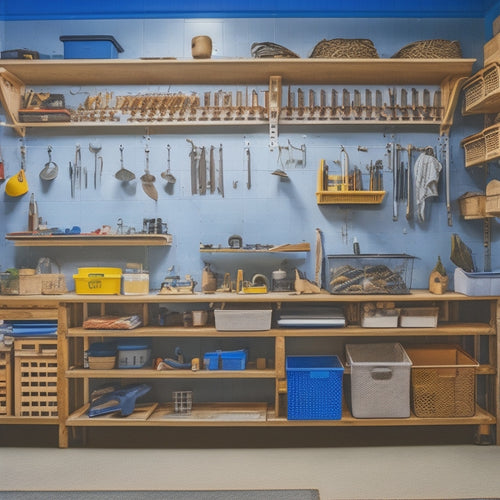
Tool Storage and Organization
Properly storing and organizing your masonry tools when not in use is essential to maintaining their condition and accessibility.
You've invested time and money in your tools, and it's vital to protect that investment. A well-organized toolbox not only saves you time but also reduces the risk of damage, loss, and even theft.
To achieve the best toolbox organization, consider the following storage solutions:
-
Categorize and group similar tools together: Store tools by function or type to make them easy to find when you need them.
-
Use dividers and compartments: Separate tools within your toolbox to prevent scratching and tangling.
-
Label and sign your tools: Identify tools quickly and easily, and make it harder for others to mistakenly take them.
-
Keep frequently used tools accessible: Store your most-used tools in an easy-to-reach location to save time.
-
Store tools in a dry, clean environment: Protect your tools from moisture, dust, and extreme temperatures.
Regular Inspection and Repair
Regular inspections help you catch minor issues with your masonry tools before they become major problems, saving you time and money in the long run. By doing so, you'll extend the tool lifespan and guarantee peak performance.
It's crucial to establish an inspection frequency that suits your tool usage. For instance, if you're a heavy user, consider inspecting your tools weekly, while moderate users can get away with monthly checks.
During inspections, look for signs of wear, corrosion, or damage. Check for loose handles, worn-out blades, and faulty electrical components. Make repairs immediately to prevent minor issues from escalating.
Keep a record of your inspections and repairs to track your tools' condition and identify potential problems early on. This proactive approach will help you stay on top of maintenance and guarantee your tools remain in top condition.
Frequently Asked Questions
Can I Use WD-40 to Clean All My Power Tools?
Don't rely on WD-40 to clean all your power tools. While it's great for rust prevention and loosening stuck parts, it's not a suitable lubricant for tool maintenance.
In fact, it can attract dirt and dust, causing premature wear. Instead, use tool-specific lubricants and follow proper tool lubrication techniques for ideal power tool maintenance.
This will guarantee your tools perform at their best and last longer.
How Often Should I Sharpen My Saw Blades?
When it comes to sharpening your saw blades, you'll want to take into account the type of blade you're working with.
For high-speed steel (HSS) blades, sharpen every 1-2 weeks, while carbide-tipped blades can go 4-6 weeks between sharpening.
Use a diamond stone or file for HSS, and a diamond wheel or CBN wheel for carbide-tipped.
Always follow the manufacturer's recommended sharpening techniques to maintain ideal performance and extend blade life.
Are There Any Eco-Friendly Tool Cleaning Products Available?
You're looking for eco-friendly tool cleaning products that won't harm the environment.
Fortunately, there are many biodegradable cleaners and natural solvents available that can effectively remove grease and grime without toxic chemicals.
Opt for plant-based formulas or those certified by organizations like the Environmental Protection Agency's Safer Choice program.
These alternatives will give you peace of mind while keeping your tools in top condition.
What Is the Best Way to Remove Rust From Metal Tools?
You're about to uncover the secret to banishing rust from your metal tools for good. It's a battle many have lost, but you won't be one of them.
To remove rust, you'll need a wire brush, some elbow grease, and a rust-dissolving solution.
But here's the thing: prevention is key. Take preventative measures like drying tools after use and applying a rust-inhibiting coating to prevent rust from forming in the first place.
Can I Store Tools in a Humid or Damp Environment?
You're wondering if you can store tools in a humid or damp environment. The short answer is, it's not ideal.
Humidity effects can be detrimental to your tools, causing rust and corrosion. Moisture seeps into crevices, accelerating damage.
To prevent this, you'll want to guarantee your tool storage is dry and well-ventilated. Consider using desiccant packets or silica gel to absorb excess moisture.
This will help maintain a stable environment, protecting your tools from the negative impacts of humidity.
Conclusion
As you wield your trusty tools, remember they're not invincible. Neglect them, and they'll rust, falter, and ultimately, sabotage your masterpiece.
But with regular TLC, they'll remain your loyal companions, precision-crafted to bring your vision to life.
By following these care and maintenance tips, you'll forge a symbiotic bond with your tools, ensuring a harmonious union that yields breathtaking results.
Related Posts
-

5 Best Home Renovation Project Timeline Checklists
You're looking for a clear understanding of the timeline for your home renovation project. A good place to start is w...
-
7 Best Tool Storage Ideas for Home Renovation
When it comes to home renovation, staying organized is key to maximizing productivity and minimizing wasted time. To ...
-

Get Discounted Plastering Tool Sets for DIY Renovations
You can find discounted plastering tool sets online, at local hardware stores, and thrift stores, offering a range of...
