Calculate Your Home Renovation Tool Budget Easily
Share
When calculating your home renovation tool budget, remember to allocate at least 10% to 20% of your total budget for tools and equipment, depending on the project's scope and complexity. Break down your tool costs into concrete mixing tools, power tool rentals, hand tool expenses, and scaffolding and ladder costs. Consider the quality and brand impact on long-term performance, and factor in maintenance, rental durations, and potential replacements. Establish a contingency fund for unexpected expenses, and prioritize safety gear and emergency preparedness. As you dive deeper into the specifics of your project, you'll uncover more nuances to fine-tune your budget for a successful renovation.
Key Takeaways
• Allocate funds for concrete mixing tools, power tool rentals, and hand tools, considering quality, brand, and long-term performance.
• Measure concrete surface preparation needs, including grinding, shot blasting, and acid etching, to ensure successful adhesion of new finishes or overlays.
• Calculate specific tool requirements, such as trowel and edger needs, concrete cutting tools, and drilling tools, based on project size and requirements.
• Factor in safety and emergency preparedness costs, including personal protective equipment, hazardous material handling, and emergency response planning.
• Establish a contingency fund for unexpected expenses and consider renting tools to stay within budget.
Concrete Mixing Tool Costs
When it comes to concrete mixing, you'll need to budget for a variety of tools, including a mixing bucket, trowel, and drill, which can cost anywhere from $50 to $200, depending on the quality and brand. This investment will pay off in the long run, as having the right tools will guarantee a smooth and efficient mixing process.
There are different concrete mixer types to reflect upon, such as electric, gas-powered, and manual mixers. Each type has its own advantages and disadvantages, so it's vital to choose the one that suits your specific needs and project requirements.
In addition to the right tools, it's important to master mixing technique tips to achieve a consistent and high-quality concrete mix. This includes following the correct mixing ratio, using the right mixing speed, and avoiding over-mixing.
Power Tool Rental Estimates
You'll likely need to rent power tools for your home renovation project, and understanding the rental estimates will help you allocate your budget effectively.
To get an accurate estimate, you'll need to take into account the power tool selection you'll require for the job. Make a list of the tools you'll need, and research their rental costs. Typically, rental prices vary depending on the type of tool and rental duration.
For example, a drill press might cost $20 per day, while a rotary hammer could cost $50 per day. Be sure to also factor in any additional costs, such as delivery fees or fuel surcharges.
Determine the rental duration for each tool based on your project timeline. If you're unsure, consult with a professional or the rental company for guidance.
Calculating Trowel and Edger Needs
When calculating your trowel and edger needs, you'll need to evaluate three key factors.
First, you'll need to determine the right trowel size for your project, as it will greatly impact the quality of your results.
Next, you'll need to choose the right edger type for maneuvering corners and tight spaces.
Trowel Size Matters Most
To accurately calculate your trowel and edger needs, start by determining the total square footage of the area that requires flooring installation, repair, or renovation. This will give you a solid foundation for estimating the number of trowels and edgers you'll need in order to complete the job.
When it comes to trowels, size matters most. You'll need to choose the right trowel type and material for your specific project. Here are some key factors to take into account:
-
Trowel types: V-notched, square-notched, and round-notched trowels are designed for specific flooring materials and applications.
-
Trowel materials: Steel, aluminum, and stainless steel trowels offer varying degrees of durability and resistance to corrosion.
-
Trowel size: Larger trowels (12-18 inches) are better suited for large, open areas, while smaller trowels (6-10 inches) are ideal for smaller spaces and detail work.
-
Trowel handle material: Wooden, fiberglass, or steel handles offer different levels of comfort, durability, and grip.
-
Specialized trowels: Some trowels are designed for specific tasks, such as applying adhesive or spreading grout.
Edger Type for Corners
Corners and edges require specialized edgers that can navigate tight spaces and curved surfaces, making it crucial to select the right edger type for your flooring project.
When it comes to corner edging techniques, you'll need an edger that can handle the unique demands of these areas. For instance, a radius edger is ideal for curved surfaces, while a corner edger with a 90-degree angle is perfect for tight corners.
The best edger types for corners include the radius edger, corner edger, and the combination edger. The radius edger is designed for curved surfaces and can be adjusted to fit different radii. The corner edger is perfect for 90-degree angles and tight corners. The combination edger, as the name suggests, combines the features of both radius and corner edgers, making it a versatile option.
When choosing an edger, consider the specific corner edging techniques required for your project. Will you need to tackle curved surfaces or tight corners?
Selecting the right edger type will guarantee a professional finish and save you time and effort in the long run. By investing in the right edger, you'll be able to achieve a seamless finish and complete your flooring project with confidence.
Quantity for Project Scope
You'll need to accurately calculate the quantity of trowels and edgers required for your project scope to guarantee you have the right tools for the job. This will help you stay on track with your renovation timeline and avoid costly delays.
To determine the quantity of trowels and edgers needed, consider the following factors:
-
Project size: Larger projects require more tools to assure efficient completion.
-
Surface area: Calculate the total square footage of surfaces that need troweling or edging.
-
Tool usage rate: Estimate how often each tool will be used to determine the required quantity.
-
Team size: If you're working with a team, you'll need more tools to keep everyone productive.
-
Backup tools: Consider having spare tools in case of damage or loss.
Budgeting for Concrete Finishing
As you plan your home renovation, allocating funds for concrete finishing is vital, since it can account for up to 20% of your overall construction budget. This substantial expense underscores the importance of effective budgeting strategies to guarantee you stay within your means. When it comes to renovation financing, it's imperative to prioritize concrete finishing costs to avoid costly surprises down the line.
To accurately budget for concrete finishing, consider the scope of your project. Will you be working with a large slab foundation, or are you focusing on finishing a smaller area, like a patio or walkway? The size and complexity of your project will directly impact your concrete finishing costs.
Be sure to factor in the cost of materials, labor, and equipment rentals when calculating your budget. Additionally, consider allocating a contingency fund to account for unexpected expenses. By taking a proactive approach to budgeting for concrete finishing, you'll be better equipped to manage your renovation financing and stay on track with your project timeline.
Estimating Hand Tool Expenses
When renovating a home, estimating hand tool expenses is essential to avoid overspending and to guarantee that your project stays on track financially. You'll need to evaluate the cost of essential hand tools, such as hammers, screwdrivers, and pliers, as well as the expenses associated with maintaining and storing them.
Here are some key factors to evaluate when estimating hand tool expenses:
-
Tool quality and brand: High-quality tools from reputable brands may cost more upfront, but they'll last longer and perform better.
-
Tool storage solutions: You'll need to invest in a tool chest, toolbox, or pegboard to keep your tools organized and within reach.
-
Hand tool maintenance: Regular cleaning, lubrication, and sharpening will help extend the life of your tools and reduce replacement costs.
-
Toolset completeness: Make sure you have a complete set of tools for each task, including specialized tools like a level or stud finder.
-
Tool replacement and upgrade: Factor in the cost of replacing tools that wear out or upgrading to better tools as your project progresses.
Pricing Out Concrete Cutting Tools
Now that you've accounted for hand tool expenses, it's time to turn your attention to pricing out concrete cutting tools, which are critical for making precise cuts in concrete, asphalt, or masonry.
When it comes to concrete cutting, you'll need to take into account the type of project you're undertaking and the specific tools required. For example, a diamond blade saw or a concrete cutter may be necessary for making straight cuts, while a ring saw or a concrete grinder might be better suited for curved or irregular cuts.
As you research concrete cutting tools, be sure to take into account the cost of tool maintenance tips, such as regular blade cleaning and replacement, as well as the cost of any necessary safety equipment, like respirators and protective eyewear.
Additionally, take into account the cost of concrete cutting techniques training or tutorials if you're new to this type of work. By factoring in these costs, you'll get a more accurate estimate of your concrete cutting tool budget.
Remember to prioritize quality over cost, as investing in high-quality tools will ultimately save you time and money in the long run.
Concrete Drilling Tool Budget Breakdown
You'll need to allocate a considerable portion of your tool budget to concrete drilling tools, which include hammer drills, rotary hammers, and core drills, each designed for specific tasks and hole sizes. These tools are essential for various drilling techniques, such as making holes for anchors, pipes, or electrical conduits.
When budgeting for concrete drilling tools, consider the following factors:
-
Tool quality and brand: Invest in high-quality tools from reputable brands to guarantee durability and performance.
-
Drill bit selection: Choose the right drill bits for your specific drilling tasks, as they can greatly impact tool performance and lifespan.
-
Tool maintenance: Regularly maintain your tools to prevent wear and tear, and extend their lifespan.
-
Additional accessories: Consider the cost of additional accessories, such as drill chucks, bits, and extension rods.
-
Rental or purchase options: Weigh the costs of renting versus purchasing concrete drilling tools, depending on your project's requirements and frequency of use.
Scaffolding and Ladder Costs
When planning your scaffolding and ladder costs, you'll need to take into account the type of ladder material that suits your project, whether it's aluminum, fiberglass, or wood.
You'll also need to guarantee your scaffolding meets height requirements to safely access high areas, and determine the ideal platform size to accommodate your team and equipment.
Ladder Material Options
Choose from a range of ladder materials, such as aluminum, fiberglass, or wood, to guarantee you select the right one for your specific renovation project and budget. When deciding, consider factors like ladder weight, ladder height, and durability.
Here are some key points to keep in mind for each material option:
-
Aluminum ladders: Lightweight, corrosion-resistant, and affordable, but may not be as sturdy as other options.
-
Fiberglass ladders: Non-conductive, making them ideal for electrical work, and durable, but often heavier than aluminum ladders.
-
Wooden ladders: Aesthetically pleasing, durable, and sturdy, but may be heavy, prone to rot, and require maintenance.
-
Hybrid ladders: Combine materials for added strength and durability, but can be expensive.
-
Specialized ladders: Consider ladders with unique features, such as articulating or extension ladders, for specific tasks or hard-to-reach areas.
Scaffolding Height Requirements
Determine the scaffolding height requirements for your renovation project by calculating the highest point of access needed, as this will directly impact the cost of scaffolding and ladders.
You'll want to take into account the height of walls, ceilings, and any other areas that need work. This calculation will help you choose the right scaffolding equipment and guarantee scaffolding safety.
Check local scaffolding regulations to establish the maximum height allowed for your project. Typically, scaffolding is required for heights above 6 feet, but this can vary.
You'll also need to take into account the weight capacity of the scaffolding, considering the number of workers and materials that will be on the platform.
When calculating the height, don't forget to factor in any obstacles, such as power lines or overhanging branches.
You should also take into account the type of scaffolding you'll need, such as single-width or double-width scaffolding, depending on the width of the area that needs work.
Platform Size Options
Considering your project's specific requirements, you'll need to select from a range of platform size options, which will greatly impact scaffolding and ladder costs. The right platform size guarantees a stable and secure working area, allowing you to complete your renovation tasks efficiently.
When choosing a platform size, consider the following factors:
-
Width and length: Confirm the platform dimensions fit comfortably within your renovation space, allowing for easy movement and access to all areas.
-
Weight capacity: Select a platform that can support the weight of you, your team, and your tools to avoid accidents and injuries.
-
Height adjustability: Opt for a platform that can be adjusted to different heights to accommodate various tasks and renovation areas.
-
Material and durability: Choose a platform made from durable, weather-resistant materials to withstand harsh outdoor conditions and heavy use.
-
Customization options: Consider platforms with customization options, such as adjustable legs or extension decks, to fit your unique renovation space and needs.
Measuring Concrete Surface Preparation
You'll need to evaluate the concrete surface's condition to identify any cracks, spalls, or other defects that require repair before applying a new finish or overlay. This critical step guarantees a strong bond between the old surface and the new material.
To measure the surface preparation needs, you'll need to inspect the concrete for any signs of damage, wear, or settlement. Take note of the surface's roughness, porosity, and moisture levels, as these factors can affect the adhesion and performance of the new finish.
Effective surface preparation techniques, such as grinding, shot blasting, or acid etching, can help create a strong bond and guarantee a successful renovation.
Additionally, concrete leveling methods, like self-leveling compounds or epoxy-based systems, can help correct uneven surfaces and provide a smooth, even base for the new finish.
Allocating Funds for Safety Gear
When allocating funds for safety gear in your home renovation project, you'll need to evaluate three essential points.
First, you'll need to budget for personal protective equipment, such as hard hats and respirators, to safeguard yourself and others on site.
Next, you'll have to account for the costs of handling hazardous materials and planning for emergency response scenarios.
Personal Protective Equipment
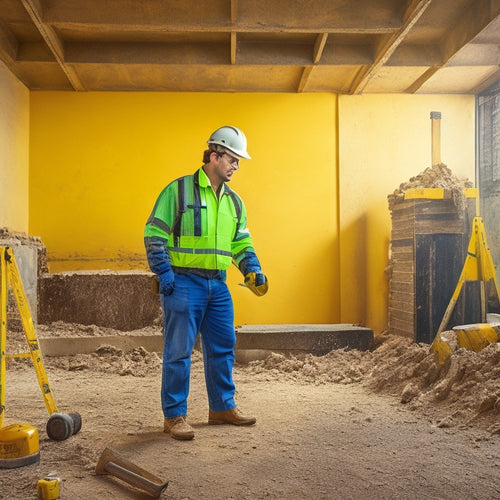
Set aside a dedicated budget for personal protective equipment (PPE) to guarantee you're prepared for the hazardous tasks that come with home renovation, such as dealing with asbestos, lead paint, or power tools.
Don't underestimate the importance of safety gear - it's vital for protecting yourself from serious injuries and illnesses.
Allocate funds for the following essential PPE items:
-
Respirators: for filtering out airborne contaminants like dust, mold, and asbestos fibers
-
Safety glasses: for shielding your eyes from flying debris and chemical splashes
-
Protective clothing: such as gloves, coveralls, and steel-toed boots for guarding against cuts, abrasions, and impact
-
Ear protection: for reducing noise exposure from power tools and machinery
-
First aid kit: for treating minor injuries and wounds on the spot
Hazardous Material Handling
Handling hazardous materials during home renovation demands careful planning and allocation of funds for specialized safety gear to minimize exposure risks.
You'll need to budget for personal protective equipment (PPE) and safety gear specifically designed for handling hazardous materials. This includes respirators, gloves, and protective clothing to prevent skin contact and inhalation of toxic substances.
When working with hazardous materials, it's crucial to follow strict safety protocols to avoid accidents. Identify the types of hazardous materials you'll be working with, such as asbestos, lead, or chemicals, and research the recommended safety gear and handling procedures.
Allocate funds for training on proper handling and disposal techniques to make sure you're equipped to handle emergencies.
Don't skimp on safety – allocate a dedicated budget for hazardous material handling. This may include hiring professionals for tasks that require specialized expertise, such as asbestos removal.
Emergency Response Planning
You'll need to allocate a specific portion of your budget for emergency response planning, including funds for safety gear and equipment that can help mitigate the impact of accidents or spills during home renovation. This planning is vital to guarantee your safety and the safety of others on the renovation site.
To develop a thorough emergency response plan, consider the following key elements:
-
Develop a communication plan for emergency situations, including a system for alerting response teams and conducting emergency drills.
-
Identify potential hazards and assess the risks associated with each, such as fires, electrical shocks, or chemical spills.
-
Establish a first aid kit and a plan for providing medical assistance in case of an emergency.
-
Designate a meeting point outside the renovation site where everyone can gather in case of an evacuation.
-
Identify local emergency services and their contact information, such as the fire department and ambulance services.
Frequently Asked Questions
Can I DIY Concrete Renovation or Do I Need Professional Help?
You're wondering if you can tackle a DIY concrete renovation or need professional services. While DIY concrete projects are possible, they often require specialized skills and equipment, so it's essential to assess your expertise before deciding.
How Do I Account for Potential Renovation Cost Overruns?
You're wise to worry about cost overruns - they can quickly derail your renovation plans. To avoid this, you'll need to pad your budget with a contingency fund, typically 10-20% of your total cost estimation, to absorb unexpected expenses.
What Is the Ideal Renovation Timeline for a Typical Home Project?
When planning a typical home project, you'll want to establish an ideal timeline, which typically ranges from 3-6 months for minor renovations to 6-12 months for major overhauls, allowing for flexibility and contingency planning.
Can I Reuse or Repurpose Old Materials to Save on Costs?
Did you know that 40% of waste in landfills comes from construction materials? You can reduce waste and save cash by upcycling materials, exploring cost-effective solutions like repurposing old doors as kitchen islands or using reclaimed wood for flooring.
How Do I Prioritize Renovation Tasks Based on Importance and Urgency?
You'll prioritize renovation tasks by conducting a task assessment, categorizing each task by importance and urgency, and then plotting them on an urgency matrix to visualize and tackle the most critical ones first.
Conclusion
You've survived the renovation tool budgeting gauntlet! Pat yourself on the back, because calculating your home renovation tool budget just got a whole lot easier.
From concrete mixing tools to scaffolding, you've got the estimates nailed down. With a budget that's as solid as concrete, you're ready to tackle that renovation project head-on.
Now, go forth and renovate like a pro – your wallet (and your home) will thank you!
Related Posts
-

Why Home Renovators Need Smart Tool Storage Now
You need a smart tool storage system that streamlines your workflow, reduces clutter, and protects your investments b...
-

Top 3 Safety Essentials for DIY Renovations
When tackling a DIY renovation, you'll want to prioritize three essential safety items to protect yourself from poten...
-

5 Vital Safety Tips for DIY Renovation Success
When tackling a DIY renovation, you'll need to prioritize safety above all else. Start by protecting yourself from fl...


