
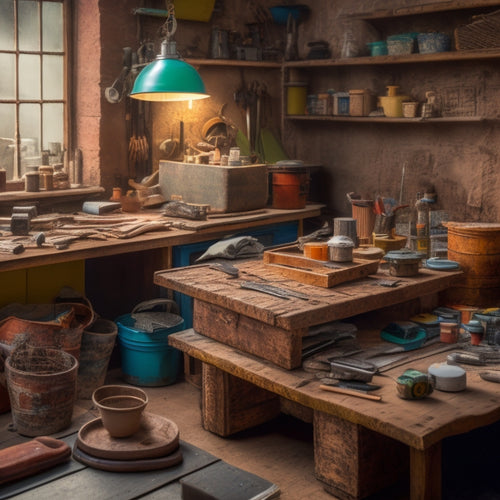
Budget-Friendly Tool Storage for Home Renovation
When tackling a home renovation, you need a budget-friendly tool storage solution that keeps your tools organized and within reach, maximizing your efficiency and productivity. Consider affordable tool chest options, DIY shelving for power tools, and repurposing old furniture pieces to reduce waste and add uniqueness to your storage solutions. Employ empty wall space, install wall-mounted racks, and optimize garage storage with overhead racks and slatwall panels. From creating a solid sorting strategy to implementing effective labeling systems, you'll find the right tools and techniques to create a well-organized workspace that streamlines your renovation process, and there's more to uncover.
Key Takeaways
- Evaluate affordable tool chest options made of steel or aluminum for durability and compact storage.
- Repurpose old furniture pieces, like vintage dressers or kitchen cabinets, to create unique and budget-friendly tool storage solutions.
- DIY shelving systems using durable materials like wood or metal frames can be customized to fit specific storage needs and save money.
- Maximize wall space by installing wall-mounted racks, pegboards, and vertical storage solutions to expand tool storage capacity.
- Utilize pegboard accessories and design an efficient layout to maximize pegboard space and organize tools effectively.
Affordable Tool Chest Options
With a multitude of tool chest options available in the market, finding an affordable one can be a challenging task. You need to evaluate factors like tool chest materials, size, and features to guarantee you get the best value for your money.
Look for tool chests made from durable materials like steel or aluminum that can withstand heavy use.
You can opt for a compact storage solution that fits in a small space, perfect for apartments or small workshops. These compact tool chests often have multiple drawers and shelves, allowing you to organize your tools efficiently.
Additionally, assess tool chests with removable trays or dividers that can be customized to fit your specific tool set.
When shopping for an affordable tool chest, you'll likely come across options from popular brands like DeWalt, Milwaukee, or Stanley.
Compare prices and features to find the best fit for your budget and needs.
DIY Shelving for Power Tools
Organization takes center stage when it comes to efficient tool storage, and DIY shelving for power tools can be a cost-effective solution.
By creating your own shelving system, you can customize it to fit your specific tool storage needs and save money in the process.
When it comes to building your DIY shelving, the type of shelving materials you choose will play a significant role in the overall functionality of your system.
Here are three key considerations to keep in mind:
-
Durability: Choose shelving materials that can withstand the weight of your power tools, such as sturdy wood or metal frames.
-
Adjustability: Opt for shelving materials that allow for adjustable shelves, so you can customize the storage space to fit tools of different sizes.
-
Accessibility: Consider shelving materials with smooth surfaces or rounded edges to guarantee easy tool retrieval and to prevent damage to your tools.
Utilizing Empty Wall Space
By maximizing empty wall space, you can greatly expand your tool storage capacity without taking up precious floor or bench space. This is especially useful in small workshops or garages where every square foot counts.
You can install wall-mounted racks to hang tools like bikes, ladders, or even pegboards for smaller items. These racks are easy to install and can be adjusted to fit your specific needs. For example, you can place a pegboard near your workbench to keep frequently used tools within easy reach.
Another option is to invest in vertical storage solutions like stackable bins or shelves. These can be used to store items like paint cans, power tools, or other equipment. By going vertical, you can make the most of your wall space and keep your tools organized and out of the way.
Repurposing Old Furniture Pieces
Beyond the traditional toolbox or storage bin, you can breathe new life into old furniture pieces to create functional and budget-friendly tool storage solutions.
This approach not only reduces waste but also adds a touch of uniqueness to your workshop or garage.
Consider the following upcycled furniture pieces to store your tools:
-
Vintage dressers: Remove the drawers and attach pegboards or hooks to store small tools, such as wrenches, pliers, and screwdrivers.
-
Upcycled cabinets: Refurbish old kitchen cabinets to store larger tools, like power drills, saws, and sanders. You can add dividers or shelves to maximize storage space.
-
Old bookshelves: Convert bookshelves into storage units for bins, baskets, or containers filled with nuts, bolts, and other small hardware.
Budget-Friendly Cabinet Solutions
You've repurposed old furniture pieces to create functional tool storage solutions, but now it's time to investigate more budget-friendly cabinet options that can help you stay organized and efficient. Cabinet solutions offer a more traditional and durable storage option for your tools and equipment.
When selecting a budget-friendly cabinet, evaluate the material and finish. Here are some options to contemplate:
| Cabinet Material | Price Range |
|---|---|
| MDF | $50-$100 |
| Plywood | $75-$150 |
| Solid Wood | $100-$250 |
| Metal | $50-$150 |
| Plastic | $20-$50 |
Cabinet finishes also vary in price, with laminate being the most affordable and solid wood being the most expensive. Additionally, assess the size and number of cabinets you need, as well as any additional features like drawers, shelves, and locks. By assessing these factors, you can find a budget-friendly cabinet solution that meets your tool storage needs.
Maximizing Garage Storage Space
Your garage is likely one of the most essential storage spaces in your home, but it's easy for clutter to build up and make it difficult to find what you need when you need it.
To maximize your garage storage space, you'll want to make the most of your walls and ceiling.
-
Install overhead storage: Take advantage of the space above your garage door or ceiling by installing overhead storage racks. These can hold infrequently used items like seasonal decorations or out-of-season clothing.
-
Use vertical racks: Vertical racks are great for storing items like bikes, tools, or even luggage. They keep your floor clear and make it easy to access what you need.
-
Opt for slatwall panels: Slatwall panels are a versatile storage solution that can hold a variety of items, from bins and baskets to hooks and accessories.
They're easy to install and can be customized to fit your specific storage needs.
Tool Organization Hacks
You're now ready to tackle the nitty-gritty of tool organization.
By implementing effective tool sorting strategies, creating DIY shelving ideas that fit your needs, and making labeling a breeze, you'll be able to find what you need when you need it.
With these hacks, you'll be well on your way to a more efficient and stress-free workspace.
Tool Sorting Strategies
A well-organized toolbox is only as good as its sorting strategy. You've got the perfect toolbox, but without a solid plan for organizing your tools, it's just a cluttered mess.
To maximize your tool storage, you need a system that makes sense for your needs. Developing a tool sorting strategy is vital for efficient tool maintenance and a smooth renovation process.
Here are three essential steps to get you started:
-
Categorize by Function: Group tools by their purpose, such as drilling, cutting, or fastening. This helps you quickly find the right tool for the task at hand.
-
Prioritize Frequently Used Tools: Store your most-used tools in easy-to-reach locations, making them readily available when you need them.
-
Conduct Regular Tool Inventory: Schedule regular checks to verify your tools are in good condition, and make adjustments to your sorting strategy as needed.
DIY Shelving Ideas
Tool-laden workbenches and cluttered garages are a thing of the past with creative DIY shelving ideas that optimize tool organization. You can repurpose old pallets or crates to create rustic shelving units that add a touch of industrial charm to your workspace.
Alternatively, you can opt for more conventional shelf materials like plywood or MDF, which are affordable and easy to work with.
When designing your DIY shelving system, keep vertical storage in mind. Install shelves that go up to the ceiling to maximize storage capacity and keep your tools within easy reach.
You can also add hooks, bins, and baskets to store smaller items like nuts, bolts, and screws. Consider adding a pegboard to hang frequently used tools, freeing up shelf space for less frequently used items.
With a little creativity and some basic carpentry skills, you can create a customized shelving system that meets your specific tool storage needs.
Labeling Made Easy
Once your shelving system is in place, it's time to take your tool organization to the next level by labeling your storage containers and shelves. This simple step will help you quickly identify what's inside each container, saving you time and frustration when searching for specific tools.
To get started, you'll need some basic labeling supplies, such as labels, a label maker, and markers.
Here are three tips to make labeling a breeze:
-
Use a consistent labeling system: Choose a format for your labels, such as writing the tool name or category, and stick to it. This will make it easy to scan your shelves and find what you need.
-
Color code your labels: Use different colors to categorize your tools, such as red for power tools and blue for hand tools. This visual system will help you quickly identify the type of tool you need.
-
Keep your labels concise: Use short, descriptive words or phrases to describe the contents of each container. This will save you space and make it easier to read your labels at a glance.
Inexpensive Pegboard Ideas
You don't have to break the bank to get a pegboard that keeps your tools organized and within reach.
With a little creativity, you can create a functional pegboard on a budget, and even install it yourself with some basic DIY skills.
Pegboard on a Budget
Creating a pegboard on a budget requires some creative thinking, but with a little bit of planning, you can design a functional and efficient storage system without breaking the bank.
You'll need to get resourceful with your materials and think outside the box to achieve your desired outcome.
To start, consider repurposing materials you already have on hand.
For example:
-
Use reclaimed wood: Instead of buying a brand new pegboard, look for old pallets or wooden crates that you can upcycle into a pegboard.
-
Opt for affordable pegboard accessories: Instead of buying expensive hooks and bins, look for cheaper alternatives at your local hardware store or online.
-
Get creative with arrangements: Think about the layout of your pegboard and how you can maximize your space.
Consider using baskets, bins, and other containers to store small items and keep your pegboard organized.
DIY Pegboard Installation
With your budget-friendly pegboard design in hand, it's time to bring it to life. You've chosen your pegboard materials, from affordable plywood to durable MDF, and now it's time to focus on the installation techniques.
Start by marking the wall studs where you plan to hang your pegboard. Use a level to guarantee the marks are straight and a pencil to mark the spot. Next, drill pilot holes and screw the pegboard into place, making certain it's secure and level.
If you're using a pegboard with a frame, attach it to the wall first, then add the pegboard material. For a more rustic look, you can attach the pegboard directly to the wall without a frame.
Consider adding a French cleat or a screw-and-anchor system for extra support. Finally, add your hooks, bins, and accessories to complete your pegboard installation.
With these simple steps, you'll have a functional and budget-friendly tool storage system up and running in no time.
Maximizing Pegboard Space
Optimizing your pegboard's storage capacity is essential to making the most of your budget-friendly tool storage system.
You've invested time and effort into setting up your pegboard, and now it's time to maximize its potential.
To make the most of your pegboard, consider the following strategies:
-
Use a variety of pegboard hooks to store different types of tools, such as bins for small items, hooks for hanging tools, and trays for larger equipment.
-
Implement a color-coding system to categorize your tools by type or frequency of use, making it easier to find what you need in a hurry.
-
Group similar tools together to reduce clutter and increase efficiency, such as storing all your screwdrivers in one area.
Decluttering Your Workshop Area
Behind the cluttered chaos of your workshop area, a well-organized space is waiting to emerge. To get there, you need to declutter your workshop area. Start by clearing everything out – yes, everything! Sort items into categories like "keep," "donate," and "recycle." Be ruthless about getting rid of broken or useless tools and supplies.
Once you've purged your collection, implement tool decluttering techniques to optimize your workshop space. Assign a home for each tool and supply, and store them in a way that makes sense for your workflow.
Consider installing shelves, bins, or a pegboard to keep frequently used items within easy reach. This will help you stay focused and avoid wasting time searching for misplaced tools.
Frequently Asked Questions
How Do I Prevent Tools From Getting Rusty in Storage?
You prevent tools from getting rusty in storage by taking preventive measures, like cleaning them before storing, using rust-inhibiting coatings, and maintaining humidity control with silica gel packets or a dehumidifier to keep the air dry.
Can I Use a Storage Unit for Tools in a Small Apartment?
You're like a skilled chef, juggling ingredients in a tiny kitchen; similarly, you can optimize your small apartment's space by using a storage unit for tools, implementing clever tool organization strategies to maximize every inch.
Are Soft Tool Cases Sufficient for Protecting Tools During Storage?
You're wondering if soft tool cases are enough to protect your tools during storage. While they're convenient, they may not provide adequate protection. Look for tool case materials with sturdy padding and consider compact storage space solutions to keep your tools organized and safe.
Can I Store Gas-Powered Tools in an Enclosed Space?
When storing gas-powered tools, you must prioritize fuel safety and ventilation needs. Don't store them in enclosed spaces, as fuel vapors can accumulate and ignite; instead, choose well-ventilated areas or use spark-resistant containers to minimize risks.
How Often Should I Clean and Maintain My Tool Storage?
You should regularly clean and maintain your tool storage to guarantee ideal tool organization and extend the lifespan of your storage solutions; aim to tidy up every 1-2 weeks and perform a deep clean every 3-6 months.
Conclusion
You've finally tamed the tool chaos, and your workshop is now a haven of organization and efficiency. Gone are the days of digging through cluttered drawers and scrambling to find that one screwdriver. With these budget-friendly tool storage solutions, you've converted your space from a messy nightmare to a sleek, streamlined oasis. Now, get back to the renovation - those DIY projects won't finish themselves!
Related Posts
-
Budget-Friendly Materials for Your Home Renovation Project
As you plan your home renovation project, finding budget-friendly materials is key to turning your design vision into...
-

Why Use Concrete Blocks in Home Renovation
You're considering using concrete blocks in your home renovation, and for good reason: they offer a unique combinatio...
-

3 Best Planter Shopping Timeline Tips for Renovators
When incorporating planters into your renovation project, you'll want to plan carefully to avoid delays and guarantee...


