
Brick Wall Renovation Tool Buying Guide
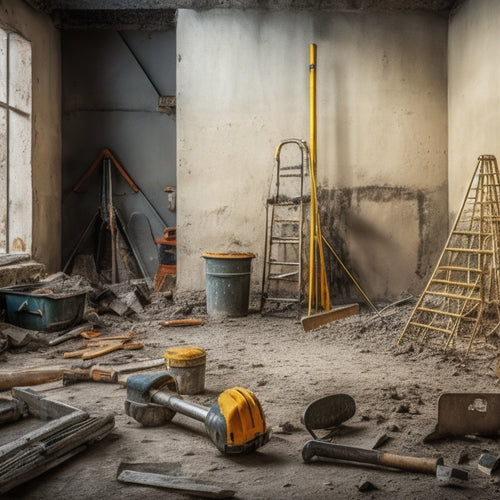
When tackling a brick wall renovation, you'll need a strategic arsenal of tools to guarantee success. Essential hand tools include sturdy hammers, pry bars, and wrecking chisels for efficient demolition and removal. Demolition hammers, like rotary and jack hammers, are vital for large-scale projects. Trowels, levels, and measuring tools facilitate precise mortar application and brick placement. Cleaning and preparation tools, like stiff-bristled brushes and HEPA-filter vacuums, maintain a clean workspace. Specialized tools, such as pattern-making instruments and mortar combs, enable complex design execution. With the right tools, you'll improve accuracy, aesthetic quality, and efficiency - and mastering them is just a step ahead.
Key Takeaways
• Essential hand tools for brick wall renovation include hammers, pry bars, wrecking chisels, and breakers for efficient demolition and removal.
• Demolition hammers, categorized into rotary, jack, and demolition hammer drills, are crucial for effective brick removal, with safety gear being a top priority.
• Pointing trowels, available in various materials and sizes, facilitate precise mortar application between bricks, enhancing overall project quality.
• Leveling and measuring tools, such as digital levels and tape measures, ensure accurate wall leveling and precise measurements for successful renovations.
• Specialized tools, including pattern-making instruments and mortar combs, enable complex design execution, improved accuracy, and enhanced aesthetic quality.
Essential Hand Tools for Demolition
When tackling a brick wall renovation, you'll need to equip yourself with the right hand tools to efficiently demolish the existing structure, starting with a sturdy hammer, pry bars, and a wrecking chisel. These essentials will help you master various demolition techniques, from gentle coaxing to full-on destruction mode.
Remember, a good hammer is like a trusty sidekick – it's got your back (and the wall's, for that matter).
Don't forget to prioritize tool maintenance to avoid mid-demolition meltdowns. Keep your pry bars lubricated and your chisel clean to guarantee they're always ready for action. A well-maintained tool is a happy tool, and a happy tool is one that won't leave you hanging (or, you know, stuck with a half-demolished wall).
With your arsenal of hand tools at the ready, you'll be well on your way to successfully tearing down that old brick wall. Just remember to stay focused, stay safe, and maybe – just maybe – have a little fun with the demo process.
After all, there's something satisfying about taking a sledgehammer to an old wall (just don't tell the wall that).
Trowels and Pointing Trowels Explained
As you prepare to tackle your brick wall renovation, you'll need to understand the different types of trowels and their specific uses.
You'll discover that pointing trowels, in particular, are designed for applying and finishing joint mortar.
Types of Trowels
You'll need to select the right type of trowel for your brick wall renovation project, since different tasks require distinct tool features. Don't worry, we've got you sorted! There are various types of trowels, each designed for specific tasks. Let's explore!
Trowel materials are an essential consideration. You'll find trowels made from stainless steel, carbon steel, or aluminum.
Stainless steel trowels are rust-resistant and perfect for wet environments, while carbon steel trowels are durable and suitable for heavy-duty use.
Aluminum trowels are lightweight and ideal for smaller projects.
Trowel sizes also play a significant role. You'll find trowels ranging from 4 to 12 inches in length, with varying widths.
Smaller trowels are perfect for precision work, such as applying mortar between bricks, while larger trowels are better suited for applying render or plaster.
When choosing a trowel, consider the size of your project and the type of material you're working with.
With the right trowel, you'll be well on your way to a successful brick wall renovation.
Pointing Trowel Uses
A pointing trowel is a specialized tool designed to facilitate precise application and finishing of mortar between bricks, making it an indispensable asset for achieving professional-looking results in brick wall renovation projects.
You'll find yourself reaching for it frequently to fill gaps, smooth out excess mortar, and create a seamless joint. Mastering pointing trowel techniques takes practice, but with patience and persistence, you'll be a pro in no time. Start by holding the trowel at a 45-degree angle and pressing it firmly into the joint. Then, use a gentle pushing motion to fill the gap, feathering the mortar outwards towards the edges.
To guarantee your pointing trowel remains in top condition, prioritize regular maintenance. Clean the tool thoroughly after each use, removing any dried mortar and debris. Store it in a dry place, away from direct sunlight, to prevent rust or corrosion.
Choosing the Right
When selecting the ideal trowel for your brick wall renovation project, it's essential to understand the key differences between trowels and pointing trowels to guarantee you're choosing the right tool for the task at hand. You don't want to be stuck with a tool that's not compatible with your project's specific needs, wasting valuable time and money.
Here are some key factors to take into account when choosing between a trowel and a pointing trowel:
-
Trowel size and shape: Trowels come in various sizes and shapes, making them suitable for larger areas and applying mortar. Pointing trowels, on the other hand, are smaller and more angled, perfect for precision work and filling small gaps.
-
Material compatibility: Confirm the trowel you choose is compatible with the type of mortar or material you're working with. Some trowels are designed specifically for certain materials, so don't assume one-size-fits-all.
-
Project budget: Set a budget and stick to it. Pointing trowels tend to be more affordable, while larger trowels may be more expensive.
- Tool versatility: Think about a trowel that can handle multiple tasks, saving you money and space in your toolbox.
Hammers for Brick Wall Renovation
Tackling brick wall renovation projects requires selecting the right hammers to effectively demolish, dismantle, or reshape existing brick structures.
You'll need the right tool for the job to avoid damaging the brick, the wall, or yourself! When it comes to hammer types, you've got a few options. Claw hammers are great for general demolition, while ball-peen hammers are better suited for more precise work, like tapping bricks into place. Sledgehammers, on the other hand, are perfect for heavy-duty demolition.
Now that you've got the right hammer, it's time to talk techniques. You'll want to master the art of controlled swings, using your legs and core to generate power. Don't try to muscle the hammer - it's all about finesse!
For more precise work, try using a hammer with a shorter handle to give you more control. And remember, it's not just about the hammer - it's about you. Keep your cool, stay focused, and you'll be knocking down brick walls like a pro!
Chisels and Breakers for Removal
When it comes to removing brick walls, you'll need the right tools to get the job done efficiently.
You're likely to rely on chisels and breakers, which can be used in various ways to achieve your desired outcome.
Next, you'll want to contemplate the specific demolition hammer options and brick removal techniques that will work best for your project.
Demolition Hammer Options
You'll need a reliable demolition hammer to effectively dismantle a brick wall, and that's where chisels and breakers come into play. These tools are the unsung heroes of demolition, making quick work of even the toughest brick structures.
When choosing a demolition hammer, you'll want to evaluate the type and brand that best suits your needs.
Here are some top demolition hammer options to evaluate:
-
Rotary Hammers: These hammers use a rotating drill bit to break up brick and mortar. They're ideal for smaller demolition projects and are often more affordable than other types.
-
Jack Hammers: These heavy-duty hammers are designed for large-scale demolition projects. They're powerful, but can be heavy and tiresome to use.
-
Demolition Hammer Drills: These versatile tools combine the power of a jackhammer with the precision of a drill. They're perfect for projects that require both heavy demolition and precise drilling.
- Top Brands: Look for trusted brands like Bosch, DeWalt, and Makita, which offer a range of demolition hammer types and styles to suit your needs.
Brick Removal Techniques
With chisels and breakers in hand, start by identifying the weakest points in the brick structure, typically around windows, doors, or areas with existing cracks. This is where you'll focus your demolition efforts to minimize damage and maximize efficiency.
As you plan your demolition project, remember that brick removal safety should always be your top priority. Wear protective gear, including gloves, safety glasses, and a dust mask to avoid injuries and respiratory issues.
When using chisels, start with gentle taps to dislodge individual bricks, working from the top down to avoid damaging surrounding structures. Breakers, on the other hand, are better suited for larger areas or more stubborn bricks. Be cautious not to apply too much pressure, which can cause the breaker to bounce back or kickback.
As you remove bricks, set them aside in a designated area to prevent tripping hazards and keep your workspace organized. Throughout the process, regularly inspect the structure to guarantee it remains stable and secure.
Level and Straightedge Tools Needed
Two essential tools for guaranteeing accuracy in your brick wall renovation are a level and a straightedge.
You can't just wing it and hope for the best - well, you could, but don't say we didn't warn you! A level guarantees that your brick wall is, you guessed it, level. It's vital for maintaining structural integrity and avoiding a wonky wall that'll make you question your life choices.
Here are some must-haves for your level and straightedge toolkit:
-
Digital level: Because who needs analog when you can have precision digital readings?
-
Torpedo level: Perfect for tight spaces and guaranteeing level accuracy in those hard-to-reach areas.
-
Straightedge with adjustable arms: For maintaining straight lines and making straightedge maintenance a breeze.
- Combination square: A two-in-one tool that doubles as a straightedge and a square - talk about multitasking!
Safety Gear for Brick Workers
Before you start renovating your brick wall, make sure you're protected from potential hazards with the right safety gear. You don't want to end up as a human brick, stuck in a hospital bed with a bunch of broken bones!
As a brick worker, you're exposed to falling objects, flying debris, and hazardous materials, so it's essential to follow safety regulations.
Invest in personal protective equipment (PPE) like hard hats, safety glasses, and earplugs to shield yourself from impact and noise. A dust mask or respirator will keep you breathing easy when working with dusty or toxic materials.
Steel-toed boots and gloves will protect your feet and hands from heavy objects and sharp edges. Don't forget a first-aid kit on site, just in case.
Measuring and Marking Tools Required
You'll need a set of measuring and marking tools to accurately assess and prepare your brick wall for renovation. These tools will help you determine the scope of the project, identify potential issues, and create a plan of attack.
Don't worry, it's not as intimidating as it sounds! With the right tools, you'll be a master measurer and marker in no time.
Here are the essential measuring and marking tools you'll need:
-
Tape measure: A sturdy, 25-foot tape measure will help you measure the length, width, and height of your brick wall.
-
Level: A level guarantees your measurements are accurate and your walls are straight.
-
Marking chalk: This is used to mark cutting lines, indicate areas for repair, and create a map of your renovation plan.
- Laser level: This tool projects a level line or dot, making it easy to transfer measurements and mark straight lines.
Cleaning and Preparation Tools
When tackling a brick wall renovation, you'll need to clean and prepare the surface before applying any finishes.
This vital step requires the right tools to remove dust and debris, scrub the surface, and extract any remaining impurities.
You'll want to gather dust removal essentials, surface scrubbing tools, and debris extraction methods to guarantee a strong bond between the old brick and new materials.
Dust Removal Essentials
Remove loose debris and dust from the brick wall surface using a stiff-bristled brush or a vacuum cleaner equipped with a HEPA filter to prevent airborne particles from spreading. You don't want to inhale those tiny dust bunnies, trust us!
When it comes to dust removal, you'll need the right tools for the job. Here are some essentials to add to your arsenal:
-
Dust collection bags: These will help contain the mess and make cleanup a breeze.
-
Vacuum systems with HEPA filters: These will trap 99.97% of particles as small as 0.3 microns, leaving your air clean and your lungs happy.
-
Dustless sanding systems: These will minimize dust creation while you work, making your life (and your neighbors') much easier.
- Dust masks or respirators: Because, let's face it, you can never be too careful when it comes to inhaling dust and debris.
Surface Scrubbing Tools
Scrub the brick wall's surface with stiff-bristled brushes or scrubbers to dislodge and remove dirt, grime, and old adhesives, preparing it for renovation. This vital step in surface preparation techniques guarantees a strong bond between the brick and any new materials you'll be applying.
You'll want to invest in a few effective scrubbing tools to get the job done right. For tough grime buildup, reach for a wire brush with sturdy bristles that can withstand some serious elbow grease.
For more delicate surfaces, a soft-bristled brush or a scrubber with flexible fingers might be a better fit. Don't forget to wear some heavy-duty gloves to protect those hands from the scrubbing action and any harsh chemicals you might be using.
Debris Extraction Methods
You'll need to employ effective debris extraction methods to clear the brick wall's surface of loose material and dust generated during scrubbing, ensuring a clean slate for renovation. As you scrub away, you'll be left with a mess that needs to be tackled before moving forward.
Efficient cleanup strategies are vital to maintaining a safe and organized workspace.
Here are some debris disposal methods to take into account:
-
Vacuum with a HEPA filter: Perfect for capturing fine dust and debris, making it an essential tool for post-scrubbing cleanup.
-
Dustless sanding systems: These systems use a vacuum attachment to contain dust and debris, reducing the risk of airborne particles.
-
Damp sweeping: A simple yet effective method for removing larger debris and dust from the wall's surface.
- Wet vacuuming: Ideal for tackling liquid-based messes, such as water or cleaning solution spills.
Mixing and Application Tools List
When renovating a brick wall, selecting the right mixing and application tools is crucial to guarantee a strong and durable bond between the brick and mortar. You don't want to be stuck with a wall that's more crumbly than a cookie fresh out of the oven!
To get it right, you'll need to master various mixing techniques and application methods. For mixing, you'll need a sturdy mixing bucket, a mixing stick or trowel, and a measuring cup to guarantee the perfect ratio of cement to sand. Don't skip the mixing paddle or drill attachment – they'll make quick work of that mortar!
Now, onto application. You'll need a pointing trowel to apply the mortar to the brick, and a jointer or finishing trowel to smooth out the joints.
Don't forget a level and straightedge to keep those joints straight and level. With these tools in your arsenal, you'll be well on your way to creating a brick wall that's as solid as a rock.
Happy renovating!
Specialized Tools for Pattern Making
To create intricate patterns and designs on your brick wall, a set of specialized tools is essential, including pattern-making instruments that help you achieve precise control over mortar application and distribution.
With the right tools, you'll be able to master various pattern design techniques and bring your unique vision to life.
Here are some must-haves for your pattern-making arsenal:
-
Custom template creation tools: These allow you to create custom templates for your design, ensuring precision and consistency in your pattern.
-
Mortar combs: These tools help you achieve uniform mortar distribution, which is fundamental for creating intricate patterns.
-
Pattern gauges: These gauges enable you to measure and mark the brick surface with precision, ensuring your pattern is accurate and symmetrical.
- Mortar spacers: These spacers help you maintain consistent spacing between bricks, which is critical for creating complex patterns.
With these specialized tools, you'll be well on your way to creating stunning, one-of-a-kind designs that will elevate your brick wall renovation project.
Frequently Asked Questions
Can I Reuse Old Mortar From a Demolished Brick Wall?
Can you reuse old mortar from a demolished brick wall? Well, you're not alone in wondering. But, sadly, the answer is a hard no.
Mortar testing will reveal it's likely degraded, and reusing it can compromise your new wall's structural integrity.
Plus, think about the environmental impact - old mortar can leach chemicals into the soil.
It's better to start fresh with new, eco-friendly mortar.
Sorry, it's time to let go of that old mortar - it's had its brick-y day!
How Do I Deal With Asbestos During Brick Wall Renovation?
You're about to commence on a brick wall renovation, but first, you need to tackle the elephant in the room - asbestos.
You won't be able to ignore it, so don't even think about it. Get asbestos testing done to identify contaminated areas.
Then, plan for safe removal by hiring a pro or taking necessary precautions yourself.
Don't risk your health; it's not worth it.
Can I Renovate a Brick Wall Without Professional Experience?
Can you renovate a brick wall without professional experience? You bet! With some DIY techniques and renovation tips, you can tackle the job.
Start by evaluating the wall's condition, then plan your attack. Research local regulations, prep the area, and get the right gear.
Don't be afraid to ask for help or YouTube tutorials when needed. Remember, it's okay to make mistakes - they're just learning opportunities.
Just don't say we didn't warn you about the potential mess and sweat equity involved!
What Is the Best Way to Dispose of Demolition Waste?
Demolition debris drizzles down, intimidating your dumpsite. Don't despair! You're doing the dirty work, now do it responsibly.
Sort and separate materials for demolition recycling, and research local waste management facilities that accept construction waste. You'll be doing the environment a favor, and avoiding hefty fines.
Bag it, tag it, and haul it away correctly - your conscience (and the planet) will thank you.
Do I Need to Obtain Permits for a Brick Wall Renovation Project?
You're about to plunge into a brick wall renovation project, but first, you'll need to navigate the permit requirements.
Don't worry, it's not as painful as it sounds! You'll need to check with your local government to determine if you need permits for your renovation.
Research the renovation regulations in your area to avoid any costly surprises.
Conclusion
You've got the know-how to tackle that brick wall renovation!
With these must-have tools, you'll be well-equipped to break down barriers (literally!) and build something truly remarkable.
Remember, a solid foundation is key, so don't skimp on the essentials.
From demolition to application, you're now armed with the expertise to transform that wall into a masterpiece.
Happy renovating!
Related Posts
-

10 Best Power Tools to Buy for Home Renovation
To tackle your home renovation project efficiently, you'll need the right power tools for the job. A cordless drill f...
-
What Tools to Rent for Block Wall Renovation
When renovating a block wall, it's vital to have the right tools for the job. You'll need demolition tools like pry b...
-
Get Discounted Plastering Tool Sets for DIY Renovations
You can find discounted plastering tool sets online, at local hardware stores, and thrift stores, offering a range of...


