
7 Tools You Need for DIY Home Renovation
You'll need a solid arsenal of tools to tackle a DIY home renovation project efficiently and effectively. For demolition, grab a rotary hammer, reciprocating saw, and impact driver. To cut and smooth concrete blocks, you'll require a diamond blade saw, masonry saw, and block chisel. Don't forget essential drywall and paint prep tools like a drywall hammer and quality paintbrush. For flooring installation, you'll need a flooring stapler, flooring cutter, and notched trowel. And, of course, precise measuring and marking tools like a sturdy tape measure, chalk line, and level are a must. Your project's success depends on having these critical tools at your fingertips, and there's more to learn about the tools and techniques that'll get the job done.
Key Takeaways
• Essential power tools like rotary hammers, reciprocating saws, and impact drivers are necessary for demolition and construction tasks.
• Cutting and smoothing tools like diamond blade saws, masonry saws, and concrete grinders are required for concrete block cutting and smoothing.
• Flooring tools such as putty knives, scrapers, and flooring cutters are necessary for removing old flooring and preparing subfloor surfaces.
• Measuring and marking tools like tape measures, chalk lines, and levels ensure accurate room measurements and proper installations.
• Safety equipment like gloves, safety glasses, and dust masks are crucial for protecting yourself from injuries and harm during DIY home renovation.
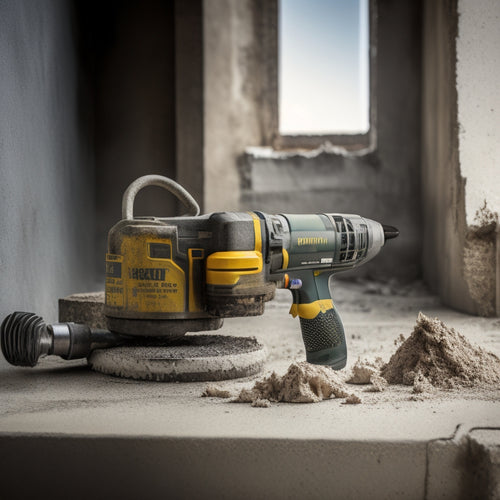
Essential Power Tools for Demolition
When tackling a demolition project, what's the first thing you reach for - a sledgehammer or a power tool that can make the job faster and safer?
As a DIY enthusiast, you know that having the right power tools can make all the difference in getting the job done efficiently. For demolition projects, you'll need a reliable rotary hammer, reciprocating saw, and an impact driver. These power tools will help you master various demolition techniques, such as breaking up concrete, tearing down walls, and dismantling fixtures.
But, remember, power tools are only as good as their maintenance. Regularly check and maintain your tools to guarantee they're in top condition.
Cleanliness is key - keep your tools free from dust and debris to prevent overheating and motor damage. Also, make sure to follow the manufacturer's guidelines for maintenance and storage.
By keeping your power tools in prime condition, you'll be able to tackle even the toughest demolition projects with confidence.
Concrete Block Cutting Tools Needed
Cutting through concrete blocks requires the right tools to make precise cuts and minimize waste, and you'll need a diamond blade saw or a masonry saw for the job. Don't try to wing it with a regular saw, trust us, you'll end up with a mangled mess and a bunch of wasted blocks.
Here's a breakdown of the concrete block cutting tools you'll need:
| Tool | Best For | Cutting Technique |
|---|---|---|
| Diamond Blade Saw | Large, heavy blocks | Slow, controlled cuts |
| Masonry Saw | Smaller, lighter blocks | Quick, precise cuts |
| Block Chisel | Splitting blocks | Tapping and prying |
| Concrete Grinder | Smoothing edges | Grinding and polishing |
| Safety Goggles | Protecting yourself | Common sense (we hope) |
When working with different concrete block types, such as solid, hollow, or insulated blocks, you'll need to adjust your cutting techniques accordingly. For example, solid blocks require more force and slower cuts, while hollow blocks can be cut more quickly and precisely. Remember to always follow safety guidelines and use protective gear to avoid injuries and damage. Happy cutting!
Drywall and Paint Preparation Tools
After conquering concrete block cutting, you'll need to prep your walls for a smooth paint job, and that requires the right drywall and paint preparation tools to get the job done efficiently.
For drywall installation, you'll need a drywall hammer, drywall screws, and a drywall tape measure to guarantee accurate cuts. Don't forget a putty knife for applying joint compound to those pesky seams. Speaking of joint compound, you'll need a putty pan to mix and apply it smoothly.
Now, onto paint preparation! A good quality paintbrush or roller is a must-have for any DIY enthusiast. Invest in a paint tray and extension pole to reach those hard-to-get areas. Don't forget a paint edger for crisp, clean lines.
To guarantee a smooth finish, grab a sanding block or sandpaper to rough out any imperfections. With these drywall and paint preparation tools, you'll be well on your way to mastering paint techniques like a pro.
Flooring Installation and Removal
When tackling a flooring installation and removal project, you'll need to start by removing the old flooring, which can be a labor-intensive task.
Next, you'll need to prepare the subfloor surface to guarantee it's level, clean, and dry, which is essential for a successful installation.
Then, you'll be ready to lay the new flooring, which requires precision and attention to detail to achieve a professional-looking result.
Remove Old Flooring
Tear out the old flooring to make way for the new, ensuring you're prepared for the physical demands and potential hazards that come with this labor-intensive process.
You'll need to choose the right removal techniques depending on the type of flooring you're dealing with. For instance, vinyl and linoleum can be scraped off with a putty knife or a flooring scraper, while tile requires a more aggressive approach with a hammer and chisel or a tile scraper. If you're tackling hardwood, you'll need a pry bar and some serious elbow grease. Carpet, on the other hand, can be pulled up by hand or with the help of a carpet removal tool.
Don't forget to wear protective gear like gloves, safety glasses, and a dust mask to shield yourself from flying debris and dust. Remember to work in small sections, and consider enlisting a friend to help with the heavy lifting (literally!).
With the right tools and a solid game plan, you'll be ready to rip out that old flooring and make way for your shiny new installation.
Prepare Subfloor Surface
With the old flooring removed, you're left with a subfloor surface that likely requires attention before installing your new flooring, so inspect it carefully for any cracks, unevenness, or signs of damage. This is a critical step, as a poorly prepared subfloor can lead to a host of issues down the line, from uneven flooring to water damage.
Here are some key steps to take during your subfloor inspection:
-
Check for cracks and unevenness using subfloor inspection techniques like tapping and listening for hollow sounds, or using a level to identify dips and peaks.
-
Ascertain the subfloor is dry and free of moisture, which can damage your new flooring or lead to mold and mildew. Consider installing a moisture barrier to protect your flooring investment.
-
Fill any gaps or cracks with a self-leveling compound to create a smooth, even surface for your new flooring.
Lay New Flooring
You're now ready to begin installing your new flooring, a process that requires patience, attention to detail, and the right tools. This is where the fun begins – and by fun, I mean the part where you get to enjoy the fruits of your labor and finally walk on that beautiful new floor.
Before you start, make sure you've got the necessary tools, including a flooring stapler, flooring cutter, and a notched trowel for spreading adhesive.
Depending on the type of flooring materials you're working with, you may need to use different installation techniques. For instance, hardwood flooring requires a specific stapling pattern, while tile flooring needs to be carefully aligned and spaced.
Don't worry, it's not rocket science – but it does require some planning and precision. Take your time, follow the manufacturer's instructions, and don't be afraid to ask for help if you need it.
With the right tools and a bit of know-how, you'll be enjoying your new flooring in no time.
Measuring and Marking Tools Required
Accurate measurements are crucial to a successful DIY home renovation, and a sturdy tape measure is the most essential tool in your measuring arsenal. You'll use it to measure rooms, walls, doors, and windows, so make certain it's a good one. Don't be that person who ends up with a wonky bookshelf because they misread the measurements (been there, done that, got the t-shirt!).
Here are some other measuring and marking tools you'll need:
-
A chalk line for snapping straight lines on walls and floors
-
A level to guarantee your shelves and cabinets are, well, level
-
A combination square for precise angle measurements and marking
These tools will help you take accurate measurements, mark straight lines, and guarantee everything is level and plumb.
Trust us, you don't want to skip this step – it's the difference between a professional-looking renovation and a DIY disaster.
Safety Equipment for DIY Projects
Protect yourself from potential hazards by equipping yourself with essential safety gear, including gloves, safety glasses, and a dust mask, before tackling your DIY home renovation project. You don't want to become a DIY disaster story, do you?
Injury prevention is key, and safety gear is your best friend. Gloves will protect your hands from cuts, abrasions, and splinters, while safety glasses will shield your eyes from flying debris. A dust mask will prevent you from inhaling harmful particles, keeping your lungs happy and healthy.
Don't underestimate the importance of proper footwear, like steel-toed boots, which will keep your toes intact in case of accidental drops. And, of course, a hard hat is a must-have for any project involving overhead work or demolition.
Finishing Touches With Hand Tools
With your safety gear in place, it's time to focus on the finer details of your DIY home renovation project, where hand tools come into play to add those finishing touches that make all the difference. You'll be amazed at how a few subtle tweaks can elevate the entire space.
Here are the hand tools you'll need to add those decorative accents and perfect finishing touches:
-
Tweezers: For precision tasks like placing small tiles or adjusting tiny decorative pieces.
-
Hand saw or coping saw: For cutting curves or irregular shapes in wood, metal, or plastic.
-
Level and clamps: To guarantee your creations are straight, level, and securely held in place while the glue or adhesive sets.
Frequently Asked Questions
What Is the Best Way to Dispose of Renovation Waste and Debris?
You're done demo day, but now you're left with a mountain of renovation waste and debris.
Don't just dump it all in the landfill! You've got better options.
Sort materials like wood, drywall, and metal for recycling.
Check with local waste management for specialized pickup or drop-off services.
And, yes, it's worth the extra effort – you'll reduce your environmental footprint and maybe even score some sweet tax deductions.
Can I DIY a Home Renovation Project Without Prior Experience?
Are you ready to release your inner DIY superhero?
You're about to start on a thrilling adventure, tackling a home renovation project without prior experience!
Buckle up, because DIY challenges await.
But fear not, for this journey will fuel your skill development.
You'll learn to navigate obstacles, and your problem-solving skills will skyrocket.
How Do I Obtain Necessary Permits for My DIY Renovation Project?
You're taking the leap and tackling that DIY renovation project!
Now, let's get official - you'll need to obtain necessary permits.
Start by researching your local renovation regulations to determine what permits you'll need.
Then, fill out the permit application, making sure to include detailed plans and specs.
Don't worry, it's not as painful as it sounds!
Just remember, it's better to be safe than sorry (and fined) - so take the time to do it right.
What Is the Recommended Budget for a DIY Home Renovation Project?
You're getting down to business! Estimating costs is essential for a successful DIY renovation.
You'll want to allocate 10-20% of your budget for unexpected expenses.
Start by calculating the cost of materials, labor, and permits (you've already got that one covered!).
Be realistic about your DIY skills and factor in potential hiring costs.
Create a detailed budget plan to avoid financial stress.
How Long Does a Typical DIY Home Renovation Project Take to Complete?
You're wondering how long your DIY home renovation project will take to complete? Well, buckle up, because it's not a quick fix! A typical DIY home renovation can take anywhere from a few weeks to several months.
To estimate your timeline, break down your project into phases, like demo, construction, and finishing touches. This will help you create a realistic timeline estimation.
Conclusion
As you begin your DIY home renovation journey, remember that having the right tools is like having a roadmap to success - it helps you navigate the twists and turns of the project.
With these 7 essential tools, you'll be well-equipped to tackle even the most challenging tasks.
From demolition to finishing touches, you'll be building a solid foundation for a beautiful, functional space that reflects your vision.
Related Posts
-
Top Drill for Concrete Wall Renovation
When choosing the top drill for your concrete wall renovation, you'll want to prioritize key features like drill powe...
-

5-Step Subfloor Prep Checklist for a Smooth Renovation
You can guarantee a smooth renovation by following a 5-step subfloor prep checklist. First, assess the current subflo...
-

Why Exterior Wall Renovation Requires a Plan
You're about to commence a complex and potentially costly project when you decide to renovate your exterior walls, an...


