
7 Tools You Need for a Successful Renovation
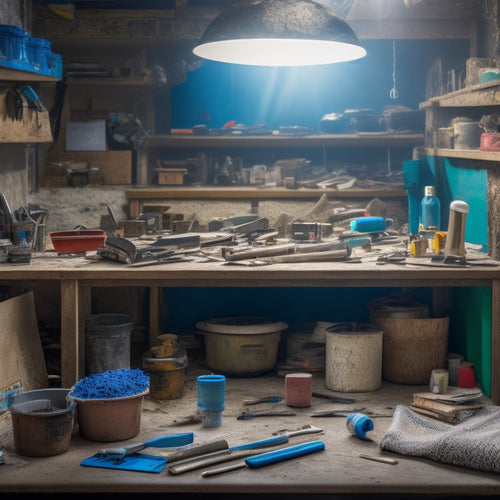
To guarantee a successful renovation, you'll need seven essential tools to get started. First, invest in cement floor preparation tools like floor scrapers and chemical strippers to remove existing coatings and debris. Next, acquire a dust containment and removal system, including a vacuum with HEPA filters, to prevent debris spread and airborne dust. You'll also need floor leveling and screeding tools, grinding and polishing machines, and concrete mixing and pouring equipment. Additionally, don't forget finishing and sealing tools like tampers and edgers, and finally, prioritize safety equipment and gear like protective eyewear and gloves. Now, get ready to tackle your renovation project with confidence!
Key Takeaways
• A dust containment system with HEPA filters is essential for reducing damage risk and ensuring a healthier environment during renovation.
• A spirit level and straightedge are necessary for assessing floor unevenness and ensuring proper surface preparation.
• A grinder or polisher is crucial for achieving a smooth finish and preparing the surface for flooring installation.
• A screed rail or board is vital for even material distribution and a successful floor leveling and screeding process.
• Protective gear, including safety glasses, gloves, and a dust mask, is a must-have for protecting yourself from debris, dust, and chemicals during renovation tasks.
Essential Cement Floor Preparation
Before applying a new finish or overlay, you must thoroughly prepare your cement floor by removing any existing coatings, cleaning the surface, and filling in cracks and joints to guarantee a strong bond and prevent future damage. This essential step guarantees that your cement floor benefits from a durable and long-lasting renovation.
Proper surface preparation techniques are vital to achieving a successful outcome. Start by removing old adhesives, paints, or sealers using a floor scraper or chemical stripper.
Next, sweep or vacuum the floor to remove dirt and debris, followed by a thorough cleaning with a degreaser to eliminate any oils or waxes.
Finally, fill in any cracks or joints with a suitable filler, allowing it to dry completely before applying your new finish or overlay.
Grinding and Polishing Machines
When it comes to achieving a high-gloss finish or removing old coatings, you'll need the right grinding and polishing machines for the job.
You'll have to decide between floor grinding equipment, which can tackle rough surfaces, and stone polishing options, which are better suited for finer finishes.
Floor Grinding Equipment
You'll need a range of floor grinding equipment, including grinding and polishing machines, to achieve a high-quality finish and remove imperfections from your renovated floor. For efficient diamond grinding, consider investing in a planetary grinder or a walk-behind grinder, which are ideal for large areas. These machines utilize diamond abrasives to remove old coatings, flatten uneven surfaces, and prepare the floor for further treatment.
When it comes to floor maintenance, a propane-powered grinder is a great option for smaller areas or for detail work. These machines are lightweight, easy to maneuver, and provide excellent control for precision grinding. Additionally, they're perfect for removing old adhesives, paint, or epoxy from the floor.
Remember to always follow the manufacturer's instructions and take necessary safety precautions when operating floor grinding equipment. Wearing protective gear, such as gloves, safety glasses, and a dust mask, is essential to prevent injury and exposure to hazardous materials.
Stone Polishing Options
By investing in the right stone polishing options, including grinding and polishing machines, you can release the full capability of your newly renovated floor, bringing out the natural beauty of the stone and achieving a high-gloss finish.
When it comes to polishing natural stone, you'll need to employ various polishing techniques to achieve the desired outcome. This is where grinding and polishing machines come into play. These machines are designed to remove imperfections, scratches, and etching from the stone surface, leaving it smooth and even.
With the right machine, you can choose from a range of polishing techniques, from aggressive grinding to fine polishing, to achieve the desired level of shine.
For best results, consider investing in a machine with adjustable speed and pressure controls, as well as interchangeable polishing pads. This will allow you to tailor your polishing technique to the specific type of natural stone you're working with, ensuring a flawless finish every time.
Dust Containment and Removal
Set up a dust containment system to prevent fine particles from spreading throughout your home, as even the most minor renovation tasks can stir up massive amounts of debris.
You'll need to create a physical barrier between the renovation zone and the rest of your living space. Dust barriers, such as plastic sheets or tarps, can be taped to walls, floors, and ceilings to contain the mess.
Next, invest in a reliable vacuum system specifically designed for construction dust. These systems are equipped with HEPA filters that can capture 99.97% of particles as small as 0.3 microns.
This is essential, as airborne dust can aggravate respiratory issues and settle on surfaces, making cleanup a nightmare.
By containing and removing dust efficiently, you'll reduce the risk of damage to adjacent areas, minimize cleaning time, and guarantee a healthier work environment.
With the right tools, you'll be well on your way to a successful renovation.
Floor Leveling and Screeding
When you're about to start a renovation, it's essential that you take the time to assess the floor's unevenness, as this will impact the entire project.
You'll need to choose the right screed materials for the job, taking into account factors like drainage and insulation.
Assessing Floor Unevenness
You'll need to determine the extent of your floor's unevenness by measuring the deviation from the desired plane, as even slight variations can affect the installation of new flooring, cabinets, and appliances.
To diagnose floor issues, start by inspecting the floor visually, looking for signs of sagging, cracking, or unevenness. Next, use a spirit level and a straightedge to measure the deviation from the desired plane. Take readings at multiple points across the floor to get an accurate picture of the unevenness.
When evaluating structural integrity, consider factors such as the floor's age, material, and history of water damage or settlement. Check for any signs of foundation issues, such as cracks in walls or ceilings, and inspect the floor's underlying structure, including the joists and subfloor.
Choosing Screed Materials
Choosing Screed Materials
Having identified the extent of your floor's unevenness, it's now time to select the right screed materials to achieve a level surface, guaranteeing a solid foundation for your renovation. You'll need to take into account factors such as screed thickness selection, drying times, and compatibility with your flooring type.
| Screed Material | Properties |
|---|---|
| Cement-based | Fast drying, suitable for most flooring types |
| Anhydrite-based | Slow drying, ideal for underfloor heating |
| Epoxy-based | High-strength, chemical-resistant |
| Polymer-modified | Improved durability, reduced shrinkage |
| Self-leveling | Easy to apply, fast setting |
When selecting a screed material, think about the specific requirements of your project. For instance, if you're installing underfloor heating, an anhydrite-based screed may be the best choice due to its slow drying time, which allows for gentle heat distribution. On the other hand, if you're looking for a fast-drying option, a cement-based screed might be the way to go. By choosing the right screed material, you'll guarantee a solid foundation for your renovation and achieve a level surface that's ready for your new flooring.
Achieving Smooth Finish
With your screed material selected, it's time to focus on achieving a smooth finish by guaranteeing your floor is properly leveled and screeded. This critical step requires attention to detail and the right tools to get the job done.
You'll need a spirit level, laser level, or optical level to check for any deviations in the floor's surface. Next, use a screed rail or screed board to spread the screed material evenly, holding it at a consistent angle to achieve the desired finish.
As you work, employ smoothing techniques like tamping or floating to eliminate any imperfections. Finishing products such as screed finishing compounds or self-leveling compounds can be applied to further refine the surface.
It's vital to follow the manufacturer's instructions for application and drying times to guarantee a flawless finish. Remember to work methodically, dividing the floor into sections to maintain control and achieve a uniform finish.
Concrete Mixing and Pouring
Mixing and pouring concrete correctly is essential to achieving a strong and durable foundation for your renovation project. To guarantee a solid base, you'll need to master the art of concrete mixing and pouring.
Start by selecting the right concrete additives for your project, such as fly ash or silica fume, which can improve strength and durability. Next, choose the right mixing technique, whether it's the 'slump test' or 'cone test', to achieve the perfect consistency.
When mixing, make certain to follow the manufacturer's instructions and use the right proportions of cement, water, and aggregate. Overmixing can lead to a weak and brittle concrete, so be careful not to overdo it.
Once mixed, pour the concrete into the prepared forms, taking care to vibrate the mixture to remove any air pockets. Finally, finish the pour by screeding and floating the surface to achieve a smooth, even finish.
Finishing and Sealing Tools
You'll need to equip yourself with the right finishing and sealing tools to transform your newly poured concrete into a durable, long-lasting surface that can withstand the elements and heavy use. This stage is essential in achieving the desired aesthetic and functionality of your renovation project.
To achieve a flawless finish, you'll require a range of tools, including:
| Tool | Purpose |
|---|---|
| Tamping tool | Compacts and flattens the concrete surface |
| Edger | Creates clean edges and joints |
| Sealer applicator | Applies sealant evenly and efficiently |
When it comes to sealing options, you'll need to take into account the type of sealant suitable for your project. Will you opt for a penetrating sealer for added protection or a topical sealer for enhanced appearance? Whichever you choose, make sure to follow the manufacturer's instructions for application and drying times.
Safety Equipment and Gear
Your personal safety gear is the last line of defense against hazardous materials, heavy machinery, and the physical demands of renovation work. As you begin your project, it's crucial to prioritize your well-being by investing in the right safety equipment and gear.
First and foremost, you'll need protective eyewear to shield your eyes from debris, dust, and chemical splashes. Look for goggles or glasses with anti-fog coatings and impact-resistant lenses.
Next, don't forget to wear safety gloves to protect your hands from cuts, abrasions, and punctures. Choose gloves made from durable materials like Kevlar or synthetic fibers, and opt for ones with grip patterns to improve dexterity.
A hard hat or safety helmet is also a must-have, especially when working with power tools or in areas with falling objects.
Additionally, consider investing in a dust mask or respirator to filter out airborne contaminants.
Frequently Asked Questions
How Long Does a Typical Renovation Project Take to Complete?
You'll find that a typical renovation project takes around 3-6 months to complete, depending on the scope, divided into distinct project phases, such as planning, design, permitting, construction, and final inspections, which affect your renovation timeline.
Can I Renovate My Floor While Still Living in the House?
Carefully crafting your living arrangements, you can indeed renovate your floor while still residing in the house, but be prepared to navigate flooring options that accommodate your needs, such as temporary flooring or phased renovations.
Do I Need a Permit for a Renovation Project in My Area?
You'll need to research local regulations to determine if a permit is required for your renovation project, as permit requirements vary depending on the scope and location of your project.
How Do I Handle Unexpected Issues That Arise During Renovation?
"When renovation storms brew, you'll navigate unexpected issues like a pro by flexing your budget for adjustments and maintaining open contractor communication, ensuring your project stays on track, despite the unexpected twists and turns."
Can I DIY a Renovation Project or Do I Need a Professional?
You're weighing DIY considerations, like cost savings and creative control, against Professional benefits, such as expertise and liability protection. Honestly assess your skills and time commitment to determine if a pro's guidance is worth the investment.
Conclusion
You've made it to the final stretch of your renovation journey!
With these 7 essential tools in your arsenal, you're poised to transform your space into a stunning masterpiece.
From preparing the foundation to adding the finishing touches, you'll be well-equipped to tackle every challenge that comes your way.
Now, get ready to release your creativity and bring your vision to life!
Related Posts
-

Why Renovation Waste Disposal Harms the Environment
When you undertake a renovation project, you're contributing to a staggering problem: renovation waste disposal, whic...
-

Stucco Tool Kit Checklist for Home Renovation
You'll need a thorough stucco tool kit to guarantee a successful home renovation, as the right tools can make all the...
-
Get Discounted Plastering Tool Sets for DIY Renovations
You can find discounted plastering tool sets online, at local hardware stores, and thrift stores, offering a range of...


