
7 Tool Storage Tips for a Smooth Renovation
You'll greatly reduce renovation downtime and costs by implementing a well-organized tool storage system that protects your tools from environmental damage, makes them easily accessible, and streamlines your workflow. Clean tools thoroughly after each use, and store them in dry areas away from humid environments. Designate specific areas for tool storage, prioritizing frequently used items, and employ storage solutions like toolboxes, chests, or pegboards. Use moisture-absorbing products and rust inhibitors to prevent damage, and keep tools organized by type or function using a labeling system. By following these tips, you'll be well on your way to a smooth renovation - and there's even more you can do to guarantee your tools are always ready when you need them.
Key Takeaways
- Clean tools thoroughly after each use and store them in dry areas to prevent rust, decay, and damage.
- Organize tools by type or function using a labeling system, and designate specific areas for storage to optimize workflow.
- Utilize moisture-absorbing products and moisture barriers to mitigate humidity in storage areas and prevent tool damage.
- Install wall-mounted racks and pegboard systems to maximize space and accessibility, and maintain a tidy workspace for efficient renovation tasks.
- Label storage shelves or cabinets with contents and weight capacity to ensure safe storage practices for heavy tools.
Protect Your Colored Stucco Tools
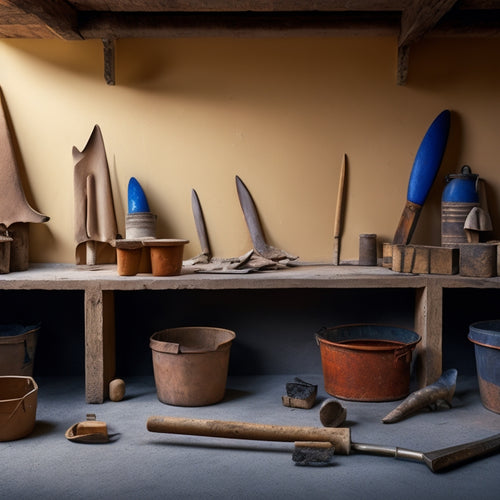
Your colored stucco tools are a significant investment, and their longevity depends on proper storage and maintenance. You've spent good money on them, so it's vital to protect them from damage and wear.
Start by cleaning your tools thoroughly after each use, paying attention to any areas with dried-on stucco or paint. Use a soft-bristled brush or cloth to remove debris, and avoid using harsh chemicals that can damage the tools' finish.
For paint protection, store your tools in a dry, well-ventilated area away from direct sunlight. This will prevent paint from fading or becoming brittle. Consider investing in a tool chest or storage container with individual compartments to keep your tools organized and protected.
Regular tool maintenance is also important. Check your tools regularly for signs of wear, and perform routine maintenance tasks like sharpening and lubricating moving parts.
Organize Your Tool Station
Now that your colored stucco tools are clean and protected, it's time to turn your attention to the tool station itself. You need a system that allows you to quickly find what you need, so you can focus on the renovation tasks at hand.
Start by taking stock of your tool inventory, making a mental note of what you have and what you still need to acquire.
Next, think about your workflow and how you can optimize it. Consider the tasks you'll be performing most frequently and the tools you'll need for each one.
Organize your tool station into zones, grouping similar tools together and placing them in easy-to-reach locations. This will streamline your workflow, saving you time and energy.
Label and Categorize Tools
You'll want to implement a tool organization system that makes sense for your specific needs, using labels that categorize your tools by type or function.
This will allow you to quickly identify where a specific tool is stored, and guarantee that it's returned to its proper place after use.
Clear storage signage will also help you and others quickly locate the tools you need, saving time and reducing frustration.
Tool Organization Systems
Set up a tool organization system to maximize your renovation's efficiency. A well-organized tool inventory is essential for a smooth renovation process. Without it, you'll waste time searching for misplaced tools, which can lead to costly delays.
A good tool organization system helps you quickly locate the tools you need, saving you time and energy.
To create an effective tool organization system, consider the following:
- Designate a specific area for tool storage, keeping frequently used tools in easy-to-reach locations.
- Use storage solutions like toolboxes, chests, or pegboards to keep tools organized and protected.
- Implement a "home for each tool" policy, guaranteeing that each tool has a designated spot where it's stored when not in use.
- Conduct regular tool inventory checks to verify that all tools are accounted for and in good condition.
Tool Category Labels
Tool category labels help you categorize and identify your tools quickly, making it easier to locate them in your designated storage area. By labeling your tools, you can implement an effective tool identification method that saves you time and reduces frustration.
You can use color coding to differentiate between tool categories, such as labeling all your power tools with a red sticker or your hand tools with a blue sticker. This visual system enables you to identify tools at a glance, making it easier to find what you need when you need it.
You can also use labels to categorize tools by their function, such as labeling all your drilling tools together or your measuring tools together. This way, you can store similar tools in the same area, making it easier to access them when working on a specific task.
Additionally, you can label your tools with their specific name or function, ensuring that you can quickly identify the tool you need. By implementing a tool category label system, you can streamline your tool storage and increase your productivity during the renovation process.
Clear Storage Signage
Most renovation projects involve a multitude of tools, and without clear storage signage, finding the right one can be a challenging task.
You need a system that allows you to quickly identify where each tool is stored, saving you time and frustration.
Clear storage signage is crucial for achieving storage visibility. It helps you and your team members locate tools effortlessly, reducing downtime and increasing productivity.
When choosing signage materials, consider durability, readability, and ease of installation. Here are four key considerations for effective clear storage signage:
- Use high-contrast colors to guarantee your signs are easy to read, even from a distance.
- Select durable materials that can withstand the rigors of a construction site, such as waterproof labels or signs made from heavy-duty vinyl.
- Keep it concise by using brief descriptions or abbreviations to identify each tool or category.
- Position signs strategically to provide maximum visibility, such as at eye level or near the storage location.
Store Heavy Tools Safely
Safety takes center stage when storing heavy tools, as a single misstep can lead to accidents, injuries, or even damage to your prized possessions. You must prioritize tool safety to guarantee a smooth renovation.
Start by designating a specific area for heavy tool storage, keeping it clear of tripping hazards and combustible materials. Next, invest in sturdy shelving or cabinets with reinforced flooring to prevent collapse.
When storing heavy tools, always face them towards the wall to prevent them from falling or tipping over. Secure storage is key, so use straps, chains, or locks to keep tools in place.
Label each shelf or cabinet with its contents and weight capacity to avoid overloading. Remember to store tools by weight, with the heaviest items at the bottom and lighter ones at the top.
Utilize Vertical Storage Space
Now that you've secured a safe and organized space for your heavy tools, it's time to maximize your storage capacity by employing vertical space. This will enable you to store more tools in a smaller area, freeing up floor space for other renovation tasks.
To effectively employ vertical storage space, consider the following:
-
Install wall mounted racks to store long-handled tools like ladders, pipes, and lumber. This will keep them organized, easily accessible, and prevent them from cluttering the floor.
-
Implement pegboard systems to hang smaller tools like hammers, saws, and drills. This will allow you to customize your storage layout and make the most of your wall space.
-
Use stackable storage bins to store small items like nuts, bolts, and screws. Label each bin to guarantee you can quickly find what you need.
- Invest in a ceiling-mounted tool organizer to store infrequently used tools like seasonal decorations or specialized equipment. This will keep them out of the way but still accessible when needed.
Keep Tools Away From Moisture
When renovating, you'll want to verify your tools are stored in dry areas to prevent damage.
Moisture can cause rust, decay, and other issues that'll render your tools useless, so it's crucial to keep them away from humid environments.
Dry Tool Storage Areas
Beyond the obvious benefits of keeping your tools organized, storing them in dry areas is vital to preventing rust, corrosion, and damage.
Moisture can seep into even the smallest crevices, causing irreparable harm to your tools. To guarantee your tools remain in top condition, designate a dry storage area that employs effective drying techniques and promotes air circulation.
When selecting a storage area, consider the following factors:
-
Avoid basements and crawlspaces: These areas are prone to dampness and humidity, making them ideal breeding grounds for rust and corrosion.
-
Opt for well-ventilated spaces: Choose areas with good air circulation to prevent moisture buildup.
-
Elevate storage containers: Keep containers off the floor to prevent moisture from seeping in from the ground.
- Use desiccant packets or silica gel: These can help absorb any remaining moisture in the air, guaranteeing your tools stay dry.
Prevent Rust and Decay
Five minutes of exposure to moisture can be enough to start the rusting process, and once it takes hold, it can be a real challenge to remove.
Don't let rust and decay ruin your renovation project. You've invested too much time and money to let your tools succumb to the elements.
To prevent rust, keep your tools away from moisture. Store them in a dry area, and wipe them clean before storing. You can also apply a rust-inhibiting coating to metal tools. This will provide an extra layer of protection against moisture.
Decay management is just as essential. Wooden handles and other organic materials can decay quickly if exposed to moisture.
Keep them dry, and consider applying a wood sealant or preservative to protect them.
Waterproof Storage Options
How can you guarantee your tools stay dry and protected from the elements? When renovating, it's vital to keep your tools away from moisture to prevent rust and decay.
Waterproof storage options are a must-have to guarantee your tools remain in top condition.
To achieve this, consider the following waterproof storage solutions:
-
Waterproof bins: Store your tools in bins made from waterproof materials like polypropylene or polyethylene. These bins will keep your tools dry even in humid environments.
-
Moisture barriers: Use moisture barriers like silicone-coated nylon or PVC sheets to line your tool storage areas. These barriers will prevent moisture from seeping in and damaging your tools.
-
Sealed containers: Store small tools and accessories in sealed containers like plastic cases or ammo cans. These containers will keep your tools dry and organized.
- Raised storage: Store your tools on raised surfaces like shelves or pallets to prevent water from accumulating around them. This will reduce the risk of water damage and rust.
Clean Tools Before Storage
Since you've invested in a quality set of tools, it's essential to clean them before storage to prevent rust and prolong their lifespan. Proper tool cleaning methods will guarantee your tools remain in top condition and are ready for the next project.
Start by wiping down each tool with a dry cloth to remove any dirt, debris, or moisture. For more thorough cleaning, use a gentle solvent like mineral spirits or a tool cleaning solution. Avoid using harsh chemicals or abrasive materials that can damage the tool's finish.
Regular cleaning and storage maintenance tips will help prevent rust and corrosion. Apply a rust inhibitor or silicone-based lubricant to metal tools to protect them from moisture.
Store tools in a dry, well-ventilated area, away from direct sunlight and extreme temperatures. Consider using dividers or compartments to separate tools and prevent scratching or tangling.
Frequently Asked Questions
How Often Should I Inspect My Tool Storage for Damage or Wear?
You should inspect your tool storage regularly, ideally every 3-6 months, to catch any damage or wear, ensuring you're on top of tool maintenance and adjusting your storage frequency as needed to prevent costly repairs.
Can I Store Tools in Plastic Bins With Locks for Added Security?
Imagine your tools safely tucked away in a fortress-like bin. You can store tools in plastic bins with locks, leveraging security features like sturdy latches and durable bin materials to protect your precious equipment from theft or damage.
Are Tool Organizers With Wheels Suitable for Uneven Workshop Floors?
You'll find tool organizers with wheels suitable for uneven workshop floors if you prioritize wheel stability, ensuring they won't topple over on irregular surfaces, thereby maintaining easy access to your tools while working freely.
What Is the Best Way to Store Tools With Oily or Greasy Surfaces?
When storing tools with oily or greasy surfaces, you'll want to prioritize oil removal and surface protection. Use a degreaser and wipe tools clean before storing them in a dry, ventilated area or a designated oily tool storage container.
Can I Use Old Furniture to Repurpose as Tool Storage Solutions?
Envision your grandma's old dresser, converted into a functional tool haven. You can repurpose it as a creative storage solution, using repurposing strategies like attaching pegboards or installing dividers to store your tools, freeing up space and your mind.
Conclusion
As you wrap up your renovation, remember that a well-organized tool storage system is the linchpin that holds everything together. Think of it as a puzzle, where every tool has its designated spot, and the entire image comes together seamlessly. By following these 7 tool storage tips, you'll be able to find what you need in a snap, and your next project will be off to a flying start.
Related Posts
-

Streamlining Your Exterior Renovation Timeline
To streamline your exterior renovation timeline, start by identifying your project goals and objectives, and prioriti...
-

Why Do Cinder Block Wall Renovations Cost So Much
You're likely surprised by the high cost estimate for your cinder block wall renovation project, but it's driven by s...
-
7 Best Plastering Bat Sizes for DIY Renovations
When tackling DIY renovations, you'll want to choose the right plastering bat size to achieve a professional-looking ...
