7 Tool Safety Checks for Home Renovation Success
Share
When tackling a home renovation project, you must prioritize tool safety to avoid accidents and guarantee success. Begin by inspecting your concrete block cutting saws, verifying the blade guard is securely in place and the saw blade is sharp. Next, check your drill bits for dullness or chipping and perform regular maintenance. Verify your block splitter's blade is free of wear and damage, and confirm your trowel handle is durable and resistant to bending. Examine your mixer blades for wear, and test your electric tools' grounding and cord integrity. Finally, ensure your personal protective equipment is readily available and easily accessible - and then take the next step to secure a safe and successful renovation.
Key Takeaways
• Verify the integrity of power tool cords and replace them if damaged to prevent electrical shock and fire hazards.
• Inspect tool handles for cracks, splinters, or damage, and replace them if necessary to maintain control and reduce fatigue.
• Regularly check and maintain concrete block cutting saws, drill bits, block splitters, and mixer blades to ensure optimal performance and safety.
• Wear personal protective equipment (PPE) such as hard hats, safety glasses, gloves, and steel-toed boots to prevent injuries from falling objects, flying particles, and heavy objects.
• Establish a routine for inspecting and replacing worn or damaged tool blades and bits to prevent accidents and ensure efficient work.
Inspect Concrete Block Cutting Saws
When operating a concrete block cutting saw, you must inspect the saw's blade guard to ascertain it's securely in place and free of damage or rust, as a compromised guard can lead to serious injury or accident. A thorough inspection is vital to guarantee the saw's cutting safety protocols are effective. Check for any signs of wear, such as dents, bends, or corrosion, and replace the guard if necessary.
In addition to the blade guard, you should also inspect the saw's blade itself. Look for signs of wear, such as dullness or chipping, and sharpen or replace the blade as needed.
Regular saw maintenance techniques, such as cleaning and lubricating the saw, can also help prevent accidents. Make sure to follow the manufacturer's guidelines for maintenance and operation to guarantee you're using the saw correctly.
Check Drill Bit Sharpness Regularly
During regular drill bit maintenance, you should inspect the bit's cutting edges for signs of wear, such as dullness or chipping, since a dull drill bit can lead to increased friction, heat buildup, and a higher risk of breakage.
A dull bit can also cause the drill motor to work harder, leading to premature wear and increased energy consumption. To avoid these issues, incorporate drill maintenance tips into your routine, such as cleaning the bit regularly and storing it in a dry place.
When inspecting the bit, look for signs of wear, such as decreased drilling speed, increased vibration, or discoloration. If you notice any of these signs, it's time to replace the bit.
Follow bit replacement guidelines, such as replacing carbide-tipped bits every 6-12 months, depending on usage. Additionally, consider upgrading to high-quality, long-lasting drill bits that can withstand heavy use.
Verify Block Splitter Functionality
When verifying your block splitter's functionality, you'll want to start by inspecting the splitter blade's condition, checking for signs of wear, damage, or rust that could affect its performance.
You should also make certain the splitter is properly aligned, as misalignment can lead to uneven splits, increased effort, and potentially even accidents.
Splitter Blade Condition
You should inspect the splitter blade regularly to confirm its cutting edges are sharp and free of debris, as dull or dirty blades can lead to reduced splitting performance and increased risk of kickback. This is essential for maintaining peak tool safety and performance during your home renovation project.
To verify your splitter blade is in top condition, follow these essential checks:
-
Visual inspection: Regularly examine the blade for signs of wear, damage, or corrosion.
-
Edge sharpness: Check the blade's cutting edges for dullness or nicks, and sharpen or replace as needed.
-
Debris removal: Clean the blade regularly to prevent debris buildup, which can affect splitting performance.
- Replacement schedule: Establish a replacement schedule for your splitter blade to confirm it's always in prime condition.
Proper Splitter Alignment
With your splitter blade in top condition, make sure it's properly aligned to verify block splitter functionality, as misalignment can lead to reduced splitting efficiency, uneven block sizes, and increased risk of tool failure. Proper alignment guarantees that the splitter blade is perpendicular to the block being split, resulting in clean, precise cuts.
To achieve ideal alignment, employ splitter calibration techniques such as referencing the manufacturer's guidelines or using a spirit level to check the blade's orientation. You can also perform a test split to verify the blade's alignment and make adjustments as needed.
The benefits of proper splitter alignment are numerous. Not only does it improve splitting efficiency, but it also reduces the risk of tool failure and extends the lifespan of your splitter. Additionally, well-aligned splitters produce uniform block sizes, which is critical for achieving professional-grade results in your home renovation project.
Ensure Trowel Handle Integrity
Your trowel's handle is subject to wear and tear, which can lead to cracks, splinters, or breaks, compromising the tool's overall performance and your safety.
A weak or damaged handle can cause loss of control, accidents, and injuries. To guarantee your trowel handle integrity, follow these essential checks:
-
Inspect handle materials: Check if your trowel handle is made of durable materials, such as fiberglass, wood, or steel. Avoid trowels with handles made of low-quality plastics or weak woods.
-
Check for cracks and splinters: Visually inspect the handle for any signs of cracks, splinters, or damage. Run your hand over the handle to detect any rough spots or weaknesses.
-
Evaluate trowel grip comfort: Ensure the handle provides a comfortable grip, allowing you to maintain control while working. A comfortable grip reduces fatigue and improves overall performance.
- Test the handle's flexibility: Gently flex the handle to check its resistance to bending or breaking. A sturdy handle should withstand moderate pressure without showing signs of weakness.
Examine Mixer Blade Condition
Four mixer blade sets typically come into contact with heavy loads, abrasive materials, and intense friction, making them prone to wear, corrosion, and damage. As you prepare for your home renovation, it's vital to examine the condition of your mixer blades to verify they're in good working order. Regular mixer blade maintenance is important to prevent accidents and achieve maximum mixing results.
| Blade Condition | Description | Action Required |
|---|---|---|
| Worn edges | Edges show signs of wear, but still functional | Sharpen or replace |
| Corroded surfaces | Visible rust or corrosion on blade surfaces | Clean and dry, or replace |
| Bent or warped | Blades are no longer straight or flat | Replace |
| Chipped or cracked | Blades have broken or fractured | Replace immediately |
| Clean and sharp | Blades are in good condition, clean, and sharp | Continue using with proper mixing techniques |
Test Electric Tool Grounding
When testing electric tool grounding, you'll want to start by inspecting the tool's insulation for any signs of wear or damage.
Next, you should carefully examine the cord for cuts, frays, or exposed wires that could compromise the grounding system.
Tool Insulation Inspection
You should regularly inspect the insulation on your power tools to confirm that the electrical conductors are properly protected from exposure, preventing shock or electrocution hazards. Tool insulation materials, such as rubber or plastic, can deteriorate over time, exposing the conductors and increasing the risk of electrical shock.
To guarantee your safety, inspect the insulation for signs of wear, including:
-
Cracks or cuts: Check for any cracks or cuts in the insulation, as these can provide a path for electricity to flow.
-
Frays or abrasion: Inspect for frayed or abraded insulation, which can expose the conductors.
-
Heat damage: Look for signs of heat damage, such as melting or discoloration, which can weaken the insulation.
- Corrosion: Check for corrosion on metal components, which can compromise the insulation.
When inspecting the insulation, make certain to check the entire length of the tool, including the cord and plug.
If you notice any insulation wear signs, it's crucial to replace the tool or have it repaired by a qualified professional to prevent electrical shock hazards.
Cord Damage Examination
In addition to inspecting the insulation, it's important to examine the cord for damage, as a compromised cord can also lead to electrical shock hazards.
When checking the cord, you'll want to look for signs of wear, such as frays, cuts, or cracks. Check for any exposed conductors, which can be a serious safety risk. Confirm the cord insulation is intact and not damaged in any way.
Next, inspect the plug integrity by checking that all prongs are securely attached and not loose. Verify the grounding pin is present and not damaged.
If you find any damage, it's imperative to replace the cord or have it repaired by a qualified electrician. Don't take any chances with a damaged cord, as it can lead to serious electrical shock or even death.
Confirm Safety Gear Availability
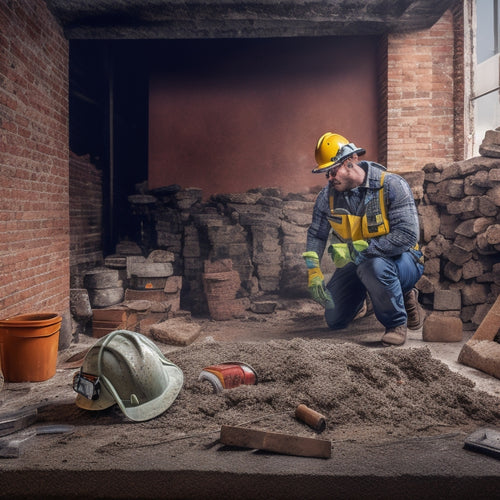
Prior to commencing any renovation task, confirm that all necessary personal protective equipment (PPE) and safety gear are readily available and easily accessible. You can't afford to compromise on personal protection, so take the time to verify you have everything you need.
Here are the essential safety gear items to check off your list:
-
Hard hats: Protect your head from falling objects, debris, and electrical hazards.
-
Safety glasses: Shield your eyes from flying particles, chemical splashes, and other hazardous materials.
-
Gloves: Prevent hand injuries from cuts, abrasions, and punctures with durable, task-specific gloves.
- Steel-toed boots: Safeguard your feet from heavy objects, crushing, and puncture wounds.
Frequently Asked Questions
How Often Should I Clean My Power Tools to Maintain Efficiency?
You should establish a regular cleaning frequency for your power tools to maintain their efficiency.
For daily users, clean your tools after each use to prevent debris buildup.
For occasional users, clean them every 1-2 months.
Additionally, perform a deeper clean every 6-12 months, disassembling and inspecting components.
Proper tool maintenance guarantees peak performance, reduces wear and tear, and extends their lifespan.
Can I Use a Cordless Drill for Heavy-Duty Construction Projects?
When tackling heavy-duty construction projects, you're probably wondering if a cordless drill can keep up. The answer is yes, but it depends on the drill's specs.
Look for a high-torque, high-voltage model with advanced battery technology.
Cordless drill advantages include increased mobility and reduced fatigue. However, they may not be as powerful as their corded counterparts for extremely heavy-duty applications.
Choose a drill that fits your project's demands, and you'll be driving screws like a pro.
Are There Any Specific Tool Safety Checks for Working at Heights?
Are you prepared to take your work to new heights - literally?
When working at heights, you'll need to prioritize safety above all else.
You should always conduct a thorough harness inspection before ascending, verifying it's in good condition and properly fitted.
Additionally, you must assure ladder stability by maintaining three points of contact and placing it on a firm, level surface.
Don't risk your life - take the necessary precautions to guarantee a safe and successful project.
What Is the Recommended Storage Method for My Tool Collection?
When organizing your tool collection, you'll want to prioritize accessibility and protection.
You're looking for storage solutions that keep your tools secure, yet easily retrievable.
Consider investing in a modular tool chest or a pegboard with designated slots for each tool.
Label each slot to maintain a logical tool organization system.
This setup will save you time and reduce frustration, ensuring you can focus on the task at hand.
Can I Modify My Tools to Improve Their Performance and Safety?
You're likely aware that 1 in 5 DIYers have experienced a power tool malfunction, resulting in injury or damage.
When it comes to modifying your tools, you're wise to proceed with caution. While tool modification can enhance performance, it's vital to guarantee any alterations don't compromise safety.
Before making changes, research and understand the manufacturer's guidelines and safety protocols. Only then can you confidently tweak your tools for peak performance enhancement, avoiding potential risks and guaranteeing a smooth renovation process.
Conclusion
You've completed the 7 tool safety checks, and now you're ready to tackle that home renovation project with confidence.
Remember, 'an ounce of prevention is worth a pound of cure.'
Don't let tool failure or misuse derail your project. By following these checks, you'll avoid costly delays and guarantee a safe, successful renovation.
Stay vigilant, and your dream home will become a reality.
Related Posts
-

7 Must-Have Safety Gears for Brick Wall Renovation
When renovating a brick wall, you'll face a multitude of hazards, making it essential to wear and use the right safet...
-

What to Inspect When Buying Used Renovation Tools
When buying used renovation tools, you need to scrutinize every detail to avoid costly mistakes. Inspect for rust and...
-

Get Discounted Plastering Tool Sets for DIY Renovations
You can find discounted plastering tool sets online, at local hardware stores, and thrift stores, offering a range of...


