
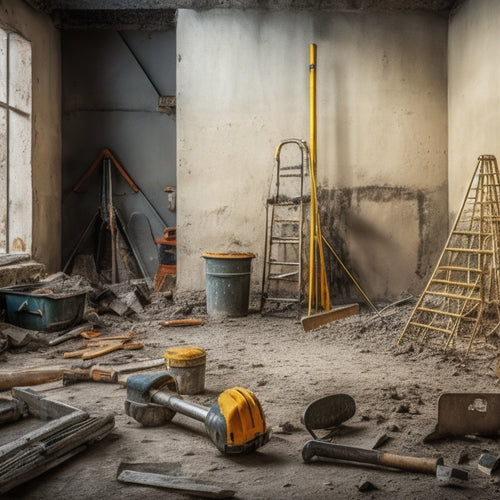
7 Must-Have Tools for Wall Renovation Success
As you start your wall renovation project, it's vital to equip yourself with the right tools to guarantee success. You'll need a sturdy mixing bucket, a reliable trowel that suits your material, and a laser level to project precise lines. Don't forget cement finishing equipment, such as a tamping tool and finishing trowel, to achieve a professional-grade finish. Safety gear, like hard hats and respirators, is also essential. Additionally, measuring and marking tools, like tape measures and combination squares, will help you achieve accuracy. Finally, cleanup and removal tools, including demolition hammers and vacuum cleaners, will make the process smoother. From here, you can start building a solid foundation for a successful renovation.
Key Takeaways
• Mixing and preparation tools, such as a sturdy mixing bucket and reliable mixing tool, are essential for wall renovation success.
• Choosing the right trowel size and material, and maintaining it properly, ensures a professional finish and optimal performance.
• Leveling and alignment tools, like laser levels, help set the foundation for successful renovations and prevent costly mistakes.
• Safety gear, including personal protective equipment and respirators, is crucial for protecting yourself and others during the renovation process.
• Having the right cleanup and removal tools, such as demolition hammers and debris bags, helps ensure a smooth and efficient renovation process.
Mixing Bucket Essentials
You'll need a sturdy mixing bucket with a few essential accessories to guarantee a successful wall renovation project. The bucket itself is vital, as it'll be responsible for holding and mixing your materials. Look for buckets made from durable, rust-resistant materials like stainless steel or heavy-duty plastic. A bucket with a non-slip handle and a flat, stable base is also a must.
When it comes to mixing techniques, a sturdy bucket is just the beginning. You'll also need a reliable mixing tool, such as a heavy-duty drill with a mixing paddle attachment or a manual mixing stick. This will make certain that your materials are thoroughly combined and consistent in texture.
Additionally, consider investing in a bucket lid or screen to prevent debris and dust from contaminating your mix. With the right bucket and accessories, you'll be able to achieve professional-grade mixing results and guarantee a successful wall renovation project.
Trowel Selection Guide
As you prepare to tackle your wall renovation project, you'll need to select the right trowel for the job.
You're about to learn how to choose the perfect trowel from various types, guarantee it's the correct size, and understand how to properly handle and maintain it.
Types of Trowels
Selecting the right trowel for your wall renovation project can make all the difference in achieving a smooth, even finish. You'll want to evaluate the type of trowel that's best suited for your specific needs.
When it comes to trowel materials, you've got options. Here are a few to evaluate:
-
Stainless Steel: Ideal for heavy-duty projects, stainless steel trowels are durable and resistant to corrosion.
-
Aluminum: Lightweight and easy to maneuver, aluminum trowels are perfect for smaller projects.
-
Carbon Steel: A popular choice among professionals, carbon steel trowels offer a balance of strength and flexibility.
-
Fiberglass: Great for working with epoxy or other resin-based materials, fiberglass trowels won't absorb or react with the material.
-
Rubber: Soft and flexible, rubber trowels are perfect for delicate or intricate work.
When choosing a trowel, think about the trowel techniques you'll be using. Will you be applying heavy pressure or working with delicate materials? The right trowel can make all the difference in achieving a professional-looking finish.
Choosing the Right Size
Frequently, the trowel size you choose will depend on the specific task at hand, with larger trowels suited for covering big areas and smaller ones ideal for detail work.
When selecting a trowel, consider the wall dimensions and the amount of material you need to apply. For large, open areas, a bigger trowel (12-18 inches) is perfect for spreading adhesive or plaster quickly. On the other hand, smaller trowels (6-12 inches) are better suited for tighter spaces, such as around windows, doors, or corners, where precision is key.
Size considerations also come into play when working with different materials. For instance, if you're applying a thick layer of plaster, a larger trowel is necessary to hold and spread the material evenly. Conversely, when working with thinner materials like joint compound, a smaller trowel is sufficient.
Handling and Maintenance
You'll extend the life of your trowel and guarantee peak performance by following a few simple handling and maintenance guidelines. Proper care and storage will assure your trowel remains in top condition, allowing you to achieve flawless wall surface preparation.
Here are some essential tips to keep in mind:
-
Clean your trowel regularly with soap and water to prevent adhesives and debris from building up.
-
Dry your trowel thoroughly after cleaning to prevent rust or corrosion.
-
Store your trowel in a protective case or tool storage solutions to prevent damage.
-
Avoid using your trowel as a scraper or hammer, as this can cause wear and tear on the blade.
-
Regularly inspect your trowel for signs of wear, such as bent or loose blades, and replace them as needed.
Leveling and Alignment Tools
When renovating a wall, accurately leveling and aligning surfaces is essential, and the right tools guarantee this vital step is done efficiently and effectively. You can't afford to get this wrong, as it sets the foundation for the rest of your renovation. That's why you need reliable leveling and alignment tools in your arsenal.
Laser levels are a must-have for any wall renovation project. These tools project a precise level line or dot onto your surface, making sure you're working on a perfectly horizontal or vertical plane. This is especially important when installing cabinets, shelves, or countertops.
You'll also benefit from advanced alignment techniques, such as using a rotary laser level to create a 360-degree reference point. This allows you to transfer precise levels and alignments across the room, making sure your walls, floors, and ceilings are perfectly aligned.
With the right leveling and alignment tools, you'll achieve professional-grade results and avoid costly mistakes. By investing in these essentials, you'll set yourself up for success and make certain a smooth, stress-free renovation process.
Cement Finishing Equipment
As you move on to the cement finishing stage of your wall renovation, you'll need the right tools to guarantee a smooth, even finish.
You'll want to familiarize yourself with the essential features of tamping tools, explore the various options for finishing trowels, and understand what to look for when selecting an edger.
Tamping Tool Essentials
Cement finishing equipment, including tamping tools, plays a crucial role in achieving a smooth, even surface during wall renovation projects. As you prepare for your renovation, it's important to understand the significance of tamping techniques and materials. You'll need the right tools to guarantee a professional-looking finish.
When it comes to tamping, you'll want to invest in a quality tamping tool that suits your specific needs. Here are some essentials to take into account:
-
Tamping rod: A sturdy rod with a flat or rounded end for compacting and leveling cement.
-
Tamping hammer: A heavy-duty hammer for applying force to the tamping rod.
-
Tamping plate: A flat, rectangular plate for compressing and smoothing large areas.
-
Tamping edger: A specialized tool for finishing edges and corners.
-
Tamping rake: A long, flat tool for spreading and leveling cement.
Finishing Trowel Options
With your tamping tools in place, you're ready to move on to the finishing phase, where a high-quality finishing trowel becomes your go-to instrument for achieving a flawless, polished surface.
Finishing trowels come in various materials, each suited for specific finishing techniques. For instance, stainless steel trowels are ideal for creating a smooth, even finish, while aluminum trowels are better suited for more intricate, detailed work.
When selecting a finishing trowel, take into account the type of finish you're aiming for. If you're looking for a high-gloss finish, a trowel with a curved or rounded edge is your best bet. For a more textured finish, a trowel with a flat or angled edge is the way to go. Additionally, the size and weight of the trowel are essential factors to evaluate, as they can greatly impact your control and precision.
Ultimately, the right finishing trowel can make all the difference in achieving a professional-looking finish. By choosing the right tool for the job, you'll be able to master various finishing techniques and produce results that exceed your clients' expectations.
Edger Selection Guide
You'll need a reliable edger to create clean, defined edges and joints in your wall renovation project, and selecting the right one depends on the specific requirements of your job. With various edger styles and materials available, it's crucial to choose the one that suits your project's unique demands.
When selecting an edger, consider the following key factors:
-
Material: Edgers can be made from steel, aluminum, or magnesium, each with its own strengths and weaknesses. Steel edgers are durable but heavy, while aluminum edgers are lightweight but may bend under pressure.
-
Radius: Edgers come in different radii, ranging from tight curves to wide sweeps. Choose an edger with a radius that matches your project's specific edge requirements.
-
Handle style: Edgers can have straight, curved, or adjustable handles. Select a handle style that provides a comfortable grip and control.
-
Blade type: Edger blades can be flat, curved, or serrated. Choose a blade type that suits the type of material you're working with.
-
Weight and balance: A well-balanced edger with a comfortable weight distribution will reduce fatigue and improve performance.
Safety Gear Must-Haves
Protecting yourself from potential hazards is essential, so make sure to wear crucial safety gear, including hard hats, safety glasses, and respirators, when tackling a wall renovation project.
You'll be working with power tools, handling heavy materials, and dealing with dusty or chemical-laden environments, which can pose serious risks to your health and safety.
Don't skimp on protective eyewear, either. Safety glasses with shatter-resistant lenses will safeguard your eyes from flying debris or splinters.
Respiratory masks are also a must-have, especially when working with materials that release hazardous particles or fumes. Make sure to choose a mask with a HEPA filter or one that's specifically designed for the task at hand.
For instance, if you're sanding or cutting drywall, you'll need a mask that filters out dust and silica particles.
Measuring and Marking Tools
Accurately measuring and marking your wall renovation materials is essential to achieving professional-looking results, so it's crucial that you have reliable tools for the job.
You'll need to guarantee that your measurements are precise and your marks are accurate to avoid costly mistakes and rework.
To achieve this, you'll need the following measuring and marking tools:
-
A high-quality tape measure that can extend to at least 25 feet to measure long distances and wide areas
-
A level to guarantee that your marks are straight and level
-
A combination square to make precise angles and marks
-
A marking gauge to create consistent and accurate marks
-
A laser level to project precise lines and levels over long distances
Cleanup and Removal Tools
With your measurements and marks in place, it's time to start demo day, and that means breaking out the heavy-duty cleanup and removal tools to clear the way for your renovation. You'll need these tools to remove old materials, dispose of debris, and prepare the surface for new installations.
Here are some essential cleanup and removal tools you'll need:
| Tool | Purpose |
|---|---|
| Demolition hammer | Break up and remove old tile, drywall, or plaster |
| Pry bar | Remove trim, molding, and other materials |
| Debris bags | Collect and dispose of debris efficiently |
| Vacuum cleaner | Clean up dust and debris from demo work |
| Sanding block | Smooth out surfaces for surface preparation |
These tools will help you efficiently clear the area, dispose of debris, and prepare the surface for your renovation. Remember to always follow safety guidelines when working with power tools and to dispose of debris responsibly. With these cleanup and removal tools, you'll be ready to tackle the next phase of your wall renovation project.
Frequently Asked Questions
What Is the Best Way to Remove Old Adhesive From Walls?
When tackling old adhesive removal, you'll want to employ effective techniques to guarantee a smooth wall surface preparation.
Start by scraping off excess adhesive with a putty knife or scraper, taking care not to gouge the wall.
Next, apply a solvent-based adhesive remover, letting it sit for the recommended time.
Then, wipe clean with a lint-free cloth and repeat as needed.
Can I Use a Laser Level for Curved Surfaces?
When working with curved surfaces, you'll face unique challenges.
Can you use a laser level for these applications? The answer is yes, but you'll need to adapt your techniques.
Traditional laser levels won't work on curved surfaces, but specialized models with rotating heads or adjustable incline features can help you achieve accurate results.
You'll need to adjust your approach, taking into account the curved surface's radius and incorporating additional reference points to guarantee precision.
How Do I Prevent Dust From Spreading During Renovation?
When renovating, you'll want to prevent dust from spreading to avoid a huge mess and potential health hazards.
To do this, focus on dust containment by sealing off rooms and using plastic sheeting to block off areas.
Invest in air filtration systems or HEPA-filter vacuums to capture airborne particles.
Additionally, wet-mop or vacuum floors regularly to minimize dust circulation.
What Is the Recommended Ratio for Mixing Cement and Sand?
When mixing cement and sand, you'll need to get the ratio just right.
The recommended mix depends on the cement type and sand quality. For general-purpose cement, a 1:4 to 1:6 ratio of cement to sand is standard.
However, if you're using high-strength cement or coarse sand, you may need to adjust the ratio.
Always follow the manufacturer's instructions and consider factors like workability and compressive strength to guarantee a strong, durable finish.
Do I Need a Permit for a Non-Structural Wall Renovation?
You're maneuvering a labyrinth of regulations, and permits are the keys to revealing your renovation's potential.
Do you need a permit for a non-structural wall renovation? It depends on your location and the scope of work.
Generally, permit requirements vary, but if you're only making cosmetic changes, like replacing drywall or painting, you mightn't need one.
However, it's always best to check with your local authorities to avoid costly setbacks down the line. Better safe than sorry, right?
Conclusion
You've got the ultimate arsenal of wall renovation tools at your disposal!
With these 7 must-haves, you'll be an unstoppable force, tearing down old walls and building new ones like a demolition expert on steroids!
Your mixing bucket will be a whirlwind of efficiency,
your trowel a precision-guided missile,
and your leveling tools a laser-sharp strike team.
Get ready to conquer the world, one wall at a time!
Related Posts
-

5-Step Subfloor Prep Checklist for a Smooth Renovation
You can guarantee a smooth renovation by following a 5-step subfloor prep checklist. First, assess the current subflo...
-

7 Smart Tool Organization Tips for Small Renovations
As you tackle your small renovation, you're likely wasting precious time searching for misplaced tools. To enhance ef...
-
What Tools to Rent for Block Wall Renovation
When renovating a block wall, it's vital to have the right tools for the job. You'll need demolition tools like pry b...


