
7 Must-Have Tools for Successful Renovation Projects
To guarantee a successful renovation project, you'll need to prioritize seven must-have tools. First, invest in essential safety gear, including safety goggles, hard hats, and steel-toed boots. Next, equip yourself with measuring and marking master tools, such as tape measures and laser levels, to guarantee accurate project execution. You'll also need cleaning and surface prep tools, like putty knives and sanding blocks, to prepare surfaces for renovation. Additionally, plaster mixing and application tools, finishing and smoothing tools, and advanced restoration equipment options are vital for smooth project execution. Finally, organization and storage solutions will help you stay on track – and exploring these categories further will reveal the specific tools you need to achieve renovation success.
Key Takeaways
• Essential safety gear like safety goggles, hard hats, and gloves protect workers from physical harm and ensure a safe working environment.
• Measuring and marking master tools, including tape measures and laser levels, enable accurate project planning and execution.
• Cleaning and surface prep tools, such as putty knives and wire brushes, ensure a strong bond between new materials and existing surfaces.
• Plaster mixing and application tools, including mixing buckets and trowels, facilitate efficient and consistent plaster application.
• Organized storage solutions, like shelving systems and storage bins, enhance workflow efficiency, reduce accidents, and support project success.
Essential Safety Gear for Renovators
When tackling a renovation project, you'll need to wear vital safety gear to protect yourself from hazards such as falling debris, sharp objects, and hazardous materials.
Safety goggles are a must-have to shield your eyes from flying particles, dust, and chemical splashes. Look for goggles with impact-resistant lenses and a snug, comfortable fit.
Hard hats are another important piece of safety equipment, protecting your head from falling objects, debris, and electrical hazards. Choose a hat that meets industry standards, such as ANSI Z89.1, and make sure it fits securely on your head.
In addition to goggles and hard hats, consider wearing earplugs or earmuffs to protect your hearing from loud power tools and machinery.
Steel-toed boots or shoes with slip-resistant soles will help prevent foot injuries and slips.
Don't forget gloves, which will protect your hands from cuts, abrasions, and punctures.
By wearing this vital safety gear, you'll be well-prepared to tackle your renovation project with confidence and minimize the risk of injury.
Measuring and Marking Master Tools
When you're tackling a renovation project, you know that precise measurement is essential to getting the job done right.
You'll need to guarantee that your measurements are accurate to the millimeter to avoid costly mistakes and wasted materials.
To achieve this level of precision, you'll rely on a set of measuring and marking tools that will become your go-to masters throughout the project.
Precise Measurement Matters
With precise measurement being vital to the success of any renovation project, you'll need a set of reliable measuring and marking master tools to secure accuracy and efficiency.
Inaccurate measurements can lead to costly mistakes, delays, and even safety hazards. To avoid measurement errors, it's fundamental to master various measurement techniques, such as using a tape measure, laser level, and calipers. These tools will help you take precise readings, confirming that your project stays on track.
When choosing your measuring tools, consider the level of precision required for your project. For instance, a tape measure with a high level of accuracy is vital for measuring room dimensions, while a laser level is ideal for confirming that surfaces are perfectly level.
Additionally, calipers are perfect for measuring small objects or precision cuts. By investing in high-quality measuring tools and honing your measurement techniques, you'll minimize the risk of measurement errors and guarantee a successful renovation project.
Accurate Marking Essentials
You'll need a reliable set of marking tools, including a carpenter's pencil, chalk line, and marker, to accurately transfer your precise measurements onto the work surface. These marking essentials are vital for guaranteeing that your renovation project is executed flawlessly.
A carpenter's pencil is ideal for marking wood and drywall, while a chalk line is perfect for creating straight lines over long distances. A marker, on the other hand, is great for making precise marks on a variety of surfaces.
When it comes to marking techniques, it's important to use the right tool for the job. For instance, using a chalk line to snap a line can help you achieve perfect alignment. Additionally, using alignment tools, such as a laser level, can confirm that your marks are accurate and level.
Cleaning and Surface Prep Tools
During the critical initial stages of your renovation project, scraping away old adhesives, dirt, and grime from surfaces is an essential step, and that's where the right cleaning and surface prep tools come in.
You'll need a variety of cleaning supplies to tackle different surfaces and substances. For example, a putty knife or scraper is perfect for removing old adhesive residue, while a wire brush is better suited for rough surfaces like concrete. Don't forget a degreaser or solvent-based cleaner for tackling tough grease and grime.
When it comes to surface preparation, you'll need tools that can effectively smooth out rough surfaces and create a clean slate for new materials. A sanding block or orbital sander is ideal for smoothing out wood, while a scraper or grinder can be used to remove old coatings or roughen up concrete.
Having the right cleaning and surface prep tools will guarantee a strong bond between new materials and the existing surface, reducing the risk of failures and costly rework.
Plaster Mixing and Application Tools
Mixing and applying plaster requires precision and control, and having the right tools for the job is vital to achieving a smooth, even finish.
When it comes to mixing, you'll need a sturdy mixing bucket or tub, a mixing stick or trowel, and a drill with a mixing paddle attachment. These tools will help you achieve the ideal plaster consistency, which is significant for proper application.
To master mixing techniques, you'll need to practice and develop a consistent routine. Start by adding water to the mixing bucket, then gradually add plaster, mixing in small circles to avoid creating air pockets.
Use your mixing stick or trowel to scrape the sides of the bucket and guarantee all ingredients are well incorporated. With your drill and mixing paddle, you can achieve a smooth, lump-free consistency.
For larger projects, consider investing in a plaster mixer, which can handle heavier loads and save you time and effort. By having the right tools and honing your mixing techniques, you'll be well on your way to achieving professional-looking results.
Finishing and Smoothing Tools
With the plaster applied, it's vital to have the right finishing and smoothing tools to achieve a flawless, high-quality finish.
You'll need a range of tools to perfect your work, including trowels, floats, and sanding blocks. A stainless steel or fiberglass trowel is ideal for applying and smoothing out the plaster, while a float helps to remove excess material and create a uniform surface. For a finer finish, you'll need a sanding block, which can be used to smooth out any imperfections or rough spots.
When it comes to smoothing techniques, it's important to work in small sections, using long, even strokes to achieve a consistent finish. As you work, be sure to wipe away any excess dust or debris to prevent it from building up and affecting the final result.
Advanced Restoration Equipment Options
You'll need to invest in advanced restoration equipment options, such as rotary hammers, demolition saws, and dustless sanding systems, to tackle more complex renovation projects efficiently. These tools will enable you to adopt advanced restoration techniques, resulting in higher-quality finishes and increased productivity.
When selecting advanced restoration equipment, consider the following key factors:
-
Equipment specifications: Guarantee the equipment is suitable for your project's specific requirements, such as the type of materials you'll be working with and the scale of the renovation.
-
Maintenance and upkeep: Regular equipment maintenance is essential to prevent breakdowns, reduce downtime, and extend the lifespan of your tools. Develop a maintenance schedule to keep your equipment in top condition.
-
Operator training: Familiarize yourself with the equipment's operation, safety features, and troubleshooting procedures to guarantee safe and effective use.
Organization and Storage Solutions
To guarantee a smooth and efficient renovation project, designate a specific area for storing tools and materials, and invest in organization solutions such as shelving units, bins, and labels to keep everything easily accessible and accounted for.
This will help you quickly locate the items you need, saving you time and reducing frustration.
Shelving systems are ideal for storing heavy or bulky items, such as power tools and construction materials, while storage bins are perfect for smaller items like fasteners, adhesives, and paints.
Labels and signage can be used to identify the contents of each bin or shelf, making it easy to find what you need at a glance.
By implementing an organized storage system, you'll be able to focus on the task at hand, rather than wasting time searching for misplaced items.
Additionally, a well-organized workspace can also help reduce the risk of accidents and injuries.
Frequently Asked Questions
How Do I Handle Asbestos or Lead-Based Paint During Renovation?
When dealing with asbestos or lead-based paint during renovation, you'll need to take extra precautions.
Start by hiring a certified professional to conduct asbestos testing or lead abatement. They'll identify affected areas and develop a plan for safe removal.
Make certain you follow their guidance to avoid exposure risks.
Wear personal protective equipment, like respirators and gloves, and contain the work area to prevent contamination.
Can I Reuse Old Materials or Should I Replace Them Entirely?
The eternal optimist, thinking you can reuse old materials and save the planet (and your wallet).
Newsflash: it's not that simple. When evaluating materials, you'll need to assess their condition, functionality, and safety.
Develop reuse strategies based on material evaluation, considering factors like structural integrity, energy efficiency, and potential hazards.
Don't be a hero; replace what's necessary to guarantee a safe, functional, and compliant renovation.
What's the Best Way to Manage Renovation Waste and Debris?
When managing renovation waste and debris, you'll need to prioritize responsible disposal.
Sort materials into categories like recyclables, reusable items, and trash.
Research local waste disposal regulations and recycling options to guarantee compliance.
Set up designated areas for each type, and consider partnering with waste management companies that specialize in construction debris.
Properly label and contain hazardous materials, and schedule regular pickups to keep your site clean and organized.
How Do I Ensure Compliance With Local Building Codes and Regulations?
'Measure twice, cut once' is a timeless adage that rings true when ensuring compliance with local building codes and regulations.
You'll need to obtain the necessary building permits before starting your renovation project.
During the inspection process, local authorities will verify that your work meets the required standards.
Be prepared to provide detailed plans and specifications to avoid costly delays or rework.
Stay organized, and don't hesitate to ask questions if you're unsure about any aspect of the process.
Can I DIY or Should I Hire a Professional for Certain Tasks?
When deciding between DIY and hiring a pro, you'll want to weigh the DIY considerations, like your skill level and available time, against the potential risks and consequences of mistakes.
For complex or high-stakes tasks, hiring professionals guarantees compliance and mitigates risks.
Consider your strengths and weaknesses, then make an informed decision.
If you're unsure, it's often better to err on the side of caution and hire a pro to guarantee a successful renovation.
Conclusion
As you gear up for your renovation project, don't be caught off guard - having the right tools can make all the difference between a smooth sail and a rocky road.
With these 7 must-have tools in your arsenal, you'll be well-equipped to tackle even the most challenging tasks.
Remember, when it comes to renovation, the devil is in the details, so don't skimp on the essentials.
Invest in these tools and you'll be hammering away at success in no time.
Related Posts
-
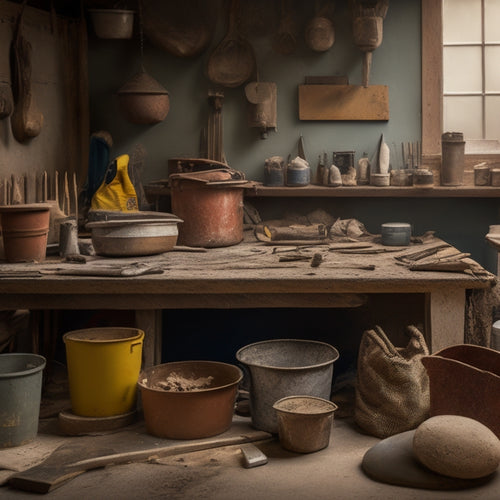
What Plastering Tools Do You Need for Renovation
You'll need a range of specialized tools to tackle a plastering renovation project efficiently and effectively. Essen...
-

Streamline Your Exterior Renovation Timeline
To streamline your exterior renovation timeline, you'll need to approach the process strategically. Start by planning...
-

Stucco Patching Material Checklist for Home Renovation
You'll need a range of essential tools, including a putty knife, wire brush, hawk or flat trowel, level, and straight...
