7 Concrete Sealing Tools for Home Renovation DIYers
Share
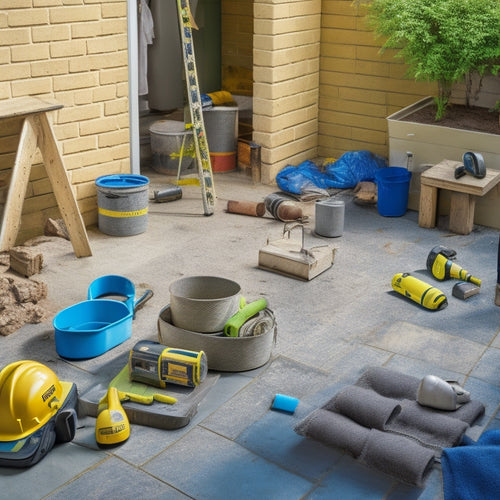
When taking on a concrete sealing project, you'll need the right tools to achieve a professional-looking finish and long-lasting results. Start with essential cleaning equipment like pressure washers, stiff-bristle brooms, and degreasers to prepare the surface. Next, choose the right applicator for your sealant, such as spray, roller, or lambswool brushes. Don't forget safety gear like chemical-resistant gloves, protective eyewear, and dust masks. You'll also need measuring and mixing essentials, plus specialized tools for sealant removal and repair. As you explore these seven key tool groups, you'll uncover the secrets to a successful concrete sealing project.
Key Takeaways
• Essential cleaning equipment like pressure washers, stiff-bristle brooms, and degreasers are necessary for thorough surface preparation.
• Choose the right concrete sealant applicator, such as spray, roller, or lambswool, depending on the surface type and area size.
• Wear safety gear, including chemical-resistant gloves, protective eyewear, and dust masks, to prevent injury and exposure to harsh chemicals.
• Accurate measuring and mixing of sealant are critical, using high-quality measuring tools and following manufacturer's instructions.
• Use specialized tools, such as scraper or putty knife, for sealant removal and repair, and follow specific techniques for different sealant types.
Essential Cleaning Equipment Needed
Before applying a concrete sealer, you'll need to thoroughly clean the surface, and that requires having the right equipment on hand, including a pressure washer, stiff-bristle broom, and a degreaser. These essential tools will help you remove dirt, grime, and oil stains that can compromise the sealer's adhesion.
When it comes to cleaning techniques, you'll want to start by using the stiff-bristle broom to sweep away any loose debris.
Next, mix the degreaser with water according to the manufacturer's instructions and apply it to the surface. Let it sit for a few minutes before using the pressure washer to rinse the area thoroughly.
This surface preparation is vital, as it will guarantee a strong bond between the concrete and the sealer. Additionally, make sure to wear protective gear, such as gloves and safety glasses, to avoid injury from the pressure washer's high-pressure stream.
Best Concrete Sealant Applicators
Now that your concrete surface is clean and ready, apply the sealer using the right applicator to confirm an even, consistent coat. The wrong tool can lead to uneven coverage, wasting your time and resources.
Choose from these top concrete sealant applicators to confirm a professional finish:
-
Spray applicators: Ideal for large areas, these applicators provide a uniform coat with minimal effort. Look for ones with adjustable nozzles for precise control.
-
Roller brushes: Perfect for smaller areas or detailed work, roller brushes offer excellent control and precision. Opt for ones with extension poles for hard-to-reach areas.
-
Lambswool applicators: Gentle on the surface, these applicators are perfect for decorative concrete or surfaces with intricate designs.
-
Microfiber applicators: Absorbent and lint-free, these applicators are ideal for water-based sealers and leave a streak-free finish.
-
Foam brushes: Great for textured surfaces, foam brushes provide an even coat and are easy to clean.
Prep Tools for Smooth Finish
When prepping your concrete surface for a smooth finish, you'll need to start with a clean slate.
You'll want to clean the surface thoroughly to remove any dirt, grime, or other substances that might interfere with the sealant's adhesion.
Next, you'll need to remove any old sealant that may still be present, ensuring a strong bond between the new sealant and the concrete.
Clean the Surface
You'll need a clean, dust-free surface to secure a strong bond between the concrete and the sealant, so remove any dirt, oil, or old coatings using a wire brush, pressure washer, or degreaser. This vital step in surface preparation techniques guarantees a smooth finish and prevents future issues.
To get the job done efficiently, consider the following cleaning product recommendations:
-
Simple Green: A popular, eco-friendly degreaser for tough oil stains
-
Trisodium phosphate (TSP): A heavy-duty cleaner for removing dirt and grime
-
Wire brushes: Effective for scrubbing rough surfaces and removing old coatings
-
Pressure washers: Ideal for blasting away dirt and debris from large areas
-
Microfiber cloths: Gentle on surfaces, yet effective for wiping away dirt and dust
Remove Old Sealant
With the surface clean and free of dirt, oil, and old coatings, turn your attention to removing any existing sealant that may be flaking or peeling. This will guarantee a smooth finish and prevent uneven adhesion of the new sealant.
You'll need to identify the type of sealant currently on the concrete, as different sealant types require specific removal techniques. For example, acrylic or polyurethane-based sealants can be removed using a chemical stripper, while epoxy-based sealants may require a more aggressive approach with a mechanical grinder or sandpaper.
When using chemical strippers, be sure to follow the manufacturer's instructions and take necessary safety precautions, such as wearing gloves and working in a well-ventilated area.
For mechanical removal, use a grinder or sandpaper with a coarse grit to break down the existing sealant, then progress to finer grits to achieve a smooth finish.
Regardless of the removal technique, it's crucial to remove all residue and old sealant to guarantee a strong bond between the concrete and new sealant. By doing so, you'll achieve a durable, long-lasting finish that will withstand the elements and heavy foot traffic.
Safety Gear for Protective Measures
Protect your skin and eyes from harsh sealers and chemicals by wearing essential safety gear, including gloves, safety glasses, and a face mask. You're about to work with strong substances, and you don't want to compromise your health. As you prepare for the concrete sealing process, don't overlook the importance of protective measures.
Here are some must-haves to add to your safety arsenal:
-
Gloves: Chemical-resistant gloves will prevent skin irritation and protect your hands from harsh sealers.
-
Protective eyewear: Safety glasses or goggles will shield your eyes from chemical splashes and dust particles.
-
Dust masks: A dust mask or respirator will filter out airborne particles and prevent inhalation of harmful fumes.
-
Face mask: A face mask will provide additional protection for your face and mouth.
-
Long sleeves and pants: Covering your skin with long sleeves and pants will prevent exposure to chemicals and sealers.
Measuring and Mixing Essentials
When you're preparing to seal your concrete, precise measurements are essential to achieving the desired results.
You'll need to calculate the correct sealing ratio, and having the right mixing bucket and tools will guarantee a smooth application process.
Accurate Measurements Matter
Measuring accurately is essential, as even slight miscalculations can greatly impact the overall quality and durability of your concrete sealant application. You can't afford to wing it when it comes to measuring the components of your sealant. To guarantee accuracy, you'll need to employ precise measurement techniques and calibrate your tools regularly.
Here are some key considerations to keep in mind:
-
Use high-quality measuring cups and scales: Invest in tools that are designed for precision and accuracy.
-
Calibrate your tools regularly: Verify that your measuring cups and scales are providing accurate readings.
-
Use the correct units of measurement: Make sure you're using the units specified in the manufacturer's instructions.
-
Measure in a well-ventilated area: Avoid measuring in areas with high humidity or drafts, which can affect accuracy.
-
Double-check your calculations: Verify your measurements before mixing to avoid costly mistakes.
Sealing Ratio Calculators
You'll frequently rely on sealing ratio calculators to guarantee accurate mixing of your concrete sealant, as these tools help you determine the ideal blend of components. The sealing ratio importance can't be overstated, as it directly affects the performance and longevity of your sealant. A slight miscalculation can lead to a compromised seal, resulting in reduced durability and potential failures.
Sealing ratio calculators simplify the process of calculating coverage, making certain you apply the right amount of sealant to your concrete surface. By inputting the surface area, desired coverage rate, and sealant type, these calculators provide you with the exact mixing ratio required. This eliminates the risk of human error and makes certain a precise blend that meets the manufacturer's specifications.
With a sealing ratio calculator, you can confidently mix your concrete sealant, knowing you're getting the perfect blend every time. This precision is critical, as it directly impacts the overall quality of your project.
Mixing Bucket Essentials
To guarantee accurate and efficient mixing of your concrete sealant, it's crucial to have the right mixing bucket essentials, including a sturdy, clean bucket, a reliable measuring cup, and a heavy-duty mixing stick or drill. You can't risk compromising the quality of your sealant by using subpar mixing tools.
When it comes to bucket materials, opt for heavy-duty plastic or metal buckets that can withstand the weight and rigidity of the mixed sealant. Avoid using buckets with cracks or scratches, as they can contaminate the sealant.
Here are some additional mixing bucket essentials to take into account:
-
A measuring cup with clear markings to guarantee accurate measurements
-
A mixing stick or drill with a sturdy handle and durable blades
-
A bucket lid or screen to prevent debris from entering the mix
-
A non-slip base or mat to prevent the bucket from sliding during mixing
-
A mixing technique guide to guarantee you're using the most effective mixing methods for your specific sealant
Sealant Removal and Repair Tools
When it comes to maintaining or replacing sealants, having the right tools for sealant removal and repair is essential to guarantee a successful home renovation project.
You'll need to choose the correct tools for the specific sealant type you're working with, whether it's silicone, polyurethane, or acrylic. For instance, a scraper or putty knife is ideal for removing old, dried sealant, while a chemical remover may be necessary for tougher sealant types.
You'll also need to take into account the removal technique you'll use. Will you be using a mechanical method, such as scraping or grinding, or a chemical method, like dissolving the sealant? Having the right tools for the job will ensure a clean and efficient removal process.
Additionally, you may need to repair areas where the sealant has failed, such as cracks or gaps in the concrete. In these cases, you'll need tools like patching compounds, injection wands, or injection ports to fill in the gaps and guarantee a strong bond.
Finishing Touches Accessories
With the sealant removal and repair process complete, finishing touches accessories come into play to enhance the appearance and longevity of the newly sealed surface.
As a DIYer, you'll want to contemplate the design aesthetics and surface textures you're aiming to achieve. Finishing touches accessories can elevate your project from good to great.
Here are some essential accessories to contemplate:
-
Concrete sealant applicators: Guarantee a smooth, even application of sealant with specialized applicators designed for your chosen sealant type.
-
Texture mats and stamps: Add unique surface textures and patterns to create visual interest and enhance design aesthetics.
-
Sealant spreading tools: Spread sealant evenly and efficiently with specialized tools designed for your specific sealant type.
-
Cleaning solutions and solvents: Effectively clean and prepare the surface for sealing with the right cleaning solutions and solvents.
-
Sealant-friendly cleaners: Maintain your newly sealed surface with cleaners specifically designed to work with your chosen sealant.
Frequently Asked Questions
Can I Use a Concrete Sealer on Newly Poured Concrete?
When you're wondering if you can use a concrete sealer on newly poured concrete, timing is everything.
You shouldn't apply a sealer until the new concrete has fully cured. This typically takes 28 days, but can vary depending on environmental conditions.
Applying a sealer too early can interfere with the curing process, reducing the concrete's strength and durability.
Wait patiently, and you'll get the best results from your sealer application.
How Long Does It Take for Concrete Sealers to Fully Dry?
As you stand like a master builder, gazing upon your freshly sealed concrete, you wonder when it'll be ready for the world.
The answer lies in the drying time, a vital phase of the curing process. On average, it takes 24 to 48 hours for most sealers to fully dry, but this can vary depending on environmental factors and the type of sealer you're using.
Be patient, and your concrete will emerge strong and resilient, ready to withstand the tests of time.
Are Concrete Sealers Safe to Use Around Pets and Children?
When you're working with concrete sealers, you're probably wondering if they're safe to use around your pets and kids.
Rest assured, most modern sealers are formulated to be non-toxic and won't pose a significant risk to pet safety or child safety.
However, you should still take precautions, like keeping them away from the application area until it's fully dry and well-ventilated.
Follow the manufacturer's instructions and take necessary safety measures to guarantee a safe environment for your loved ones.
Can I Apply Concrete Sealer in Direct Sunlight?
You're about to apply concrete sealer, and it's as vital as a chef seasoning a dish - every detail counts.
When it comes to direct sunlight, you'll want to exercise caution. Applying sealer in intense sunlight can be like pouring water into a hot skillet - it'll evaporate quickly, leading to uneven application and potential hot spots.
Instead, opt for application techniques that involve shade or overcast conditions to guarantee a smooth, even finish.
Do I Need to Reapply Concrete Sealer After Power Washing?
When you power wash your sealed concrete, you'll likely strip away the sealer's protective layer.
You'll need to reapply a new coat to maintain the concrete's protection.
The power washing effects can be intense, so it's essential to wait until the surface is completely dry before reapplying the sealer.
Be certain to follow proper sealer application techniques, such as applying thin, even coats, to guarantee a strong bond between the sealer and the concrete.
Conclusion
Now that you've got the right tools for the job, it's time to get sealing!
With these 7 essential concrete sealing tools, you'll be well on your way to a professional-looking finish.
Will you be able to achieve a smooth, glossy seal that'll make your concrete surfaces look brand new?
With the right gear and a bit of know-how, the answer is a resounding 'yes!'
Related Posts
-

7 Patio Safety Tips for DIY Renovation Projects
As you begin your DIY patio renovation project, prioritize safety by evaluating the worksite for tripping hazards and...
-

DIY Plastering Supply Checklist for Home Renovation
To tackle a DIY plastering project for your home renovation, you'll need a solid checklist of supplies. Start with es...
-

What to Look for in Pneumatic Renovation Tools
When selecting pneumatic renovation tools, you'll want to take into account several key factors to guarantee optimal ...


