7 Best Ways to Organize Tools for Renovation
Share
When tackling a renovation project, you need a solid tool organization system in place to maximize efficiency, reduce downtime, and guarantee a smooth workflow. To get started, designate a central tool station, utilize vertical storage options, and label and categorize your tools. Assign tools to specific zones, implement a tool return system, and invest in portable tool cases to keep your tools organized on-the-go. Don't forget to schedule regular tool inventory to prevent costly delays. By implementing these strategies, you'll be well on your way to a more productive and organized renovation project, and discovering even more ways to optimize your workflow.
Key Takeaways
• Designate a central tool station near the workbench to reduce clutter, improve productivity, and enhance safety.
• Assign tools to specific zones, such as power tools and hand tools, to optimize workflow and maintain accuracy.
• Utilize vertical storage options like wall-mounted racks and pegboard systems to free up floor space and enhance confidence.
• Implement a tool return system with designated spots and visual reminders to simplify the return process and create a habit of returning tools.
• Conduct regular tool inventory management to prevent costly delays, identify wear and tear, and ensure timely maintenance or replacement.
Designate a Central Tool Station
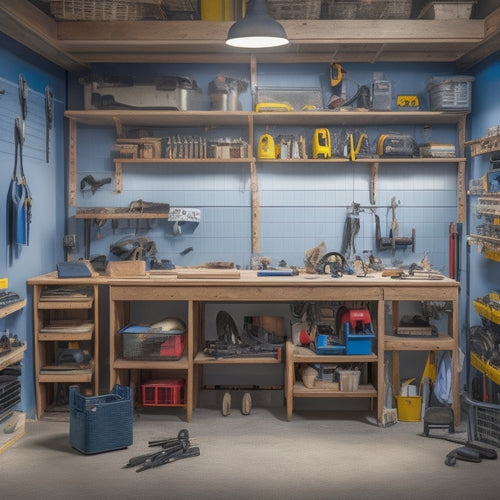
Set up a central tool station in a convenient location, such as near a workbench or in a toolbox, to serve as a hub for all your renovation tools and supplies. This will enable you to access what you need quickly and efficiently, saving you time and energy.
A well-organized tool station offers numerous benefits, including reduced clutter, improved productivity, and enhanced safety. You'll no longer waste time searching for misplaced tools or risk injury from tripping over scattered equipment.
To create an effective tool station, focus on the essentials. Start by designating a specific area for your most frequently used tools, such as hammers, screwdrivers, and pliers.
Next, add storage containers or bins to hold smaller items like nails, screws, and drill bits. Consider investing in a pegboard or tool organizer to maximize vertical space and keep your tools organized and within reach.
Utilize Vertical Storage Options
When renovating, you're likely working with limited floor space, which is why you'll want to utilize vertical storage options to keep your tools organized and within reach.
By making the most of your wall space, you'll be able to free up valuable floor space for more important tasks.
Now, let's explore how to maximize wall space by hanging tool organizers, a simple yet effective way to keep your tools tidy and accessible.
Maximize Wall Space
Hang your tools from the ceiling or install wall-mounted racks to take advantage of otherwise wasted vertical space and keep your renovation site organized.
By maximizing your wall space, you'll be able to fit more tools in a smaller area, making it easier to find what you need when you need it.
Magnetic tool strips are a great option for storing small metal tools like wrenches, pliers, and screwdrivers.
You can also install pegboard systems, which provide a customizable storage solution for your tools. With pegboards, you can hang bins, baskets, and hooks to store everything from hammers to drill bits.
Consider installing a pegboard near your workbench or in a central location to keep frequently used tools within easy reach.
By utilizing wall space, you'll be able to free up floor and bench space, reducing clutter and increasing productivity.
With a well-organized wall storage system, you'll be able to tackle your renovation project with confidence and efficiency.
Hang Tool Organizers
By installing overhead tool organizers, you can create a convenient and accessible storage system that keeps your tools off the floor and out of the way, freeing up valuable space for other essential items in your renovation site. This vertical storage option is ideal for maximizing your workspace, reducing clutter, and increasing productivity.
| Tool Organizer | Benefits |
|---|---|
| Magnetic Tool Strips | Holds small metal tools, easy to install, and customizable |
| Pegboard Setups | Versatile, adjustable, and accommodates various tool sizes |
| Overhead Bins | Stores larger items, keeps them out of the way, and easy to access |
When choosing a hang tool organizer, consider the types of tools you need to store and the available space in your renovation site. Magnetic tool strips are perfect for small metal tools like wrenches and pliers, while pegboard setups offer versatility and adjustability for various tool sizes. Overhead bins are ideal for storing larger items like power tools and equipment. By selecting the right tool organizer, you'll be able to efficiently store your tools, streamline your workflow, and get the job done faster.
Label and Categorize Tools
You'll streamline your renovation workflow by assigning a designated home to each tool and categorizing them according to their function or the project phase in which they're used. This approach enables you to quickly locate the tools you need, reducing downtime and increasing productivity.
To categorize your tools effectively, consider the following strategies:
-
Group similar tool types together, such as all drilling tools or all measuring tools, to facilitate easy access and minimize clutter.
-
Label each tool category using clear and concise labels, ensuring that everyone on the project team can identify the tools they need.
-
Organize tools by project phase, separating tools used in demolition, construction, and finishing stages to maintain a logical workflow.
- Designate a specific storage solution for each tool category, such as a pegboard for hanging tools or a cabinet for storing small parts, to keep tools organized and protected.
Assign Tools to Specific Zones
As you begin assigning tools to specific zones, you'll need to designate tool stations that make sense for your renovation workflow.
This means strategically placing tools in areas where they'll be used most frequently, reducing downtime and increasing productivity.
Tool Station Designations
Designate specific zones within your workspace for each type of tool, allowing you to quickly locate and access the equipment you need. This tool station designation approach guarantees that your renovation organization is optimized for efficiency.
By assigning tools to specific zones, you'll reduce downtime spent searching for misplaced tools and increase productivity.
Here are four key zones to take into account:
-
Power tool zone: Designate an area for drills, saws, and other power tools, keeping them organized and easily accessible.
-
Hand tool zone: Allocate a space for wrenches, pliers, and other hand tools, keeping them tidy and within reach.
-
Fastener zone: Create a station for nuts, bolts, and screws, making it easy to find the right fastener for the job.
- Measuring zone: Set up a designated area for levels, tape measures, and other measuring tools, guaranteeing accurate measurements.
Tool Placement Strategies
To maximize efficiency, assign tools to specific zones within each station, ensuring that frequently used tools are easily accessible and less commonly used tools are stored out of the way but still easily retrievable. This strategic placement enables you to quickly grab the tools you need, reducing downtime and increasing productivity.
When assigning tools to zones, prioritize tool accessibility and tool safety. Place heavy or bulky tools at waist level to reduce lifting and straining, and store sharp or hazardous tools in secure, tamper-proof containers.
Label each zone clearly, so you can instantly identify where each tool is located. This organization system also helps prevent tool loss or misplacement, as you'll always know exactly where to find what you need.
Implement a Tool Return System
You'll save time and reduce frustration by establishing a routine where every tool has a designated home and is returned to it after each use. This is where a tool return system comes in – a vital aspect of tool organization that promotes tool accountability and streamlines your workflow.
Here's how to implement a tool return system that works:
-
Designate a specific spot: Assign a specific spot for each tool, making it easy to find and return.
-
Establish return protocols: Create a routine where every tool is returned to its designated spot after use, making it a habit for your team.
-
Use visual reminders: Place signs or labels near each tool's designated spot, serving as a visual reminder to return the tool.
- Conduct regular audits: Regularly check that tools are in their designated spots, addressing any discrepancies and reinforcing the importance of tool accountability.
Invest in Portable Tool Cases
Portable tool cases provide a convenient and organized way to transport your essential tools to the job site, keeping them within easy reach and protected from damage.
When selecting a portable tool case, consider the tool case materials that will best suit your needs. Durable materials like hard plastic or metal can withstand the rigors of frequent transport, while soft-sided cases made of nylon or polyester offer flexibility and ease of storage.
Investing in a high-quality portable tool case offers several benefits. You'll save time by having your tools readily available, reducing downtime and increasing productivity. Portable cases also help prevent tool loss or misplacement, keeping your investment safe and secure.
Additionally, these cases often feature organized compartments and dividers, keeping your tools organized and easy to find. By keeping your tools in a portable case, you'll be able to tackle any renovation project with confidence, knowing that your tools are within easy reach and protected from damage.
Schedule Regular Tool Inventory
By maintaining a tidy and organized tool collection, you're now ready to take the next step in guaranteeing your renovation project stays on track: scheduling regular tool inventory checks to account for every item and prevent costly delays.
Regular inventory checks are essential for effective tool maintenance and making sure that your project timeline isn't impacted by missing or damaged tools.
Here's a suggested inventory checklist to get you started:
-
Tool condition: Inspect each tool for signs of wear and tear, and schedule maintenance or replacement as needed.
-
Tool location: Verify that each tool is stored in its designated spot, and update your inventory list accordingly.
-
Tool quantities: Count and record the number of each tool type, identifying any discrepancies or shortages.
- Tool functionality: Test each tool to confirm it's working properly, and make adjustments or repairs as needed.
Frequently Asked Questions
How Do I Prevent Tool Theft on a Busy Renovation Site?
You prioritize site security to prevent tool theft on your busy renovation site.
Start by designating a tool storage area and assigning a responsible team member to oversee it.
Implement a check-in/check-out system for tools and equipment, and conduct regular inventory audits.
Consider investing in tamper-evident bags or containers, and make sure to secure valuable items in a locked area when not in use.
Can I Use Pegboards for Storing Small Handheld Power Tools?
You're considering pegboards for storing small handheld power tools, and that's a great idea!
Pegboards offer several advantages, including easy tool accessibility and visibility. By hanging your tools on a pegboard, you'll be able to quickly grab what you need, saving time and increasing productivity.
Plus, it'll help keep your workspace organized and clutter-free. Just make sure to choose a sturdy pegboard that can hold the weight of your tools, and consider adding labels for easy identification.
Are There Any Eco-Friendly Tool Storage Options Available?
You're looking for eco-friendly tool storage options that align with your values. Fortunately, you can find sustainable materials and recycled containers to store your tools.
Opt for tool chests or cabinets made from reclaimed wood or bamboo, which are durable and environmentally friendly.
You can also repurpose old pallets or containers made from recycled plastic to store your tools.
These eco-conscious solutions will help reduce your carbon footprint while keeping your tools organized and within reach.
How Often Should I Clean and Maintain My Tools?
'You're probably thinking, 'Cleaning tools? That's a waste of time!' But trust us, it's not.
In fact, regular tool cleaning and maintenance can save you time and money in the long run. Create a maintenance schedule to guarantee your tools stay in top condition.
Set aside 30 minutes each week to wipe down tools, inspect for damage, and perform routine maintenance tasks. Your tools (and your wallet) will thank you.'
Can I Use Old Pallets to Create a DIY Tool Storage System?
You can repurpose old pallets to create a DIY tool storage system that's functional and efficient.
Design your pallet layout to prioritize tool accessibility, ensuring your most-used tools are within easy reach.
Consider a multi-tiered pallet design to maximize vertical storage and keep frequently used tools at eye level.
With some creativity and planning, you'll create a customized storage system that streamlines your workflow and boosts productivity.
Conclusion
As you wrap up your renovation, remember that a well-organized toolset is key to efficiency and sanity.
You've designated a central station, utilized vertical storage, and labeled every tool in sight.
But the real test is yet to come: can you maintain this system amidst the chaos of construction?
The fate of your project hangs in the balance.
Will you be able to find that one vital tool when you need it most, or will it be lost in the shuffle?
The answer lies in your ability to stick to these 7 essential strategies.
Related Posts
-

Why Home Renovators Need Smart Tool Storage Now
You need a smart tool storage system that streamlines your workflow, reduces clutter, and protects your investments b...
-

Why Exterior Wall Renovation Requires a Plan
You're about to commence a complex and potentially costly project when you decide to renovate your exterior walls, an...
-

3 Beginner-Friendly Tools for Plaster Renovation Success
You'll be glad to know that the three essential tools you need for a successful plaster renovation are the same ones ...


