7 Best Tools for Exterior Plaster Renovation
Share
When starting an exterior plaster renovation, you'll need the right tools to guarantee a successful and safe process. Start with essential safety gear, including protective eyewear, respiratory protection, and fall protection. For removal, use a hammer and chisel or pry bar, and don't forget safety gear and environmental considerations. Next, prepare the surface with power washing, chemical cleaning, and sanding. Apply base and finish coats with trowels, leveling tools, and floats, and mix materials with plaster mixing machines and sprayers. Finally, finish and smooth with specialized tools like darbies and infrared thermometers, and inspect with precision devices. As you plunge into the world of exterior plaster renovation, you'll discover the importance of each tool and technique in achieving a flawless finish.
Key Takeaways
• Essential safety gear, including protective eyewear, respiratory protection, and skin protection, is crucial for exterior plaster renovation.
• A hammer and chisel or pry bar are effective tools for removing traditional plaster, but caution is needed to avoid substrate damage.
• Surface preparation techniques, such as power washing, chemical cleaning, and sanding, are necessary for a strong bond between old and new plaster.
• A sturdy trowel, leveling tools, and a float are essential for applying and smoothing the base and finish coats of plaster.
• Inspecting and testing devices, including moisture meters and surface scanners, help identify potential issues and ensure a successful renovation.
Essential Safety Gear for Renovation
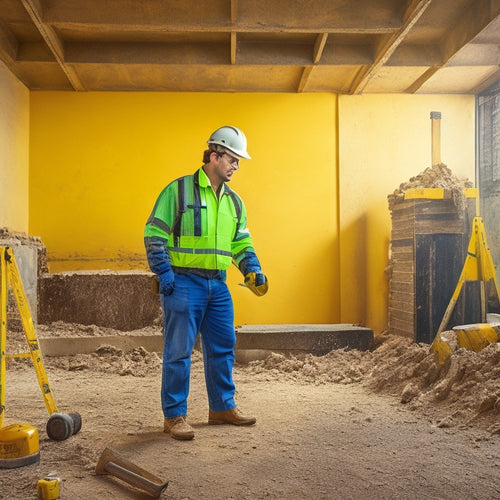
Wearing essential safety gear is crucial before starting an exterior plaster renovation, as it protects you from potential hazards like falling debris, dust inhalation, and skin irritation. You don't want to end up with a face full of plaster or a pair of itchy eyes, trust us.
So, what's on the must-have list? First, grab a pair of protective eyewear that meets safety regulations. You'll want lenses that are impact-resistant and provide 360-degree protection.
Next, don a dust mask or respirator to prevent inhaling those pesky particles. Don't forget gloves, long sleeves, and pants to shield your skin from irritation.
A hard hat and steel-toed boots will also keep you safe from falling objects and heavy tools. Finally, consider a full-body harness if you'll be working at heights.
Remember, safety gear isn't just a good idea – it's the law. Familiarize yourself with local safety regulations and make sure you're compliant.
With the right gear, you'll be ready to tackle that exterior plaster renovation like a pro!
Plaster Removal and Scraping Tools
When it comes to exterior plaster renovation, you'll need to remove old, damaged plaster layers and scrape off loose debris to expose the underlying surface.
To achieve this, you'll require specialized tools designed for efficient and effective plaster removal and scraping.
Remove Old Plaster Layers
You'll typically begin exterior plaster renovation by scraping away old, deteriorated layers, a process that requires the right tools to avoid damaging the underlying substrate.
When it comes to plaster removal techniques, you've got a few options. You can use a hammer and chisel, which is a tried-and-true method, but be careful not to damage the substrate. Alternatively, you can use a pry bar or a plaster scraper, which can be more efficient and gentler on the surface.
Whatever method you choose, make sure to wear protective gear, including gloves, safety glasses, and a dust mask.
Don't forget to reflect on environmental considerations when removing old plaster layers. You'll likely be dealing with dust and debris, so make sure to contain the mess and dispose of it properly.
You may also need to handle hazardous materials like asbestos or lead-based paint, so be sure to follow local regulations and guidelines.
Scrape Off Loose Debris
To efficiently scrape off loose debris, start by selecting the right plaster removal and scraping tools for the job. The type of tool you choose will greatly impact the effectiveness of this essential step.
You'll want to opt for tools that can effectively scrape off loose debris without damaging the underlying surface. A putty knife or a scraper with a sturdy handle and a rigid blade is perfect for this task. For larger areas, consider using a power scraper or a rotary hammer with a scraper attachment.
Don't forget to prioritize surface protection by covering nearby surfaces with drop cloths or plastic sheets to prevent damage from flying debris.
As you scrape, remember to collect the debris as you go to avoid creating a mess. Use a vacuum or a dustpan and brush to collect the loose particles, making it easier to work and reducing the risk of slipping hazards.
Prepare Surface for Repair
With the loose debris removed, you're now ready to prepare the surface for repair by selecting the right plaster removal and scraping tools to guarantee a smooth, even base for the new plaster application. This essential step guarantees a strong bond between the old and new plaster, so don't skip it! Conduct a thorough surface assessment to identify areas that need extra attention.
For areas with heavy damage, use a putty knife or a scraper to remove old, crumbling plaster. Be gentle, though - you don't want to gouge the underlying surface. For more stubborn bits, bring in the big guns: a hammer and chisel or a rotary hammer with a scraper bit. Remember, the goal is to create a smooth surface, not to pulverize the wall.
When choosing your tools, consider the type of repair techniques you'll be using. Will you be applying a new layer of plaster, or using a specialized patching compound? Different tools are better suited for different tasks, so take the time to select the right ones for your project.
Surface Preparation and Cleaning
Proper surface preparation and cleaning are vital steps in exterior plaster renovation, as they set the stage for a strong, durable, and long-lasting finish. You can't just slap on a new coat of plaster without verifying the surface is ready for it. That's like building a house on shaky ground - it's gonna crumble, baby!
You'll need to tackle different surface types, from rough and porous to smooth and dense. And, of course, each one requires its own set of cleaning techniques. Here are some key things to keep in mind:
** Power washing is great for blasting off dirt and grime, but be careful not to damage the surface.
** Chemical cleaning can be effective, but confirm you choose the right product for the job.
-
Sanding is a great way to smooth out rough surfaces, but don't forget to wear a mask!
-
Scraping off old, loose plaster is a must, but be gentle to avoid damaging the underlying surface.
-
Vacuuming up dust and debris is essential to guarantee a strong bond between the old and new plaster.
Base Coat and Finish Coat Tools
You'll need a range of specialized tools to apply the base coat and finish coat of plaster, including trowels, floats, and finishing tools that are designed to help you achieve a smooth, even finish.
For the base coat, you'll want to use a sturdy trowel with a square edge to apply the mixture evenly. Don't forget to use a level to verify the surface is straight - you don't want any wonky walls!
When it comes to finish coat techniques, a float is your best friend. Use it to smooth out the surface, feathering the edges to create a seamless finish.
Finish coat tips: work in small sections, and use a clean float for each pass to avoid leaving behind any imperfections.
And remember, practice makes perfect - don't be too hard on yourself if it takes a few tries to get the hang of it. With the right tools and a bit of patience, you'll be a plaster pro in no time!
Mixing and Application Equipment
When it comes to mixing and applying exterior plaster, you'll need the right equipment to guarantee a smooth, consistent finish.
You'll be working with plaster mixing machines that can handle large batches, as well as sprayers and pumps that allow for efficient application.
Next, you'll turn to trowels and finishing tools to refine the surface and achieve the desired texture.
Plaster Mixing Machines
With a plaster mixing machine, you can efficiently produce large quantities of consistently mixed plaster, streamlining the renovation process and guaranteeing a high-quality finish. This is especially important when working on exterior plaster renovation projects, where consistency is key to achieving a durable and weather-resistant finish.
When it comes to plaster mixing techniques, a machine can take the guesswork out of getting the perfect mix. You'll avoid common issues like under-mixing or over-mixing, which can lead to a subpar finish. Plus, with a portable mixing machine, you can mix and apply plaster right where you need it, saving time and effort.
Here are some benefits of using a plaster mixing machine:
-
Increased productivity: Mix large quantities of plaster quickly and efficiently
-
Consistency: Achieve a uniform mix every time, eliminating human error
-
Portability: Take your mixing machine to the job site, eliminating the need for multiple trips
-
Cost-effective: Reduce labor costs and minimize waste
-
Better finish: Guarantee a high-quality, durable finish that will withstand the elements
Sprayers and Pumps
Efficiently applying exterior plaster requires the right equipment, and that's where high-performance sprayers and pumps come in, allowing you to achieve a uniform, high-quality finish with precision and speed.
When it comes to sprayers, electric models are a popular choice for exterior plaster renovation. They're lightweight, easy to maneuver, and provide a consistent flow rate, making them perfect for large-scale projects. Look for electric sprayers with adjustable pressure controls and durable materials that can withstand the demands of exterior work.
For larger, more complex projects, hydraulic pumps are the way to go. These powerful machines can handle high-viscosity materials and provide a high volume of plaster at a rapid pace. Hydraulic pumps are ideal for large commercial or industrial projects where speed and efficiency are vital.
When selecting a hydraulic pump, consider factors such as maximum pressure, flow rate, and horsepower to guarantee you're getting the right tool for the job.
Trowels and Finishing
You'll need to complement your sprayer or pump with the right trowels and finishing equipment to achieve a smooth, high-quality exterior plaster finish. This is where the magic happens, and your trowel techniques will make all the difference. A good trowel should feel like an extension of your arm, allowing you to glide smoothly across the surface, leaving a flawless finish in its wake.
When it comes to finishing touches, the right tools can elevate your work from mediocre to magnificent. Here are some must-haves in your finishing arsenal:
-
A stainless steel or carbon fiber finishing trowel for a smooth, even finish
-
A corner trowel for those hard-to-reach areas
-
A darby or straightedge for removing excess plaster and achieving a straight edge
-
A hawk or mud pan for holding and carrying your plaster
-
A putty knife or joint knife for scraping and smoothing out imperfections
Finishing and Smoothing Tools
Trowels, floats, and darbies are essential finishing and smoothing tools that help you achieve a uniform, crack-free exterior plaster surface by removing excess material and creating a smooth, even finish.
When it comes to smoothing techniques, these tools are your best friends. With a trowel, you can apply the perfect amount of pressure to flatten out those pesky bubbles and humps. A float helps to remove excess material and creates a smooth, even surface. And, a darbie? That's your secret weapon for getting into tight spaces and corners.
By mastering these finishing and smoothing tools, you'll be able to add those perfect finishing touches to your exterior plaster renovation project. Remember, a smooth surface is key to a durable and long-lasting exterior plaster finish.
Inspecting and Testing Devices
Your exterior plaster renovation project's success hinges on accurate inspections and tests, which is where inspecting and testing devices come into play. These tools help you identify potential issues before they become major problems. They are the unsung heroes of your renovation journey, saving you from costly surprises down the line.
When it comes to inspecting and testing, you'll want to have the right devices in your arsenal. Here are some must-haves:
-
Moisture meters: for detecting hidden water damage and ensuring your plaster is dry before application
-
Surface scanners: for evaluating surface irregularities and identifying areas that need extra attention
-
Infrared thermometers: for detecting temperature anomalies that could indicate underlying issues
-
Digital calipers: for precise measurements and ensuring a smooth, even finish
-
Inspection cameras: for getting a closer look at hard-to-reach areas and identifying potential issues before they become major headaches
Frequently Asked Questions
Can I Reuse Old Plaster Mix for My Renovation Project?
You're wondering if you can reuse that old plaster mix for your renovation project. Here's the deal: it's not recommended.
Plaster mix composition can degrade over time, affecting its performance and durability.
Plus, renovation project guidelines often specify using fresh materials to guarantee quality and safety.
Don't risk it - mix a fresh batch and follow the guidelines to get the job done right.
Trust us, it's better to be safe than sorry (and stuck with a crumbling wall)!
How Do I Prevent Water Damage During Exterior Plaster Renovation?
You're wise to worry about water damage during your exterior plaster renovation. To prevent it, you'll want to master some waterproofing techniques.
First, guarantee a solid moisture barrier between the old plaster and new layers. Apply a waterproofing membrane to the substrate, then install a drainage plane to direct water away from the wall.
Don't forget to flash those windows and doors, and you'll be singing 'dry wall, dry wall' in no time!
What Is the Ideal Temperature for Applying Exterior Plaster?
You're about to slather on that plaster, but wait, what's the ideal temperature?
You don't want your hard work to crack under pressure (or temperature). The sweet spot for exterior plaster application is between 50°F and 90°F (10°C to 32°C).
Any hotter or colder, and you'll risk poor bonding, shrinkage, or even worse, water damage (remember our previous chat about that?).
Can I DIY Exterior Plaster Renovation Without Professional Experience?
Can you DIY exterior plaster renovation without pro experience? Well, you're brave!
While it's possible, it's essential to understand the intricacies of DIY techniques and plaster materials. Without proper knowledge, you might end up with a mess that'll leave you feeling like you're stuck in the mud.
However, with thorough research and patience, you can achieve a successful renovation. Just remember, practice makes perfect, so don't be too hard on yourself if it doesn't turn out flawless at first.
How Long Does Exterior Plaster Renovation Typically Take to Complete?
You're thinking, 'I've got this, I can DIY exterior plaster renovation without professional experience,' but let's get real, you're probably wondering how long this project will drag on.
The renovation timeline varies, but don't worry, it's not a never-ending saga. Project factors like size, complexity, and your availability will influence the duration.
On average, a small to medium-sized project can take 2-6 weeks, while larger projects can stretch to 3-6 months.
Buckle up, and let's get started!
Conclusion
You've made it to the final stage of your exterior plaster renovation project.
Remember, a successful renovation requires the right tools for the job.
According to the National Association of Home Builders, the average cost of exterior renovation projects has increased by 15% in the past year, highlighting the importance of investing in quality tools to guarantee a durable and long-lasting finish.
By choosing the best tools from each category, you'll achieve professional results that will stand the test of time.
Related Posts
-

What to Inspect When Buying Used Renovation Tools
When buying used renovation tools, you need to scrutinize every detail to avoid costly mistakes. Inspect for rust and...
-

5 Vital Safety Tips for DIY Renovation Success
When tackling a DIY renovation, you'll need to prioritize safety above all else. Start by protecting yourself from fl...
-

Home Renovation Safety Checklist for Homeowners
As a homeowner initiating a renovation project, you know that safety should be your top priority. Start by establishi...


