
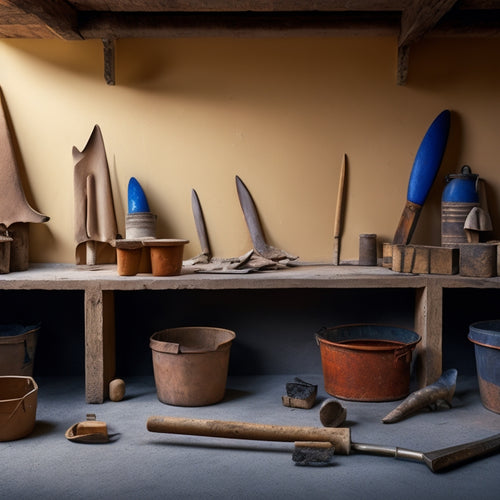
7 Best Plastering Tools for Old House Renovation
When tackling an old house renovation, you'll need the right plastering tools to achieve a professional-grade finish. You'll start with a hawk to hold and transport plaster, a trowel for smooth finishes, and a putty knife for scraping off old plaster and debris. A rasp will help prepare textured surfaces, while an edger specializes in corner and ceiling finishing. For seams, you'll need a joint knife, and a darby will smooth out wall surfaces. With these seven essential tools in your arsenal, you'll be well on your way to achieving a flawless finish - but understanding the subtleties of each tool will make all the difference in your project's success.
Key Takeaways
- Essential plastering tools include hawk, trowel, putty knife, rasp, edger, joint knife, and darby, each serving a specific purpose in the renovation process.
- Choose durable tools with ergonomic designs to reduce user fatigue and improve overall productivity.
- Proper tool maintenance is crucial, involving regular cleaning, oiling, and dry storage to prevent rust and extend lifespan.
- Mastering various stroke techniques, such as pushing and pulling strokes, is vital for even plaster application and a smooth finish.
- Selecting the right tool for the task, categorized by grit levels, significantly impacts the quality of the finish in old house renovation projects.
Hawk for Holding Plaster
A sturdy hawk is vital for efficiently holding and transporting plaster to your work area, allowing you to focus on applying a smooth, even layer.
You'll want to choose a hawk made from durable materials, such as stainless steel or heavy-duty plastic, to withstand the rigors of plastering. Regular hawk maintenance is essential to guarantee optimal performance. Clean your hawk thoroughly after each use and store it in a dry place to prevent rust or corrosion.
When selecting a hawk, consider the type of plaster you'll be working with and the size of your work area. A larger hawk may be necessary for bigger projects, while a smaller one may be more suitable for smaller areas.
Look for hawks with ergonomic handles and a comfortable grip to reduce fatigue and improve control. Additionally, consider the weight capacity of the hawk to make sure it can hold the amount of plaster you need.
Trowel for Smooth Finishes
When you're aiming for a smooth finish in your old house renovation, you'll need a trowel that's up to the task.
You'll want to choose a trowel that fits comfortably in your hand and has the right balance of flexibility and stiffness for the type of plaster you're working with.
Trowel Selection Criteria
Selecting the right trowel for a smooth finish requires careful consideration of several key factors. You'll want to think about the type of plaster you're working with, the size of the area you need to cover, and the level of finish you're aiming for.
When it comes to trowel materials, you've got options. Stainless steel trowels are durable and resistant to rust, making them ideal for working with wet plaster. Carbon steel trowels, on the other hand, are more flexible and better suited for finishing work.
You may also come across trowels made from other materials, like aluminum or fiberglass, which offer their own unique benefits.
Trowel shapes are another vital consideration. A trowel with a curved blade is great for scooping and spreading plaster, while a flat blade is better for smoothing and finishing.
You may find that you prefer a trowel with a pointed nose for getting into tight spaces or a trowel with a rounded nose for working on curved surfaces. By choosing the right trowel for your project, you'll be able to achieve a smooth, professional-looking finish with ease.
Holding the Trowel
With your trowel chosen, it's time to focus on proper holding techniques to achieve a smooth finish. You'll want to develop a comfortable, consistent trowel grip that becomes second nature.
Hold the trowel with a firm, but not overly tight, grip, allowing you to maintain control without fatigue. Your dominant hand should hold the handle, with your non-dominant hand supporting the blade. Experiment with different grip styles until you find one that feels natural.
Proper trowel maintenance is also essential for achieving a smooth finish. Regularly clean your trowel to prevent dried plaster from accumulating and affecting your work.
Use a wire brush to remove stubborn debris, and apply a light coating of oil to protect the blade. A well-maintained trowel will glide smoothly across the surface, allowing you to focus on your technique and achieve a flawless finish.
Stroke Techniques Matter
Mastering the art of stroke techniques is crucial for achieving a smooth, even finish in your old house renovation project.
When it comes to applying plaster, the way you move your trowel matters. Developing a consistent stroke technique will guarantee a professional-looking result.
You'll want to use a combination of pushing and pulling strokes to spread the plaster evenly.
Start with a pushing stroke, applying gentle to moderate pressure, to fill in larger areas. Then, use a pulling stroke to scrape off excess material and smooth out the surface.
Alternate between these two strokes to achieve a uniform layer.
Putty Knife for Scraping
When tackling old house renovation, you're bound to encounter layers of old plaster, paint, and who-knows-what-else adhered to the walls and ceilings, and that's where a putty knife for scraping comes into play. This versatile tool helps you remove old, damaged, or unwanted material, preparing surfaces for new plaster or finishes.
You'll find various putty knife types, each suited to specific tasks and surfaces. Flexible knives are ideal for scraping curved or irregular surfaces, while stiff knives are better for flat areas. You may also opt for a putty knife with a curved or angled blade for reaching tight spaces or corners.
Proper putty knife maintenance is essential to extend its lifespan. Regularly clean your knife with a wire brush or cloth to remove debris and dried material.
Store it in a dry place to prevent rust or corrosion. By choosing the right putty knife and maintaining it well, you'll be able to efficiently scrape away old material, giving you a solid foundation for your renovation project.
Rasp for Textured Surfaces
When you're dealing with textured surfaces in your old house renovation, you'll need to prepare the rough surface before applying new plaster.
You'll use a rasp to remove old, uneven textures and create a smooth surface, employing techniques that prevent gouging or scratching the underlying material.
Rough Surface Preparation
Tackle rough surfaces head-on by preparing them for plastering with the right tools and techniques. Before applying plaster, you need to guarantee the surface is clean and stable. Surface cleaning is essential to remove dirt, grime, and old adhesives that can affect plaster adhesion. Use a wire brush or a putty knife to scrape off loose debris, and then vacuum the surface to remove dust and particles.
| Step | Description |
|---|---|
| 1. Surface Cleaning | Remove dirt, grime, and old adhesives using a wire brush or putty knife |
| 2. Substrate Inspection | Inspect the substrate for cracks, holes, or unevenness |
| 3. Repair and Fill | Repair cracks and holes with a suitable filler and sand to a smooth finish |
| 4. Final Inspection | Inspect the surface for any imperfections before applying plaster |
After cleaning, inspect the substrate for cracks, holes, or unevenness. Repair and fill any defects with a suitable filler, and sand to a smooth finish. Finally, inspect the surface again to verify it's ready for plastering. By following these steps, you'll guarantee a strong bond between the plaster and the substrate, resulting in a durable and long-lasting finish.
Texture Removal Techniques
One of the most critical texture removal techniques involves using a rasp to smooth out textured surfaces.
You'll encounter various plaster texture types, from knockdown to orange peel, and a rasp is an essential tool for removing them. When choosing a rasp, select one with a coarse grit to effectively remove texture.
Hold the rasp at a 30-degree angle and work in small sections, applying moderate pressure. This will help prevent gouging the surface. As you rasp, use a vacuum or dustpan to collect debris and prevent it from spreading.
Remember to wear protective gear, including a dust mask, safety glasses, and gloves. Once you've removed the majority of the texture, switch to a finer grit rasp or sandpaper to achieve a smooth finish.
Smoothing Out Bumps
Smoothing Out Bumps
Bumps and ridges on textured surfaces require a more aggressive approach than simply rasping away. You'll need to employ a rasp designed specifically for textured surfaces to effectively smooth out these imperfections. A rasp with a coarse grit, typically 80-100, is ideal for this task.
Before you begin, conduct a thorough bump assessment and surface inspection to identify the extent of the issue. This will help you determine the best approach and guarantee you're using the right tools for the job.
| Tool | Grit | Application |
|---|---|---|
| Rasp | 80-100 | Coarse grinding, removing heavy texture |
| File | 120-150 | Medium grinding, smoothing out ridges |
| Sandpaper | 220-240 | Fine grinding, final smoothing |
Using the right rasp for the job will make a significant difference in the quality of your finish. Remember to work progressively through the grits, starting with coarse and moving to fine, to achieve a smooth, even surface.
Edger for Corners and Ceilings
When renovating old houses, you'll often encounter corners and ceilings that require a specialized tool to achieve a smooth, seamless finish. That's where an edger for corners and ceilings comes in. This tool is specifically designed for corner finishing and ceiling edges, allowing you to create a precise, professional-looking finish.
An edger is typically a handheld tool with a curved or angled blade that's used to smooth out plaster and create a clean edge. You'll typically use it to remove excess plaster, create a sharp corner, or feather out edges to blend with the surrounding surface.
When choosing an edger, look for one with a durable blade and a comfortable grip. You may also want to evaluate an edger with interchangeable blades or adjustable angles for added versatility.
With the right edger, you'll be able to tackle even the most challenging corners and ceilings with ease, achieving a finish that's truly professional-grade.
Joint Knife for Seams
As you move on from edging corners and ceilings, you'll need to tackle the seams where two plaster surfaces meet. This is where a joint knife comes in – an important tool for old house renovation.
You'll find two primary joint knife types: flexible and rigid. Flexible joint knives are ideal for curved or irregular surfaces, while rigid ones are better suited for straight seams.
When selecting a joint knife, consider the blade material. High-carbon steel blades are durable and resistant to rust, making them a popular choice. Additionally, look for a comfortable, ergonomic handle that reduces fatigue during extended use.
Proper joint knife maintenance is vital to extend its lifespan. Regularly clean the blade with a wire brush to remove dried plaster and debris.
Apply a light coat of oil to prevent rust and store the knife in a dry place. By choosing the right joint knife and following maintenance best practices, you'll achieve professional-looking results and guarantee a successful old house renovation.
Darby for Smooth Walls
Across old house renovation projects, you'll often encounter walls that require a high level of smoothness, particularly in areas where finishes like paint or wallpaper will be applied. To achieve this, you'll need a reliable darby, a long, flat tool used to smooth and flatten surfaces.
When selecting a darby, opt for high-quality materials, such as stainless steel or fiberglass, which provide durability and resistance to warping.
Mastering darby techniques is essential for achieving a smooth finish. Hold the darby at a 20-degree angle, applying moderate pressure, and work in small, circular motions to remove imperfections. Use long, sweeping strokes to cover large areas, maintaining consistent pressure to avoid creating unevenness.
For more precision, use a smaller darby or a trowel to target specific areas.
To guarantee ideal results, choose the right darby materials for your project. For example, a stainless steel darby is ideal for wet plaster, while a fiberglass darby is better suited for drywall.
Frequently Asked Questions
Can I Use a Putty Knife for Applying Plaster to Walls?
You can use a putty knife for applying plaster to walls, but expert putty knife techniques, like holding it at a 20-degree angle, to achieve a smooth finish, and follow expert plaster application tips for a successful renovation.
How Do I Clean and Maintain My Plastering Tools?
As you wield your tools like a skilled artisan's sword, remember to sharpen their edge with regular tool cleaning and maintenance tips, lest they dull and betray your artistic vision, leaving your plastering skills to wither like a once-majestic castle.
Are There Different Types of Plaster Suitable for Old Houses?
You'll find that traditional lime plaster, applied using historical techniques, is often the best choice for old houses, offering superior breathability and durability, allowing you to preserve the original charm and character of the property.
What Safety Precautions Should I Take When Plastering?
You're about to commence a plastering journey that'll leave you covered in a fine layer of dust, so don't even think about skipping safety precautions! Wear protective gear like a mask, goggles, and gloves to shield yourself from the mess and potential hazards.
Can I DIY Plastering or Do I Need a Professional?
You can DIY plastering if you're willing to invest time in learning proper plastering techniques and following DIY tips, but if you're short on experience or dealing with complex repairs, it's best to hire a professional to guarantee a flawless finish.
Conclusion
You've made it through the renovation gauntlet, and your old house is finally looking like new - but don't get too comfortable. With these 7 essential plastering tools, you'll be tempted to tackle every crumbling wall and ceiling in sight. And that's exactly what you should do, because let's face it, there's no such thing as a perfectly plastered old house - there's always another patch, another scrape, another smooth finish waiting to be achieved.
Related Posts
-

Why Invest in Quality Plastering Tools for Renovation
When renovating, investing in quality plastering tools is essential for achieving professional-looking results and mi...
-

Why Tool Exchange Matters in Home Renovation
You rely on a well-maintained tool belt to complete home renovation projects efficiently, and having access to the ri...
-
7 Best Plastering Bat Sizes for DIY Renovations
When tackling DIY renovations, you'll want to choose the right plastering bat size to achieve a professional-looking ...


