7 Best Materials for a Successful Home Renovation
Share
You'll want to choose the right materials for your home renovation to guarantee a professional finish. Start with a high-quality plaster mix that includes cement, sand, and additives for durability and a smooth finish. For drywall, select the right joint compound for your specific needs, whether it's all-purpose, lightweight, or quick-setting. Don't forget essential tools like taping knives, sanding screens, and a sturdy trowel. Finishing compounds and mesh tape are also vital for strong bonding and a flawless finish. By using these seven materials, you'll be well on your way to achieving a successful renovation - and there's more to learn about how to get the most out of them.
Key Takeaways
• Choose high-quality plaster mix with rapid-hardening cement, high sand content, and additives for a durable finish.
• Select the right joint compound type, such as all-purpose, lightweight, or flexible, based on specific joint requirements and performance needs.
• Ensure clean and dry surface preparation for effective plaster application and drywall taping and mudding.
• Use appropriate tools, such as sturdy trowels and putty knives, for even application and smoothing of plaster and joint compound.
• Finish with a suitable finishing compound, considering drying time, sandability, and durability, for a professional-looking result.
Essential Tools for Plastering
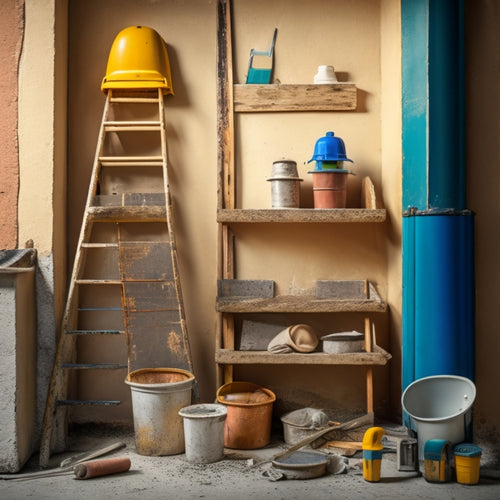
When tackling a plastering project, you'll need to equip yourself with the right tools to achieve a smooth, even finish and avoid costly rework. Having the proper tools guarantees you can master various plastering techniques, from scratch coats to finish coats, and assures a professional-looking result.
First and foremost, you'll need a sturdy trowel for applying and smoothing out the plaster. A putty knife is also essential for scraping off excess plaster and creating a clean surface.
For surface preparation, a wire brush or sandpaper will help remove any dirt, grime, or old adhesive. A bucket and mixing stick are necessary for mixing and applying the plaster, while a level and straightedge will confirm your walls are perfectly aligned.
Additionally, a hawk or plastering board is vital for holding and carrying plaster as you work. Finally, a clean, damp cloth will help you wipe away any excess plaster and create a smooth finish.
With these tools at your disposal, you'll be well on your way to mastering the art of plastering and achieving a high-quality finish.
Best Plaster Mix for DIY Projects
When you're tackling a DIY plastering project, you'll want to guarantee you're using the right mix to achieve a smooth, durable finish.
You'll need to focus on the key ingredients that make up your plaster mix, as well as the ideal mixing ratio to get the best results.
Key Ingredients Matter
You'll need a plaster mix that's specifically designed for DIY projects to guarantee a strong, durable finish. When it comes to selecting the right plaster mix, the key ingredients matter. Look for a mix that combines high-quality cement, sand, and additives that enhance material durability. A good plaster mix should also provide cost efficiency by minimizing waste and reducing the need for multiple applications.
When evaluating different plaster mixes, pay attention to the type of cement used. A high-strength cement will provide a more durable finish, while a rapid-hardening cement will speed up the drying process. The sand content is also essential, as it affects the mix's workability and finish. Opt for a mix with a high sand content for a smoother finish.
Additionally, consider the additives included in the plaster mix. Some common additives include fibers for added strength, polymers for improved adhesion, and retarders to slow down the setting process. By choosing a plaster mix with the right ingredients, you'll be able to achieve a professional-looking finish that lasts.
Mixing Ratio Importance
With the right ingredients in place, achieving the perfect mix ratio becomes the next critical step in guaranteeing a successful DIY plastering project.
You've got the best materials; now it's time to combine them in the right proportions. The secret to a strong, durable, and crack-resistant plaster lies in the mixing ratio. Get it wrong, and you'll be dealing with a weak, brittle, or even crumbling finish.
To avoid common mistakes, focus on mastering mixing techniques and ratio calculations. Here are some essential tips to keep in mind:
-
Understand the importance of water-to-cement ratio: Aim for a consistent ratio to guarantee the perfect balance of strength and workability.
-
Don't overmix or undermix: Stop mixing once the ingredients are fully incorporated, as excessive mixing can lead to a weak finish.
-
Calculate the ratio based on the specific materials you're using: Take into account the type of cement, sand, and other additives to guarantee the perfect mix for your project.
Application Tips Needed
Applying the perfect plaster mix requires mastering techniques that assure a smooth, even finish, and preventing common issues like uneven texture, cracks, and poor adhesion. You've got to get it right to stay within your renovation budget and bring your design inspiration to life.
To achieve a flawless finish, follow these essential application tips:
| Tip | Description |
|---|---|
| Prepare the surface | Ascertain the surface is clean, dry, and free of old plaster or debris. |
| Apply in thin layers | Apply 2-3 thin layers, allowing each layer to set before applying the next. |
| Use the right tool | Use a putty knife or trowel to apply and smooth the plaster mix. |
| Work in small sections | Divide the wall into small sections, completing each one at a time to maintain evenness. |
| Don't overmix | Mix the plaster according to the manufacturer's instructions, and avoid overmixing, which can lead to a weak bond. |
Drywall Options for Smooth Finish
When you're looking to achieve a smooth finish with drywall, you'll need to take into account the finishing options that suit your project's requirements.
You'll have to decide on the type of joint compound to use, as well as the taping and mudding techniques that will guarantee a seamless joint.
Finishing Options Explained
You'll achieve a smooth finish by choosing the right drywall options, which typically involve selecting from three main types: regular, moisture-resistant, or abuse-resistant drywall.
Each type has its unique benefits and is suited for specific areas of your home. For instance, moisture-resistant drywall is ideal for bathrooms, kitchens, and laundry rooms, while abuse-resistant drywall is perfect for high-traffic areas and commercial spaces.
When it comes to finishing techniques, you'll want to take into account the following:
-
Taping and mudding: a vital step in achieving a smooth finish, where joints are reinforced with tape and compound.
-
Sanding: a tedious but necessary process to smooth out any imperfections and create a seamless surface.
-
Texturing: an optional step that adds aesthetic appeal to your walls, such as knockdown, orange peel, or popcorn textures.
Joint Compound Types
Three essential joint compound types - all-purpose, lightweight, and quick-setting - will help you achieve a smooth finish, each catering to specific drywall needs and project timelines.
When choosing the right joint compound for your drywall project, you'll want to take into account factors like drying time, weight, and coverage area.
All-purpose joint compounds, like those from USG or Sheetrock, offer a balance of performance and versatility, making them suitable for most drywall applications.
Lightweight compounds, such as Easy Sand from DAP, are ideal for smaller projects or when you need to minimize weight and shrinkage.
Quick-setting compounds, like Fast Set from 3M, are perfect for tight deadlines, as they dry rapidly and allow for same-day finishing.
For different joint types, you may prefer a specific compound brand.
For instance, if you're working with curved or irregular surfaces, a flexible compound like Flexicomp from ProForm might be the best choice.
Taping and Mudding
To achieve a smooth, seamless finish, start by applying drywall tape to the seams, pressing it firmly onto the joint compound. Then, use a putty knife to spread a thin layer of compound over the tape, feathering it out towards the edges. This will create a strong bond between the tape and the drywall.
Next, focus on mastering your taping techniques. Apply the tape in a continuous motion, using slight pressure to guarantee it adheres evenly. Make sure to press the tape firmly onto the compound, eliminating any air pockets or wrinkles.
To achieve a flawless finish, pay attention to the mudding consistency. You want the compound to be smooth and pliable, not too thick or too thin.
Here are some key tips to keep in mind:
-
Use a high-quality joint compound specifically designed for drywall finishing.
-
Mix the compound to the manufacturer's instructions to achieve the right consistency.
-
Apply the compound in thin layers, allowing each layer to dry before adding the next.
Sanding Screens for Imperfections
When preparing surfaces for renovation, sanding screens prove invaluable for identifying and rectifying imperfections that might otherwise be hidden by subsequent coats of finish.
You'll want to master various sanding techniques to effectively utilize these screens. Start with coarser screen grits (around 80-100) to quickly remove old finish, filler, or other debris. As you progress, switch to finer grits (120-150) for a smoother finish. Don't forget to work in small, circular motions, applying moderate pressure to avoid scratching the surface.
When you encounter stubborn imperfections, don't hesitate to switch to an even finer grit or try a different sanding technique. Remember, the goal is to achieve a uniform, blemish-free surface.
Sanding screens are particularly effective at revealing hidden imperfections, allowing you to address them before applying finish coats. By incorporating these screens into your renovation workflow, you'll guarantee a professional-looking finish that showcases your attention to detail.
With practice and patience, you'll become a sanding master, capable of transforming even the most imperfect surfaces into stunning, like-new finishes.
Taping Knives for Seamless Joints
You'll achieve seamless joints by mastering the art of applying joint compound with a taping knife, an essential tool for creating smooth, imperfection-free surfaces. This tool allows you to spread and smooth out compound with precision, ensuring a strong bond between drywall panels.
To get the most out of your taping knife, it's vital to develop proper taping techniques. Hold the knife at a 45-degree angle and apply gentle to moderate pressure, depending on the compound's consistency.
Here are some additional tips to enhance your taping skills:
-
Maintain your knife: Regularly clean and dry your taping knife to prevent compound buildup and rust. Store it in a protective case or wrap it in a dry cloth to keep it in top condition.
-
Vary your pressure: Adjust your pressure according to the joint's size and compound's thickness. This will help you achieve a smooth, even finish.
-
Practice makes perfect: Don't be discouraged if your first few joints don't turn out perfectly. With practice, you'll develop the skills and techniques needed to create seamless joints.
Finishing Compounds for Perfection
Finishing Compounds for Perfection
Selecting the right finishing compound is vital for achieving a flawless, paint-ready surface, as it directly impacts the final appearance of your drywall project. You'll want to choose a compound that suits your specific needs, taking into account factors like drying time, sandability, and durability.
When it comes to finishing techniques, the right compound can make all the difference. For example, a low-shrinkage compound is ideal for large, open areas, while a fast-drying compound is better suited for smaller, more intricate projects. Surface preparation is also important, as a well-prepared surface guarantees a strong bond between the compound and the drywall.
Here's a breakdown of some popular finishing compounds:
| Compound Type | Characteristics |
|---|---|
| All-Purpose | Versatile, easy to sand, and suitable for most projects |
| Low-Shrinkage | Ideal for large areas, minimal shrinkage, and smooth finish |
| Fast-Drying | Quick-drying, perfect for small projects and tight deadlines |
| High-Strength | Durable, resistant to scratches, and suitable for high-traffic areas |
Mesh Tape for Strong Bonding
Two essential inches of mesh tape can make all the difference in ensuring a strong bond between drywall joints and corners, providing a reliable foundation for your finishing compound.
When you're renovating, you can't afford to have weak points in your drywall, and mesh tape is the solution you need. Its unique weave pattern allows for maximum adhesion, creating a strong bond that will withstand the test of time.
Here are just a few of the mesh tape benefits you can expect:
-
Reduced risk of cracks and bubbles: By providing a strong, even bond, mesh tape minimizes the risk of cracks and bubbles forming in your finishing compound.
-
Easy to apply: Mesh tape is simple to use, even for DIYers with limited experience.
-
Versatile applications: Mesh tape is perfect for drywall joints, corners, and even repairs - making it a must-have for any renovation project.
Frequently Asked Questions
What Is the Ideal Temperature for Plastering a Wall?
When you're plastering a wall, you'll want to keep the temperature between 50°F and 70°F (10°C and 21°C). This ideal range guarantees the plaster sets properly, avoiding cracks and uneven finishes.
Higher temperatures can cause rapid drying, leading to weaknesses, while lower temps slow the process, affecting workability.
Follow these plastering tips to achieve a smooth, durable finish: maintain a consistent temperature and avoid extreme humidity to assure a successful outcome.
Can I Use a Putty Knife for Applying Joint Compound?
You're wondering if you can use a putty knife for applying joint compound. The answer is yes, but it's not the most effective tool for the job.
You'll get better results with a specifically designed joint knife or trowel, which allows for smoother, more even joint compound application.
Master putty knife techniques for smaller areas, like filling holes, but for large-scale joint compound application, opt for the right tool to achieve a professional finish.
How Often Should I Clean My Sanding Screens?
You're wise to prioritize screen maintenance.
When it comes to sanding techniques, a clean screen is essential. You should clean your sanding screens after every 2-3 uses to prevent clogging and maintain effectiveness.
Use a stiff brush or vacuum to remove debris, and occasionally wash with soap and water. This guarantees peak performance and extends the life of your screens, saving you time and frustration in the long run.
Are All Drywall Screws Suitable for All Types of Drywall?
You're building a masterpiece, a smooth canvas of drywall, but don't let the wrong screw type ruin the picture.
Not all drywall screws are created equal, and using the wrong one can lead to a weak hold or even damage.
You need to take into account the drywall thickness when choosing your screw.
Coarse-thread screws are best for thicker drywall, while fine-thread screws work better for thinner sheets.
Make the right choice, and your drywall will be a work of art.
Can I Paint Over Joint Compound Without Sanding?
You're wondering if you can skip sanding and paint directly over joint compound. The answer is yes, but it depends on your joint compound application and painting techniques.
If you've applied a thin, smooth layer of compound and it's fully dry, you can get away with painting over it without sanding.
However, if the compound is uneven or still damp, sanding is crucial to guarantee a smooth finish.
In either case, use a primer to guarantee the best adhesion and coverage.
Conclusion
As you stand back to admire your renovated home, imagine a masterpiece canvas, where each material is a brushstroke of perfection.
The plaster mix is the foundation, the drywall the smooth canvas, and the sanding screens the subtle texture.
The taping knives are the precise lines, the finishing compounds the rich colors, and the mesh tape the hidden framework that holds it all together.
With these seven materials, your renovation is a work of art, a symphony of precision and craftsmanship.
Related Posts
-

7 Crucial Tools for a Successful Stucco Renovation
To guarantee a successful stucco renovation, you'll need a range of essential tools. First, invest in a stucco mixer ...
-

5-Step Subfloor Prep Checklist for a Smooth Renovation
You can guarantee a smooth renovation by following a 5-step subfloor prep checklist. First, assess the current subflo...
-

Why Delay Your Renovation With Poor Tool Management
You're likely unaware that poor tool management is a leading cause of renovation delays, and it's not just about havi...


