
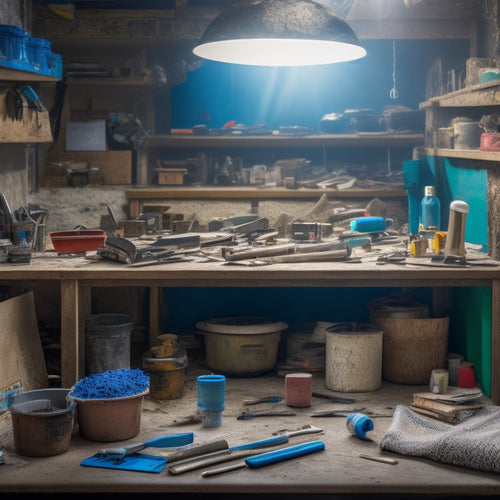
7 Best DIY Home Renovation Tool Storage Ideas
You're about to change your garage or workspace into an efficient hub for your DIY home renovation projects! Start by maximizing your garage space with overhead racks, wall-mounted shelves, and pegboards. Repurpose old furniture, like dressers and cabinets, to store tools and supplies. Invest in a pegboard toolbox, sliding storage bins, and adjustable shelves to keep everything organized. Don't forget to make use of corner spaces with carousels or turntables, and consider building a modular toolbox cart for customized storage. With these DIY tool storage ideas, you'll be well on your way to a clutter-free workspace that enhances productivity - and there's even more to uncover ahead!
Key Takeaways
- Utilize overhead racks, wall-mounted shelves, and pegboards to maximize garage space and keep tools organized and easily accessible.
- Repurpose old furniture, such as dressers and cabinets, to create unique and functional storage solutions for tools and accessories.
- Implement a pegboard toolbox or chalkboard organization system to keep tools organized and visible, with customization options for specific needs.
- Optimize corner spaces with adjustable shelves, compact tool racks, and carousels or turntables to maximize storage capacity and accessibility.
- Create a modular toolbox cart with customizable drawers and shelves to address clutter and accessibility issues in tool storage.
Utilize Unused Garage Space
Many homeowners have a wealth of untapped storage space in their garage, often cluttered with forgotten boxes and dusty memorabilia. You can reclaim this space by installing overhead racks to store infrequently used items like seasonal decorations or out-of-season clothing.
These racks are easy to install and provide a convenient way to access items without taking up precious floor space.
You can also make use of wall mounted shelves to store tools, accessories, and other essentials within easy reach. Label each shelf to guarantee you can quickly find what you need, and consider installing a pegboard for hanging tools like hammers, screwdrivers, and wrenches.
This will keep your tools organized and prevent clutter from building up. Additionally, consider installing a slatwall or modular storage system to maximize your garage's vertical space.
With a little creativity and some strategic planning, you can turn your garage into a functional and efficient storage space that makes your life easier.
Repurpose Old Furniture Pieces
Repurpose Old Furniture Pieces
Several old furniture pieces, like dressers, cabinets, and shelving units, are likely collecting dust in your attic, basement, or garage. Instead of throwing them away, consider repurposing them as tool storage solutions. This approach not only reduces waste but also adds a touch of nostalgia to your workshop.
Here are some ideas to get you started:
-
Old Dresser Storage: Remove the drawers and attach hooks, bins, or small shelves to store small tools, nuts, and bolts.
-
Vintage Cabinet Refurbishment: Refinish an old cabinet and install dividers or shelves to store larger tools, power tools, or equipment.
-
Shelving Unit Makeover: Add baskets, bins, or containers to an old shelving unit to store items like paint cans, cleaning supplies, or safety gear.
- Upcycled Cabinet Doors: Hang old cabinet doors on the wall, and attach hooks or a pegboard to store frequently used tools or accessories.
Create a Pegboard Toolbox
Now that you've breathed new life into old furniture pieces, it's time to focus on creating a pegboard toolbox that will keep your tools organized and within easy reach.
A pegboard toolbox is an essential component of any DIY home renovation project, providing a dedicated space for your tools and accessories. When designing your pegboard, consider the layout carefully to guarantee maximum tool visibility. You'll want to group similar tools together, such as hammers and screwdrivers, and reserve prime real estate for frequently used items.
Choose a pegboard design that suits your style, whether it's a simple grid or a more complex arrangement. You can customize your pegboard with hooks, bins, and holders to fit your specific needs.
Be certain to leave enough space between each tool to prevent clutter and allow for easy retrieval. By creating a pegboard toolbox, you'll be able to find what you need quickly, saving you time and frustration on your DIY projects.
With your tools organized and within reach, you'll be more productive and efficient, taking your DIY skills to the next level.
Install Sliding Storage Bins
Your toolbox's real estate is crucial, and maximizing its storage capacity is imperative to staying organized and efficient. Installing sliding storage bins is a great way to make the most of your toolbox's space. With sliding bins, you can easily access and store tools, supplies, and materials without having to dig through a cluttered toolbox.
To get started, consider the following:
-
Choose the right sliding bin materials: Opt for durable, high-quality materials that can withstand the weight and wear of your tools and supplies.
-
Measure your toolbox: Take precise measurements to confirm your sliding bins fit snugly and maximize storage capacity.
-
Select the right size bins: Choose bins that are the right size for your tools and supplies to prevent clutter and disorganization.
- Install with ease: Use a simple and secure installation method, such as a soft-close drawer slide or a ball-bearing slide, to guarantee smooth and quiet operation.
Maximize Corner Cabinet Space
When you're working with corner cabinets, it's crucial to optimize the space by considering the unique dimensions of the area.
You'll want to employ adjustable shelves that can be customized to fit your specific needs, and install sliding baskets to make the most of the often-wasted space.
Optimize Corner Dimensions
Corners often get wasted in DIY home renovation projects, but they can be optimized to maximize tool storage space. By designing your corner storage solutions with precision, you can fit more tools in a smaller area, making your workspace more efficient.
To optimize your corner dimensions, consider the following:
-
Measure carefully: Take precise measurements of your corner space to guarantee a snug fit for your storage solutions.
-
Choose compact tool racks: Look for compact tool racks that can be mounted on the wall or placed on the floor, making the most of your corner space.
-
Install corner shelving solutions: Corner shelving solutions can provide additional storage for smaller tools and accessories, keeping them organized and within reach.
- Utilize carousels or turntables: Consider installing carousels or turntables in your corner space, allowing you to easily access tools and supplies without having to dig through clutter.
Utilize Adjustable Shelves
By incorporating adjustable shelves into your corner cabinet design, you can access the full potential of this often-underutilized space. Adjustable shelves allow you to customize the shelf height to fit your specific tool storage needs. This flexibility is especially useful in corner cabinets, where fixed shelves can leave wasted vertical space.
You can choose from various shelf materials, such as wood, metal, or glass, to match your cabinet's aesthetic. Adjustable shelves often come with slide-out or fold-down features, making it easy to access tools stored in the back of the cabinet.
This design also enables you to store items of varying sizes, from small hand tools to larger power tools. When selecting adjustable shelves, consider the weight capacity and durability of the shelves.
You'll also want to verify the shelves are easy to adjust and install. With adjustable shelves, you can maximize your corner cabinet space, keeping your tools organized and within reach. This efficient storage solution will make your DIY projects more enjoyable and less frustrating.
Install Sliding Baskets
To further optimize your corner cabinet space, consider installing sliding baskets that can hold an array of tools and accessories. This will enable you to make the most of the often-wasted space in corners, keeping your tools organized and within easy reach.
When it comes to basket installation, you'll want to guarantee that you choose baskets with smooth sliding mechanisms that won't jam or get stuck.
Here are some tips to keep in mind:
- Measure your corner cabinet space carefully to choose baskets that fit perfectly.
- Choose baskets with sturdy handles that can hold the weight of your tools.
- Consider baskets with dividers or compartments to keep similar tools organized.
- Install the baskets at a comfortable height to avoid straining your back when reaching for tools.
Hang Tools on a Chalkboard
You can create a chalkboard organization system that's both functional and visually appealing.
By adding tool labels and signs, you'll be able to quickly identify where each tool is stored, making it easy to grab what you need in a flash.
With an erasable tool grid, you can rearrange your tools as needed and make adjustments to your storage system on the fly.
Chalkboard Organization System
A cluttered workbench can hinder your productivity and make it difficult to find the right tool when you need it. A chalkboard organization system is an innovative solution to keep your tools within easy reach while maintaining a clean workspace. By hanging your tools on a chalkboard, you can create a visually appealing and functional storage system.
To get started, choose a chalkboard color that complements your workshop's aesthetic. Next, consider the chalkboard's maintenance needs, as regular cleaning will guarantee the board remains legible and functional.
Here are some benefits of a chalkboard organization system:
-
Easy tool identification: Write the tool's name next to its hook to guarantee you can quickly identify the tool you need.
-
Customizable layout: Arrange the hooks and tools according to your workflow and preferences.
-
Space-saving design: Maximize your workshop's vertical space by hanging tools on the chalkboard.
- Aesthetically pleasing: The chalkboard's matte finish and organized layout create a visually appealing workspace.
Tool Labels and Signs
By the time you've set up your chalkboard organization system, it's essential to add the finishing touches with tool labels and signs that hang alongside your tools. This is where labeling techniques come into play, enhancing your tool organization and making it easy to identify what's stored where.
You can use chalkboard labels or whiteboard labels, depending on your preference, to write the tool's name or a brief description. For a more rustic look, you can use wooden or metal signs with a distressed finish.
When creating your labels and signs, consider the size and font style. You want them to be easy to read, even from a distance. You can also add icons or images to help you quickly identify the tool. For instance, an illustration of a hammer next to the label "Hammers" can be very helpful.
Erasable Tool Grid
The workshop's centerpiece, a chalkboard, evolves into a functional erasable tool grid where tools hang neatly, awaiting their next task.
This innovative storage solution keeps your tools organized, visible, and within reach. With erasable markers, you can draw grid patterns to categorize and separate your tools, making it easy to find what you need quickly.
To create an erasable tool grid:
-
Choose a chalkboard: Select a chalkboard that fits your workshop's style and size. You can opt for a traditional green chalkboard or a modern black one.
-
Design your grid: Use erasable markers to draw a grid pattern on the chalkboard. You can create squares, rectangles, or any shape that suits your tool collection.
-
Hang your tools: Use hooks, magnets, or adhesive strips to hang your tools on the chalkboard, following the grid pattern you created.
- Erase and rearrange: As your tool collection changes, simply erase the old grid and redraw a new one to accommodate your updated tools.
Build a Modular Toolbox Cart
You're probably tired of digging through cluttered workbenches or scouring the garage for that one specific tool. A modular toolbox cart can help you stay organized and focused on your DIY home renovation projects. This cart's modular design allows you to customize its layout to fit your specific tool storage needs.
When choosing toolbox materials, assess durability and ease of cleaning. Here are some options to evaluate:
| Material | Durability | Ease of Cleaning |
|---|---|---|
| Wood | Medium | Medium |
| Metal | High | High |
| Plastic | Low | High |
| Hybrid | High | High |
You can build your cart using a hybrid of materials, such as a metal frame with wooden or plastic drawers. This will provide a sturdy structure while also offering flexibility regarding design and functionality. With a modular toolbox cart, you can easily add or remove drawers, shelves, or compartments as your tool collection grows or changes. This will help you stay organized and focused on your DIY projects.
Frequently Asked Questions
How Do I Organize Small Tools Like Screws and Nails Effectively?
You'll effectively organize small tools like screws and nails by using a screw organization system with labeled compartments and a nail storage container with dividers, keeping them visible, accessible, and preventing mix-ups.
Can I Use Adhesive Hooks on Textured or Uneven Surfaces?
Like a skilled puzzle solver, you're tackling tool storage. Now, about those adhesive hooks: they're not ideal for textured or uneven surfaces, as their grip is compromised. Instead, opt for specialized adhesive hook brands designed for rough surfaces or use alternative solutions like 3M command strips or adhesive putty.
Are There Any DIY Storage Ideas for Cordless Tool Batteries?
You can create a DIY battery management system using a wooden or plastic organizer with individual compartments for each battery, ensuring easy access and tracking during battery charging, and keeping them organized and protected.
How Do I Keep My Tool Storage Area Dust-Free and Clean?
You'll want to regularly sweep and vacuum your tool storage area to prevent dust buildup, then implement storage solutions like sealed containers and tool cleaning stations to keep your tools dust-free and organized.
Can I Repurpose Old Pallets for Tool Storage Without Refinishing?
You can repurpose old pallets for tool storage without refinishing, embracing their rustic charm. Simply disassemble, clean, and reassemble the pallets into unique pallet projects, like shelving units or crates, perfect for rustic storage solutions that add character to your workspace.
Conclusion
You've tackled the DIY home renovation tool storage ideas, and now your garage is humming like a well-oiled machine! With every tool in its place, you're ready to tackle the next project with ease. Your newly organized space is a orchestra of efficiency, where every item sings in harmony. You've struck the right chord, and your workflow is now in perfect tune.
Related Posts
-

7 Best Home Renovation Project Checklists With Timelines
You're about to initiate a home renovation project, and establishing a clear plan with timelines is vital to staying ...
-

5 Best Home Renovation Project Timeline Checklists
You're looking for a clear understanding of the timeline for your home renovation project. A good place to start is w...
-
Get Discounted Plastering Tool Sets for DIY Renovations
You can find discounted plastering tool sets online, at local hardware stores, and thrift stores, offering a range of...


