7 Best DIY Home Renovation Checklist Items
Share
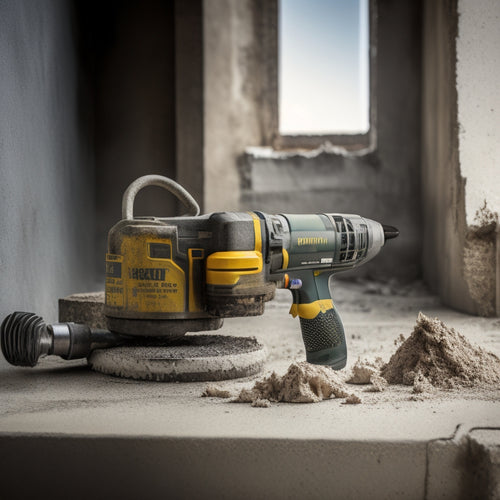
As you begin your DIY home renovation project, it's essential to have the right tools and essentials to guarantee a successful outcome. You'll need power tools like a cordless drill, sawzall, and rotary hammer for demo and construction tasks. Measuring and marking tools, such as a level, digital measuring tape, and calipers, will guarantee accurate measurements. Don't forget safety gear like safety glasses, dust masks, and gloves to protect yourself from hazards. Additionally, you'll require fastening and joining essentials, flooring and tiling tools, and demolition and debris removal tools to complete the job. With these items checked off, you'll be well-prepared to tackle your renovation project and uncover the secrets to a seamless transformation.
Key Takeaways
• Invest in essential power tools like a cordless drill, Sawzall, circular saw, and rotary hammer for various renovation tasks.
• Ensure accurate measurements with leveling and plumb tools, digital measuring tapes, laser distance measurers, and calipers.
• Prepare for flooring and tiling tasks with a tile cutter, wet saw, notched trowel, rubber mallet, and grout float.
• Prioritize safety with protective gear like safety glasses, dust masks, work gloves, first-aid kits, and hard hats.
• Plan for demolition and debris removal with demolition hammers, pry bars, heavy-duty debris bags, and compliance with local regulations.
Essential Power Tools for Renovation
When tackling a DIY home renovation project, you'll need to invest in a set of essential power tools to get the job done efficiently and effectively.
A cordless drill is a must-have for drilling holes and driving screws in various materials. Look for one with high torque and adjustable speed settings to tackle tasks ranging from hanging drywall to mixing concrete.
Another versatile tool is a sawzall, which offers unmatched versatility for demo and removal tasks. Its reciprocating action and variety of blades make it perfect for cutting through pipes, metal studs, and wood.
Additionally, consider a circular saw for making precise cross-cuts and rip cuts in lumber. A jigsaw or reciprocating saw will come in handy for curved cuts and intricate work.
Don't forget a rotary hammer for heavy-duty drilling and chiseling. With these power tools in your arsenal, you'll be well-equipped to tackle a wide range of renovation tasks.
Remember to choose tools with high-quality batteries, durable construction, and ergonomic design to guarantee peak performance and comfort during extended use.
Safety Gear for Home Projects
You'll need to invest in personal protective equipment (PPE) to safeguard yourself against potential hazards and risks associated with DIY home renovation projects. Don't underestimate the importance of safety gear - it's crucial to prevent injuries and guarantee a successful project.
Start with the basics: safety glasses or goggles to protect your eyes from debris, dust, and chemicals. A dust mask or respirator will shield you from airborne particles and hazardous fumes. Invest in a good pair of gloves to provide grip, protection, and comfort while working with power tools and handling materials.
Implement safety protocols to minimize risks. Confirm a first-aid kit is easily accessible and stocked with essentials like bandages, antiseptic wipes, and pain relievers. Create a safe working environment by clearing clutter, securing loose cords, and maintaining good lighting.
Wear a hard hat and steel-toed boots when working at heights or with heavy materials. Finally, stay alert and focused - fatigue can be a major contributor to accidents.
Measuring and Marking Tools
When tackling a DIY home renovation, you'll need to guarantee accuracy and precision in your measurements and markings.
To achieve this, you'll require a range of measuring and marking tools that can help you get the job done correctly.
You'll want to invest in a level and plumb tools, accurate measuring devices, and a way to clearly mark surfaces, which we'll explore in more detail below.
Level and Plumb Tools
Measure your space accurately with an extensive set of level and plumb tools, which are essential for ensuring that surfaces, walls, and installations are properly aligned and positioned during your DIY home renovation project.
As you commence on this project, you'll need to master leveling techniques to guarantee that your floors, countertops, and shelves are perfectly horizontal. A plumb line will help you achieve this by providing a precise vertical reference point. With a reliable level, you can detect even the slightest deviations from the horizontal or vertical plane.
You'll need various level and plumb tools to tackle different tasks. A bubble level, for instance, is ideal for checking the levelness of surfaces, while a laser level is perfect for projecting a level line over long distances. A plumb bob will help you create a precise vertical reference point, ensuring that your walls, cabinets, and other installations are properly aligned.
Accurate Measuring Devices
Equipping yourself with accurate measuring devices is essential to ensuring that every cut, hole, and assembly is precise, thereby saving you time, materials, and frustration in your DIY home renovation project.
You'll want to invest in precision tools that provide reliable measurements, every time. A digital measuring tape is a must-have, as it allows for quick and accurate readings. Look for one with a fractional display and a sturdy design that can withstand the rigors of your project.
In addition to a digital measuring tape, consider adding a laser distance measurer to your toolkit. This handy device uses laser technology to calculate distances with precision, making it ideal for larger spaces or complex layouts.
You'll also want to pick up a set of calipers, which enable you to take precise measurements of small objects or tight spaces. By having these accurate measuring devices at your disposal, you'll be able to tackle your DIY project with confidence, knowing that your measurements are spot-on.
With precision tools like these, you'll be able to achieve professional-grade results without breaking the bank.
Marking Surfaces Clearly
With precise measurements in hand, you'll need to accurately mark surfaces to confirm that your cuts, holes, and assemblies align perfectly. This step is essential in guaranteeing that your DIY project turns out as planned.
To achieve accurate markings, you'll need to employ effective marking techniques. Start by preparing the surface, cleaning it of dirt, grime, or old adhesives that may interfere with your markings.
Next, choose the right marking tool for the job, such as a pencil, marker, or chalk line. For precise markings, use a straightedge or combination square to guide your tool.
When marking curved or irregular surfaces, use a flexible curve or template to confirm accuracy. Remember to mark lightly, as heavy marks can be difficult to erase and may affect the finish of your project.
Fastening and Joining Essentials
As you prepare for your DIY home renovation, you'll need to stock up on fastening and joining essentials, including an assortment of screws, nails, and adhesives that will help you securely assemble and attach various components.
To master various fastening techniques, you'll require a selection of screws, such as wood screws, drywall screws, and self-tapping screws. Don't forget about nails, including finish nails, common nails, and roofing nails. Adhesives like wood glue, hot glue, and epoxy will also be essential for bonding materials together.
When it comes to joining methods, you'll need to take into account the type of joint you're creating. For example, you may use mortise and tenon joints for furniture making or tongue and groove joints for flooring. Other joining methods include dado joints, dovetail joints, and butt joints.
Having the right fastening and joining essentials on hand will guarantee that your DIY project turns out strong and durable. Make sure to research the best fastening techniques and joining methods for your specific project to achieve professional-looking results.
Painting and Decorating Must-Haves
When it comes to painting and decorating, you'll need to contemplate the overall aesthetic you want to achieve.
You'll want to choose a wall color that sets the tone for your space, and then balance it with a complementary color scheme to create visual harmony.
Wall Color Options
What kind of ambiance do you want to create in your newly renovated space, and which wall color options will help you achieve it?
When selecting wall colors, consider the mood and atmosphere you want to evoke. Modern neutrals like soft grays, creamy whites, and taupe tones can create a calming and serene environment. On the other hand, bold accents like deep blues, emerald greens, or vibrant yellows can add energy and excitement to a room.
To narrow down your options, think about the natural light in the space, the color of your furniture and decor, and the style you're aiming for. If you're going for a minimalist look, a single neutral color might be sufficient. However, if you want to add some visual interest, consider a bold accent wall or a subtle ombre effect.
Remember to test the colors with different lighting conditions and against various materials to guarantee the final result aligns with your vision.
With a clear understanding of your desired ambiance and a thoughtful approach to color selection, you'll be able to choose the perfect wall color options to elevate your newly renovated space.
Color Scheme Balance
You'll need to strike a balance between complementary and contrasting colors to create a harmonious color scheme that ties together your newly renovated space. Achieving color harmony is vital, as it can make or break the overall aesthetic of your home.
To guarantee a cohesive look, consider the 60-30-10 rule: 60% of the room should be a dominant color, 30% a secondary color, and 10% an accent color. This ratio will create a visually appealing balance.
Here are some essential tips to keep in mind:
-
Limit your palette: Stick to 3-5 core colors to avoid visual overload.
-
Choose accent colors wisely: Use bold, contrasting hues to draw attention to specific design elements, like a statement wall or decorative accessories.
-
Consider the natural light: Adjust your color scheme according to the amount of natural light your space receives, as this can greatly impact the overall ambiance.
Flooring and Tiling Tools Required
Typically, a flooring and tiling project requires a range of specialized tools to guarantee accurate cuts, secure installations, and a professional finish. You'll need to invest in the right tools to work efficiently with various flooring materials and master different tiling techniques.
Here's a list of essential tools you'll need to get started:
| Tool | Purpose |
|---|---|
| Tile cutter | Cuts tiles accurately to fit around corners and edges |
| Wet saw | Cuts through thick flooring materials like porcelain and ceramic |
| Notched trowel | Applies adhesive for tile installation with precision |
| Rubber mallet | Secures tiles in place without damaging them |
| Grout float | Spreads grout evenly between tiles for a clean finish |
| Level | Guarantees floors and surfaces are level and plumb |
Remember to choose tools that suit your project's specific requirements and your level of expertise. With the right tools, you'll be able to achieve a professional-looking finish that enhances the overall aesthetic of your home.
Demolition and Debris Removal Tools
Before demolishing existing flooring or structures, gather the necessary tools to efficiently dismantle and remove debris, ensuring a safe and efficient renovation process. You'll need the right equipment to execute demolition techniques effectively and dispose of debris responsibly.
Here are some essential tools to add to your arsenal:
-
Demolition hammer: A heavy-duty hammer designed for tearing down walls, floors, and other structures.
-
Pry bars: Leverage tools used to pry apart flooring, baseboards, and other materials.
-
Debris bags and containers: Heavy-duty bags and containers for collecting and disposing of debris, making cleanup efficient and organized.
Remember to always wear protective gear, including gloves, safety glasses, and a dust mask, when engaging in demolition activities.
It's also vital to check local regulations regarding debris disposal and plan accordingly.
Frequently Asked Questions
How Do I Obtain Necessary Permits for My Renovation Project?
When tackling your renovation project, you'll need to obtain necessary permits to avoid costly delays and fines.
Start by researching local renovation regulations to determine which permits you require.
Next, gather required documents and submit a permit application to your local building authority.
Be prepared to provide detailed project plans and specifications.
Make certain you understand the review process and timeline to avoid delays.
Can I Reuse Old Materials to Reduce Waste and Costs?
You're considering repurposing materials from your existing space to reduce waste and costs.
This sustainability practice isn't only eco-friendly but also budget-smart.
You can reuse items like doors, windows, and even flooring, as long as they're in good condition.
Assess what can be salvaged, and get creative with repurposing materials.
Just verify they meet building codes and regulations.
With some elbow grease, you'll reduce waste and save money.
What Is the Ideal Timeline for a DIY Home Renovation?
You're revving up for a DIY home renovation, but timing is everything.
Think of it like a well-oiled machine - each renovation phase needs to fire on all cylinders to stay on track.
Create a realistic timeline by breaking down your project into manageable chunks, allocating time for each task, and padding for contingencies.
Effective budget planning will be your GPS, guiding you through the twists and turns of your renovation journey.
How Do I Protect My Valuables During the Renovation Process?
When renovating, you'll need to safeguard your valuables from dust, damage, and theft.
First, identify items that require special care, like artwork or electronics.
Then, consider valuable storage options, such as climate-controlled units or on-site containers.
Don't forget to review your renovation insurance policy to guarantee it covers your belongings during the process.
Should I Hire a Professional for Complex Renovation Tasks?
You're standing at a crossroads, wondering if you should tackle complex renovation tasks solo or call in the pros.
Take a deep breath and weigh the cost vs benefit. Honestly assess your skills—can you really handle that tricky electrical wiring or intricate tilework?
Be realistic, and don't risk your safety or the project's success. If the stakes are high, it's wise to hire a professional, even if it means shelling out extra cash.
Conclusion
As you stand on the threshold of your DIY home renovation journey, remember that a well-stocked toolbox is your golden ticket to transforming your space into a masterpiece.
With these 7 essential checklist items, you'll be armed with the precision and power to tackle any project that comes your way.
From the first swing of your hammer to the final coat of paint, you'll be building a foundation for success, one tool at a time.
Related Posts
-

Top Drill for Concrete Wall Renovation
When choosing the top drill for your concrete wall renovation, you'll want to prioritize key features like drill powe...
-

What to Inspect When Buying Used Renovation Tools
When buying used renovation tools, you need to scrutinize every detail to avoid costly mistakes. Inspect for rust and...
-

Trowel Tool Cost for DIY Home Renovation Projects
When it comes to your DIY home renovation project, you'll need to budget for a variety of trowel tools, including stu...


