
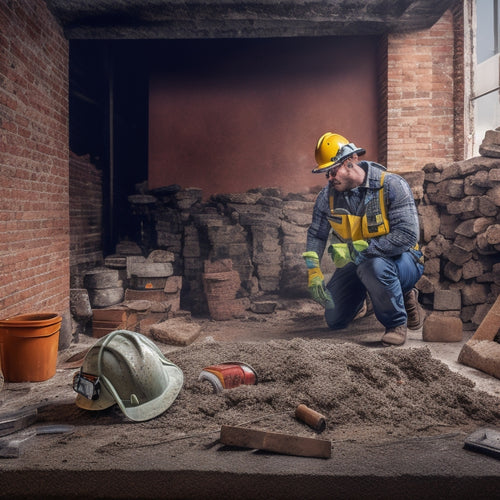
5 Must-Have Tools for Planter Renovation Success
You'll need five must-have tools to guarantee planter renovation success. First, invest in essential cutting tools like high-quality pruning saws and bypass loppers for precise cuts. Safety gear, including goggles, steel-toed boots, and gloves, will protect you from hazards. Next, rely on measuring and marking tools like tape measures and combination squares for accurate readings. Heavy-duty demolition equipment, such as pry bars and sledgehammers, will help you efficiently separate materials. Finally, finishing touches require smoothing tools like high-grit sandpaper and putty knives to achieve a smooth surface. With these tools, you'll be well-equipped to tackle your planter renovation project, and a closer look at each tool will reveal even more benefits.
Key Takeaways
• High-quality pruning saws and loppers are essential for precise cuts and maneuverability in tight spaces during planter renovation.
• Safety goggles, steel-toed boots, and gloves are must-haves to protect yourself from hazards and debris during the renovation process.
• A reliable tape measure, durable marking pencils, and a level ensure accurate measurements and markings for a successful renovation.
• Heavy-duty demolition equipment like pry bars and sledgehammers are necessary for safely and efficiently separating materials and demolishing old planters.
• Smoothing tools like high-grit sandpaper and putty knives are critical for achieving a smooth, even surface and preparing it for new materials.
Essential Cutting Tools for Success
When tackling a planter renovation, you'll need to arm yourself with the right cutting tools to efficiently demolish and disassemble the existing structure, allowing you to start from scratch. A high-quality pruning saw is essential for making precise cuts and maneuvering tight spaces. Invest in a durable, rust-resistant model with a comfortable grip, and don't forget to maintain it regularly to prevent dulling.
You'll also need a reliable pair of pruning loppers for thicker branches and stems. Opt for a bypass-style lopper, which makes clean cuts without crushing plant material.
Mastering pruning techniques will help you make the most of your tools. Practice cutting at a 45-degree angle, and always cut outside the branch collar to prevent damage.
Regular tool maintenance is also vital to extend the lifespan of your cutting tools. Clean and lubricate your tools after each use, and store them in a dry place to prevent rust.
Safety Gear for Protective Measures
Protecting yourself from potential hazards is crucial, and outfitting yourself with the right safety gear is essential to prevent injuries and guarantee a successful planter renovation.
When working with power tools, sharp objects, and heavy materials, you're exposed to risks that can be mitigated with proper protection.
Start by investing in a good pair of safety goggles that provide impact resistance and optical clarity. These will shield your eyes from debris, dust, and other hazards.
Next, make sure you're wearing steel-toed boots that meet industry safety standards. These will protect your feet from heavy objects, sharp edges, and other hazards that can cause serious injury.
Don't forget to wear long sleeves, gloves, and a dust mask to prevent skin and respiratory problems.
Additionally, consider wearing a hard hat and ear protection if you're working with heavy machinery or in noisy environments.
Measuring and Marking Tools Needed
Accurate measurements and markings are critical to a successful planter renovation, so you'll need to equip yourself with a range of precision tools to get the job done right. As you begin measuring your planter's dimensions, you'll rely on a reliable tape measure to guarantee accurate readings. Opt for a high-quality tape measure with a sturdy blade and clear markings to simplify the process.
When it comes to marking your measurements, a set of durable marking pencils will be your go-to tool. These pencils should be able to leave clear, smudge-free marks on a variety of surfaces, from wood to metal.
In addition to your tape measure and marking pencils, consider investing in a combination square to guarantee precise angle measurements. A level will also come in handy to ensure your planter's surfaces are perfectly horizontal or vertical.
With these essential measuring and marking tools at your disposal, you'll be able to tackle your planter renovation with confidence, knowing that your measurements are accurate and your markings are precise.
Heavy-Duty Demolition Equipment Required
You'll need to break out the heavy-duty demolition equipment to dismantle the old planter, and a pry bar is a must-have for safely and efficiently separating materials like wood and metal. A sledgehammer is another essential tool for demolishing concrete or brick planters. When using these demolition techniques, be certain to wear protective gear, including gloves, safety glasses, and a dust mask.
To guarantee your equipment lasts, regular maintenance is vital. Clean and store your tools properly after each use, and perform routine checks for wear and tear. For example, inspect your pry bar for bent or damaged tips, and replace them as needed. Additionally, keep your sledgehammer's handle clean and dry to prevent damage from moisture.
Proper equipment maintenance won't only extend the lifespan of your tools but also assure a safer working environment. By having the right heavy-duty demolition equipment and following best practices, you'll be well-equipped to tackle even the toughest planter renovation projects. Remember to always follow safety guidelines and manufacturer instructions when working with heavy-duty demolition equipment.
Finishing Touches With Smoothing Tools
With the old planter dismantled, it's time to turn your attention to smoothing out the rough edges and surfaces, and that's where a set of high-grit sandpaper and a putty knife come into play. These smoothing tools are essential for achieving a smooth, even surface, which is critical for a successful planter renovation.
Start by using your putty knife to scrape off any remaining old adhesive, dirt, or debris from the surface. Next, switch to your high-grit sandpaper and begin sanding the surface in a circular motion, working your way up to higher grits for a finer finish.
As you sand, pay close attention to any areas with imperfections or rough spots, using your putty knife to fill in any gaps or holes. This surface preparation is key to ensuring a strong bond between the old surface and any new materials you'll be applying.
Frequently Asked Questions
How Do I Dispose of Old Planter Materials and Debris Eco-Friendly?
When disposing of old planter materials and debris, you'll want to contemplate eco-friendly options.
Start by separating recyclable materials like plastic, metal, and glass from organic waste.
Compost any plant-based debris, like dead plants or soil, to create nutrient-rich soil for future planters.
For non-organic materials, explore local recycling centers that accept construction waste.
Can I Renovate a Planter During Extreme Weather Conditions?
When deciding to renovate a planter, you'll want to take into account the extreme weather conditions in your area.
Will the materials you've chosen be durable enough to withstand heavy rain, scorching sun, or freezing temperatures?
You'll need to select materials that can handle the elements, ensuring your planter remains stable and secure.
Research the specific needs of your region and choose materials that fit those requirements, so your renovated planter can thrive in any weather.
What Is the Ideal Planter Renovation Project Timeline?
As you begin your planter renovation journey, you're probably wondering what the ideal project timeline looks like.
Well, let's break it down: think of your renovation as a recipe, with each phase building upon the last.
Typically, you'll want to allow 2-3 weeks for planning and design,
4-6 weeks for material sourcing and preparation,
and 6-8 weeks for the actual renovation.
How Do I Prevent Pest Infestation During Planter Renovation?
When renovating your planter, you'll want to prioritize pest control to avoid infestations.
Start by inspecting your planter for any signs of pests, then treat the soil and plants accordingly.
Regular planter maintenance, such as pruning and watering correctly, will also help prevent infestations.
Additionally, consider using physical barriers, like fine mesh or copper tape, to deter pests.
Can I DIY Planter Renovation or Do I Need Professional Help?
You're wondering if you can DIY planter renovation or if you need professional help.
Well, it depends on the scope of your project. If you're comfortable with DIY tips like repotting and pruning, you can tackle smaller renovations on your own.
However, if you're dealing with complex issues like structural damage or pest infestations, it's best to seek professional services to guarantee a successful renovation that meets your vision.
Conclusion
With these 5 must-have tools in your arsenal, you'll be well-equipped to tackle even the most challenging planter renovation projects.
Remember, a successful renovation isn't just about the end result, but also about the journey.
Take, for example, the story of Sarah, who transformed her backyard eyesore into a thriving oasis with the right tools and a little determination.
Don't let your planter renovation dreams wither away - get the right tools and watch your vision come to life.
Related Posts
-

Create a Home Renovation Project Timeline in Excel
You can create a detailed home renovation project timeline in Excel by setting up a tailored template with separate w...
-
7 Must-Have Safety Gears for Brick Wall Renovation
When renovating a brick wall, you'll face a multitude of hazards, making it essential to wear and use the right safet...
-

7 Smart Tool Organization Tips for Small Renovations
As you tackle your small renovation, you're likely wasting precious time searching for misplaced tools. To enhance ef...


