
5 Essential Tools for Garden Block Renovation
You'll need a diamond blade saw and masonry saw for precision cutting, a block splitter for dividing large blocks, and a carbide-tipped chisel set for intricate shaping. A sturdy workbench provides a stable surface for tools and materials, while a complex block carving technique enables detailed designs. Additionally, a level tool guarantees even ground, and a spirit level and string line help maintain straight lines and correct angles during block laying. With these essential tools in your arsenal, you'll be well on your way to creating a beautifully renovated garden - but there's more to learn to achieve a truly professional-looking result.
Key Takeaways
• A diamond blade saw or masonry saw is essential for making clean cuts through tough materials in garden block renovation.
• A block splitter is necessary for efficiently dividing large blocks into manageable pieces for the project.
• A carbide-tipped chisel set allows for precise removal of small amounts of material for intricate shaping and design.
• A sturdy workbench provides a stable surface for tools and materials during cutting and shaping tasks, ensuring accuracy and safety.
• A spirit level and string line are crucial for ensuring straight lines and correct angles during block laying and alignment.
Block Cutting and Shaping Tools
You'll need a robust set of block cutting and shaping tools to precisely slice through dense materials and craft intricate designs, as they form the backbone of your garden renovation's hardscaping endeavors. These tools will enable you to execute complex block carving techniques, revealing the full potential of your design vision.
Invest in precision cutting tools, such as a diamond blade saw or a masonry saw, to make clean cuts through even the toughest materials like concrete, stone, or brick. A high-quality block splitter will also be essential for efficiently dividing large blocks into manageable pieces.
For more intricate shaping, a carbide-tipped chisel set will allow you to remove small amounts of material with precision and control.
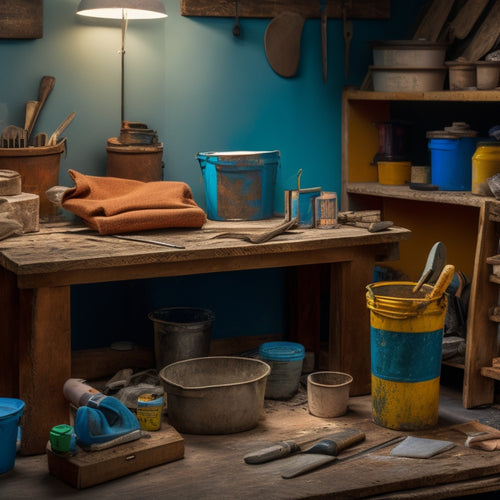
Don't forget a sturdy workbench or cutting table to provide a stable surface for your tools and materials.
With these tools at your disposal, you'll be well-equipped to tackle even the most demanding block cutting and shaping tasks, bringing your garden renovation design to life with precision and accuracy.
Soil Preparation and Leveling
With your hardscaping elements precisely cut and shaped, it's time to turn your attention to the foundation of your garden renovation - the soil - and prepare it for the new landscape features by breaking up compacted areas and removing debris.
You'll need to evaluate the soil's condition and identify any potential issues that could affect drainage or plant growth. Conduct a soil test to determine the pH level, nutrient content, and soil type, which will help you choose the right plants and amendments for your garden.
Next, assess the site's drainage by observing how water flows across the surface. Look for low-lying areas where water may collect and plan to install drainage solutions, such as French drains or swales, to redirect water away from your garden features.
Use a leveling tool to guarantee the ground is even and compact the soil to create a stable base for your hardscaping elements.
Mortar Mixing and Application
Your mortar mixing and application skills will be put to the test as you combine cement, sand, and water in precise proportions to create a strong, durable bond between your hardscaping elements.
You'll need to choose the right mortar type for your project, whether it's a general-purpose mix or a specialized formula for high-traffic areas or extreme weather conditions.
When it comes to mixing techniques, you'll want to follow a consistent ratio of cement to sand to water and avoid over-mixing, which can lead to a weak bond.
Use a mixing bucket with a sturdy handle and a mixing stick or trowel to combine the ingredients. Start with a small amount of water and gradually add more as needed, mixing in a circular motion to avoid creating air pockets.
You'll know the mix is right when it reaches a workable consistency, similar to thick toothpaste.
Now, it's time to apply the mortar to your hardscaping elements, using a level and a spirit level to confirm proper alignment.
With the right mortar and application techniques, you'll achieve a professional-looking finish that will withstand the elements and last for years to come.
Block Laying and Alignment
Five essential blocks into place, guaranteeing a level foundation, and you're ready to begin the block laying process.
Now it's time to focus on block laying techniques and alignment strategies. You'll need to use a spirit level and a string line to maintain a straight line and guarantee blocks are laid to the correct angle.
As you lay each block, use a rubber mallet to tap it gently into place, checking the level and alignment frequently. To achieve a consistent joint width, use a joint spacer or a small piece of cardboard as a guide.
For more complex layouts, consider using a laser level to project a level line or a grid pattern onto the ground. This will help you maintain accuracy and precision as you lay the blocks.
Remember to work methodically, laying blocks in a staggered pattern to guarantee maximum strength and stability.
Finishing and Sealant Tools
Two essential finishing tools in your arsenal are a pointing trowel and a jointing tool, which you'll use to apply and finish sealants between blocks.
The pointing trowel is ideal for spreading and smoothing sealants in tight spaces, ensuring a clean and even finish. The jointing tool, on the other hand, is used to remove excess sealant and create a neat, flush joint.
When applying sealants, it's vital to use the correct finishing techniques to achieve a professional-looking result. Start by applying a small amount of sealant to the joint, then use the pointing trowel to spread it evenly.
Next, use the jointing tool to remove excess sealant and create a smooth finish. For larger joints, you may need to use a sealant gun to apply the sealant, followed by the pointing trowel and jointing tool to finish the joint.
Frequently Asked Questions
How Do I Choose the Right Type of Block for My Garden Renovation?
When choosing the right block for your garden renovation, you'll want to contemplate two key factors: block material types and aesthetic considerations.
You'll need to decide between concrete, clay, or natural stone blocks, each with its own durability and maintenance requirements.
Think about the color, texture, and pattern you want to achieve, as well as how the blocks will complement your garden's overall style and theme.
Can I Reuse Old Blocks From My Existing Garden Wall?
Did you know that 75% of homeowners reuse materials from their existing garden walls during renovations?
You're not alone in considering reusing old blocks from your existing garden wall! While it's possible, it's essential to assess their condition first.
If they're still in good shape, you can apply block restoration techniques to give them a fresh look. This can also spark wall design inspiration, as you'll be working with existing materials.
Inspect each block carefully, and don't hesitate to replace any that are damaged or worn out.
What Safety Gear Is Essential for a Garden Block Renovation Project?
When tackling a garden block renovation project, you'll need to prioritize your safety above all else.
You'll be working with heavy materials and power tools, so it's essential to wear the right gear.
First, grab your safety goggles to protect those peepers from flying debris.
Then, slip on your knee pads to cushion your joints from rough landings and extended kneeling.
With these essentials in place, you'll be ready to tackle the job with confidence and focus.
How Do I Ensure Proper Drainage in My Newly Renovated Garden?
You'll want to assess your soil moisture levels to determine the best drainage solutions for your garden.
Start by observing how water flows through your soil - does it pool or absorb quickly?
Then, identify areas where water tends to collect.
Consider installing French drains, rain gardens, or permeable pavers to redirect excess water.
Can I Complete a Garden Block Renovation Project on My Own?
As you stand before your garden, a blank canvas awaiting transformation, you wonder: can I really do this on my own?
The answer is yes, but it'll require meticulous planning and execution. Treat your DIY renovation like a puzzle, breaking it down into manageable tasks.
Create a project timeline, prioritizing tasks and allocating realistic deadlines. With a clear plan and dedication, you'll be digging, building, and thriving in no time.
Conclusion
As you stand back to admire your newly renovated garden block, remember that a staggering 70% of homeowners cite outdoor living as a top priority.
With the right tools, you've transformed a once-neglected space into a tranquil oasis. From cutting and shaping blocks to applying the perfect sealant, these essential tools have helped you bring your vision to life.
The result? A stunning outdoor area that's perfect for relaxation and entertainment.
Related Posts
-

Create a Home Renovation Project Timeline in Excel
You can create a detailed home renovation project timeline in Excel by setting up a tailored template with separate w...
-

7 Best Home Renovation Project Checklists With Timelines
You're about to initiate a home renovation project, and establishing a clear plan with timelines is vital to staying ...
-
DIY Plastering Supply Checklist for Home Renovation
To tackle a DIY plastering project for your home renovation, you'll need a solid checklist of supplies. Start with es...
