
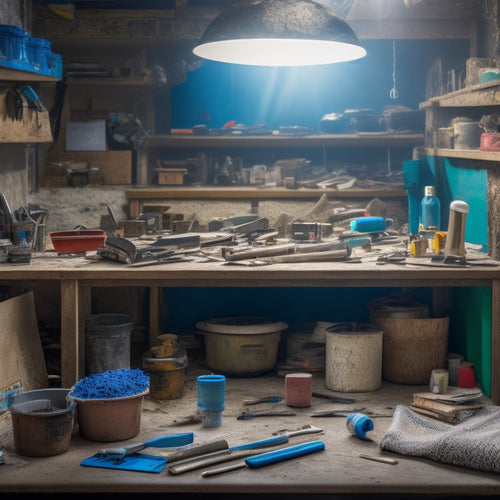
5 Best Plastering Tools for Home Renovation
You'll need the right tools to achieve a smooth finish in your home renovation project. A hawk is essential for carrying and applying plaster, while a putty knife and scraper help remove old plaster and excess material. A trowel is versatile, used for applying, spreading, and smoothing plaster, with various sizes and types available for specific tasks. Additionally, an edger and joint knife guarantee seamless finishes on edges and corners. To further master the art of plastering, familiarize yourself with specialized tools, such as offset knives and sanding blocks, and discover the benefits of high-quality mixing and applying tools.
Key Takeaways
- A high-quality trowel is essential for applying and smoothing plaster, available in various sizes and types.
- A hawk is necessary for holding and carrying plaster for efficient application, especially in large renovation projects.
- A putty knife or scraper is vital for removing old plaster and excess material from surfaces before applying new plaster.
- A finishing trowel or sanding block is crucial for smoothing and finishing large plaster areas to achieve a seamless look.
- A mixing bucket and plaster mixer are important for efficiently mixing and applying consistent plaster, especially in large home renovations.
Essential Tools for Beginners
When it comes to plastering, having the right tools for the job is vital, especially for beginners. You'll need a variety of tools to complete different plastering techniques, from applying and spreading to scraping and smoothing.
A hawk is a must-have for holding and carrying plaster, allowing you to work efficiently and accurately. A trowel is used for applying and spreading plaster, and it's important to choose the right size and type for your specific project. A putty knife is handy for scraping and removing old plaster, while a scraper is used for removing excess plaster from surfaces.
To guarantee your tools last, regular maintenance is significant. Clean your tools thoroughly after each use, and store them in a dry place to prevent rust and damage. Apply a thin layer of oil to metal tools to prevent corrosion.
You should also inspect your tools regularly for damage or wear and tear, replacing them as needed. By investing in the right tools and maintaining them properly, you'll be able to achieve professional-looking results and complete your plastering projects with confidence.
This will help you master various plastering techniques and achieve a high-quality finish.
Smoothing and Finishing Tools
Smoothing and finishing are the final stages of the plastering process, where you'll focus on achieving a high-quality, even surface. In order to accomplish this, you'll need the right tools for the job. Here are some crucial smoothing and finishing tools to take into account:
| Tool | Description | Purpose |
|---|---|---|
| Trowel | A flat, broad tool used for applying and smoothing plaster | Smoothing and finishing large areas |
| Edger | A small, handheld tool used for smoothing and finishing edges and corners | Creating a seamless finish around edges and corners |
| Joint Knife | A long, flexible knife used for smoothing and finishing joints and seams | Smoothing and finishing joints and seams |
| Sanding Block | A rectangular block used for sanding and smoothing surfaces | Smoothing and polishing surfaces |
| Finishing Trowel | A small, flat tool used for applying and smoothing final coats of plaster | Applying and smoothing final coats of plaster |
When using these tools, it's crucial to employ effective smoothing techniques, such as using long, even strokes and applying gentle pressure. Additionally, paying attention to finishing touches, such as feathering edges and filling imperfections, will help you achieve a professional-looking finish. By mastering these tools and techniques, you'll be able to create a high-quality, even surface that's perfect for painting or finishing.
Plastering Knife Selection Guide
With a solid understanding of the tools required for smoothing and finishing, you're now ready to focus on one of the most versatile and important tools in your plastering arsenal: the plastering knife. A plastering knife is used for applying, smoothing, and finishing plaster, and is an essential tool for any plastering project.
When selecting a plastering knife, consider the type of plaster you'll be working with and the specific task at hand.
There are several types of plastering knives available, each with its own unique characteristics and uses. Some common types of plastering knives include:
- Flexible knives, which are ideal for smoothing and finishing large areas
- Rigid knives, which are better suited for applying and scraping plaster
- Offset knives, which are designed for working in tight spaces and corners
To keep your plastering knife in good condition, follow these knife maintenance tips:
- Clean your knife regularly to prevent plaster from drying on the blade
- Store your knife in a dry place to prevent rust and corrosion
- Use a sharpening stone to maintain a sharp edge and prevent the blade from becoming dull
Trowel and Blade Options
As you expand your plastering toolkit, it's important to evaluate the various trowel and blade options available, as they play a vital role in applying and finishing plaster effectively. Choosing the right trowel and blade can make a significant difference in the quality of your work. There are several trowel types to take into account, including pointing trowels, finishing trowels, and margin trowels. Each type is designed for a specific application and can greatly impact the final result.
| Trowel Type | Best For |
|---|---|
| Pointing Trowel | Applying and finishing joints and edges |
| Finishing Trowel | Smoothing and finishing large surfaces |
| Margin Trowel | Creating clean lines and edges around openings |
In addition to selecting the right trowel, it's important to choose a suitable blade material. The most common materials include stainless steel, carbon steel, and aluminum. Carbon steel blades are ideal for general-purpose plastering, while stainless steel blades offer added durability and resistance to rust. Aluminum blades are lightweight and ideal for small-scale projects.
Mixing and Applying Tools
You've selected the right trowel and blade for your plastering project, now it's time to focus on the tools that'll help you mix and apply the plaster efficiently. When it comes to mixing and applying plaster, having the right tools can make a huge difference in the outcome of your project.
Here are three essential mixing and applying tools to contemplate:
-
A high-quality mixing bucket or container with a sturdy handle, designed for efficient mixing and transportation of the plaster mix.
-
A plaster mixer or drill attachment, which helps to achieve a consistent mix and can be especially useful for large-scale projects.
-
A hawk or plaster holder, a flat, rectangular tool that allows you to hold and transport small amounts of plaster to the work area.
These tools will help you develop efficient mixing techniques and application methods. For instance, using a plaster mixer can help you achieve a consistent mix, while a hawk allows you to work with precision and accuracy.
Frequently Asked Questions
Can I Use a Putty Knife for Plastering Small Areas?
When working with small areas, you'll find that putty knife techniques are perfect for precise applications. Use a flexible, high-carbon putty knife for smooth, even coverage, applying compound in thin, controlled strokes for a professional finish.
How Do I Clean and Maintain My Plastering Tools?
You'll extend tool lifespan by washing them immediately after use, and regularly sanitizing with mild soap and water. Implementing these cleaning techniques and scheduling routine tool maintenance will optimize performance and prevent damage.
Are Plastering Tools Suitable for Other DIY Projects?
When tackling DIY projects, you'll find that many plastering tools offer versatility, adapting to various techniques beyond plastering. You can repurpose trowels for tile work, hawk for holding materials, and edgers for trimming carpet.
Can I Use a Drill With a Mixing Paddle for Large Batches?
Precisely positioned, you'll maximize mixing efficiency with a drill, leveraging its robust power to tackle large batches. Verify the drill's RPM matches the mixing paddle's requirements, then expertly combine materials for a perfectly blended concoction.
How Do I Store Plastering Tools to Prevent Damage?
When storing your tools, you'll want to prioritize organization and protection. Implement a tool organization system using storage solutions like bins, baskets, or a pegboard to keep your gear tidy and prevent damage from moisture, dust, and impacts.
Conclusion
You've made it to the end of our guide to the 5 best plastering tools for home renovation. As a beginner, having the right tools can make all the difference in achieving a smooth, professional finish. Curiously, the US Census Bureau reports that over 40% of homeowners tackle DIY projects, including plastering, each year. With these essential tools, you'll be well-equipped to join their ranks and tackle your next renovation project with confidence.
Related Posts
-

5 Best Home Renovation Project Timeline Checklists
You're looking for a clear understanding of the timeline for your home renovation project. A good place to start is w...
-

Why Inspect Stucco Repair Equipment Before Renovation
When starting a stucco repair renovation, you need to inspect your equipment to prevent accidents, save time and mone...
-
Get Discounted Plastering Tool Sets for DIY Renovations
You can find discounted plastering tool sets online, at local hardware stores, and thrift stores, offering a range of...


