5 Best Block Laying Tools for DIY Renovators
Share
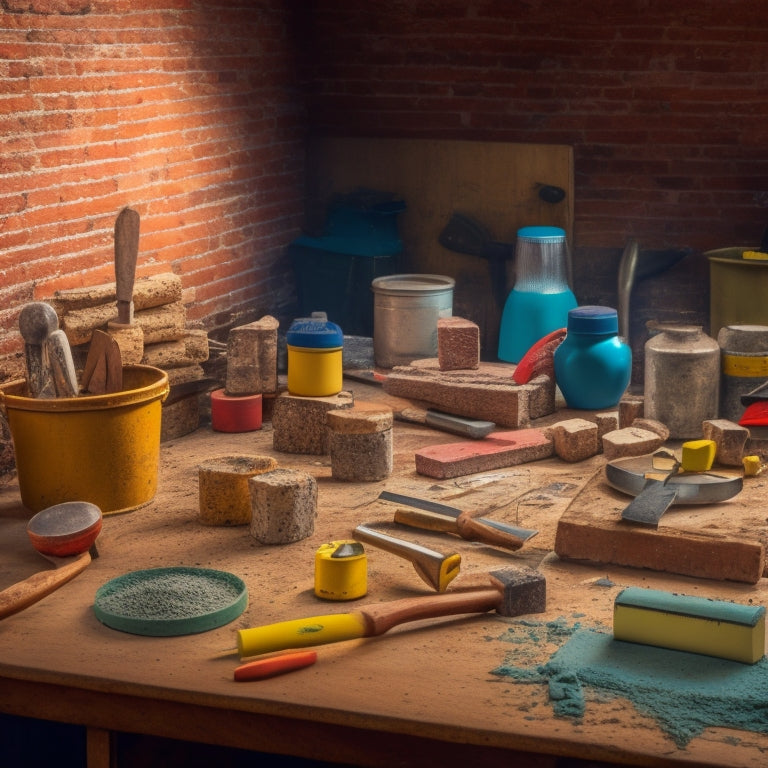
When it comes to DIY renovations, you'll need a solid set of block laying tools to achieve professional-looking results and guarantee structural integrity. For efficient block laying, invest in a high-quality trowel, such as a stainless steel or high-carbon steel model, and master the ideal mortar consistency and application technique. Accurate leveling and alignment can be achieved with string lines, spirit levels, and laser levels. Cutting and shaping cinder blocks require precision tools like block cutters and masonry saws, while jointing tools like jointers and joint rakers create clean, even surfaces. By mastering these five essential tools and techniques, you'll be well on your way to a successful project.
Key Takeaways
• Invest in a high-quality pointing trowel for precise mortar application and a comfortable grip.
• A stainless steel or high-carbon steel gauging trowel is ideal for large-scale block laying projects.
• A spirit level or laser level is essential for ensuring accurate block alignment and leveling.
• A cinder block cutter or masonry saw is necessary for making clean, precise cuts in blocks.
• A jointer or joint raker is required for creating clean, even surfaces and optimal joints.
Selecting the Right Trowel for Block
When laying blocks, you'll need a trowel that's specifically designed for the job, as using the wrong one can lead to uneven distribution of mortar, poor adhesion, and a weakened structure. There are several trowel types to choose from, each suited for specific block laying tasks. For instance, a pointing trowel is ideal for filling small gaps and joints, while a gauging trowel is better suited for applying and leveling mortar.
The material of your trowel is also important. Stainless steel or high-carbon steel trowels are durable and resistant to corrosion, making them perfect for heavy-duty block laying. On the other hand, plastic or resin trowels are lightweight and easy to clean, making them suitable for smaller projects or DIY renovations.
It's vital to choose a trowel that feels comfortable in your hand, with a handle that provides a secure grip. A well-balanced trowel will reduce fatigue and improve your overall block laying experience.
Mix and Apply Mortar Efficiently
To guarantee a strong bond between the blocks, you need to mix and apply mortar efficiently, using the right consistency and technique to confirm a solid structure. A well-mixed mortar is essential to achieve the required strength and durability of your block structure.
Here are some key tips to help you mix and apply mortar efficiently:
-
Start with the right consistency: The ideal mortar consistency should be similar to that of toothpaste. If it's too dry, add a little water; if it's too wet, add a little more cement.
-
Use the correct mixing techniques: Mix the mortar in a circular motion, using a mixing stick or trowel, to confirm all ingredients are well combined.
-
Apply the right amount: Hold the trowel at a 45-degree angle and scoop up the right amount of mortar for each block.
- Work in small sections: Divide the area into smaller sections, and complete each one at a time to maintain even mortar consistency and prevent it from drying out.
Leveling and Aligning Blocks Accurately
With your mortar mixed and applied, you're now ready to focus on leveling and aligning blocks accurately, guaranteeing a structurally sound and visually appealing block structure. To achieve this, you'll need to master various block alignment techniques and invest in the right leveling equipment options.
When it comes to block alignment, you'll want to use a combination of string lines, spirit levels, and laser levels to guarantee your blocks are perfectly aligned. For example, you can use a string line to guide your block placement, while a spirit level helps you check for plumb and level. Laser levels, on the other hand, provide a high degree of accuracy, especially when working on larger projects.
In terms of leveling equipment options, you'll want to take into account investing in a high-quality spirit level, such as a rotary laser level or a digital level. These tools provide precise readings, allowing you to make adjustments as needed. Additionally, think about using a leveling tool with a built-in vial, which helps you detect even the slightest deviations from level.
Cutting and Shaping Cinder Blocks
Cutting and shaping cinder blocks requires precision and the right tools to achieve a professional-looking finish and guarantee a secure fit. As a DIY renovator, you'll need to make precise cuts and shapes to ascertain a snug fit and prevent gaps in your block laying project.
To achieve this, you'll need the following essential tools:
-
Cinder block cutters: These specialized cutters are designed to make clean, precise cuts through cinder blocks. They come in various types, including manual and electric models.
-
Masonry saws: These saws are ideal for making straight cuts or curved cuts in cinder blocks. They offer more control and precision than traditional saws.
-
Block chisels: These hand tools are used to remove small amounts of material from cinder blocks, allowing you to shape them to fit specific spaces.
- Shaping techniques: Mastering various shaping techniques, such as splitting, scoring, and snapping, will help you achieve precise shapes and cuts.
Finishing Touches With Jointing Tools
Having precision-cut and shaped your cinder blocks, you're now ready to focus on achieving a professional-looking finish by mastering the art of jointing. This vital step requires the right tools and techniques to guarantee strong, durable, and visually appealing joints.
To begin, you'll need a jointing tool, such as a jointer or a joint raker, to remove excess mortar and create a clean, even surface. Next, practice various jointing techniques, like bucket handling and tamping, to achieve the perfect joint.
Remember to maintain your tools regularly to prevent wear and tear; a well-maintained tool will produce better results and last longer. For instance, clean and lubricate your jointer regularly to prevent rust and keep it running smoothly.
Frequently Asked Questions
What Safety Gear Is Essential for Block Laying and Renovation Projects?
When tackling a renovation project, you'll need to prioritize your safety.
Essential gear includes safety goggles to protect your eyes from debris and dust. You'll also need work gloves to prevent cuts and abrasions on your hands.
Don't forget a dust mask to prevent inhaling hazardous particles. Additionally, a hard hat and steel-toed boots will safeguard you from falling objects and heavy materials.
Can I Use a Hammer Drill for Mixing Mortar and Concrete?
When it comes to mixing mortar and concrete, you're wondering if a hammer drill will do the trick.
While it's tempting to use your trusty hammer drill, its capabilities are better suited for drilling and hammering, not mixing.
For effective mixing, you'll need a dedicated mixer or a drill with a mixing paddle attachment.
Proper mixing techniques involve slow, consistent speed and a controlled motion to avoid introducing air pockets.
How Do I Prevent Mortar From Drying Too Quickly in Hot Weather?
As you're about to lay those blocks, you're wondering how to prevent mortar from drying too quickly in hot weather. You're right to worry - it's a common pitfall.
To outsmart the sun, you'll need to employ some clever tactics. Start by incorporating mortar additives that slow down the setting process.
Next, master shading techniques to keep the mortar out of direct sunlight.
What Is the Ideal Temperature Range for Laying Blocks Outdoors?
When laying blocks outdoors, you'll want to guarantee the ideal temperature range for best results.
Aim for temperatures between 40°F (4°C) and 90°F (32°C) for most block laying techniques.
Weather considerations are vital, as extreme temperatures can affect mortar's workability and strength.
Avoid laying blocks in direct sunlight, high winds, or during precipitation.
Can I Reuse Old or Leftover Mortar From Previous Projects?
As you rummage through your toolbox, the remnants of past projects stare back at you, begging the question: can you revive that old mortar for your new block-laying endeavor?
Unfortunately, you can't revive a mixture that's gone stale. Check the storage conditions and mortar consistency before deciding to reuse it.
If it's been exposed to air, moisture, or extreme temperatures, it's best to start fresh. Don't risk compromising your project's integrity – mix a new batch to guarantee a strong, durable bond.
Conclusion
You've made it to the final brick in the wall - literally!
With these high-quality block laying tools, your DIY renovation project is sure to be a solid success.
Remember, a strong foundation is key, and the right tools will help you build a fortress that will stand the test of time.
Don't let your project crumble under the weight of inferior tools - invest in the best and watch your vision rise from the ashes like a phoenix.
Related Posts
-

Top Drill for Concrete Wall Renovation
When choosing the top drill for your concrete wall renovation, you'll want to prioritize key features like drill powe...
-

Streamlining Your Exterior Renovation Timeline
To streamline your exterior renovation timeline, start by identifying your project goals and objectives, and prioriti...
-

Why Exterior Wall Renovation Requires a Plan
You're about to commence a complex and potentially costly project when you decide to renovate your exterior walls, an...


