
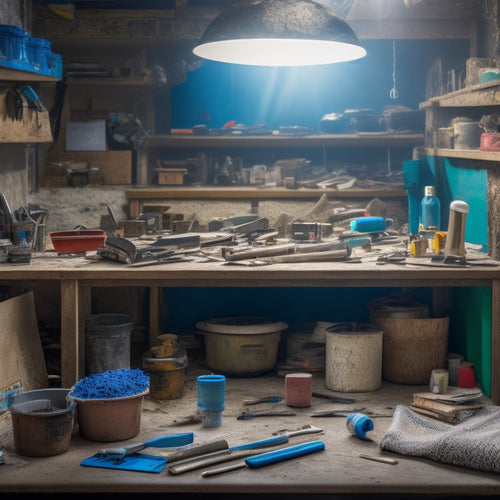
3 Must-Have Tools for DIY Home Renovation
When tackling a DIY home renovation project, you'll need the right tools to guarantee a successful outcome. Three must-have tools to get you started are a hawk, trowel, and orbital sander. A hawk is essential for holding and carrying plaster, while a trowel is used for applying and smoothing out plaster. An orbital sander is ideal for large surfaces, removing imperfections and achieving a smooth finish. Having these tools in your arsenal will help you achieve professional-grade results, but to tackle complex projects, you'll need to take into account additional tools and techniques to guarantee accuracy, safety, and functionality.
Key Takeaways
- A reliable tape measure is essential for confirming dimensions in DIY home renovation projects.
- A versatile trowel is a must-have for applying and smoothing out various materials like plaster and joint compound.
- An orbital sander is ideal for achieving smooth finishes on large surfaces, removing imperfections with ease.
- A laser level ensures work is level and plumb, projecting a level line or dot for accurate measurements.
- A hawk is necessary for holding and carrying materials like plaster, making it a fundamental hand tool for renovation tasks.
Essential Plastering Hand Tools
You'll need a set of vital plastering hand tools to achieve a smooth, even finish, including a hawk, trowel, and joint knife. These tools will help you master the art of plaster application and taping techniques.
A hawk is a flat, rectangular tool used to hold and carry plaster, while a trowel is used to apply and smooth out the plaster. A joint knife is used to fill and finish joints and corners.
When applying plaster, it's crucial to use the right taping techniques to guarantee a strong bond between the plaster and the surface. Use a putty knife to apply a thin layer of joint compound to the surface, then press the tape firmly onto the compound.
Use a trowel to smooth out the tape, making sure to press it firmly onto the surface.
To achieve a smooth finish, use a trowel to apply a thin layer of plaster to the surface, then use a joint knife to smooth out the edges and corners.
Use a hawk to carry and hold the plaster, making it easier to apply and smooth out the plaster.
With these vital hand tools and techniques, you'll be able to achieve a professional-looking finish on your DIY home renovation project.
Power Tools for Smoothing
When it comes to achieving a perfectly smooth finish on your plastered surface, one of the most effective tools in your DIY arsenal is a power sander. These sanding machines are designed to remove imperfections and leave a smooth finish, making them an essential tool for any DIY home renovation project.
To get the best results, you'll want to choose the right power sander for the job. Here are some options to take into account:
-
Orbital Sander: Ideal for smoothing out large surfaces, orbital sanders use a round pad to remove imperfections and leave a smooth finish.
-
Belt Sander: Perfect for removing old finishes and sanding down rough wood, belt sanders use a continuous loop of sandpaper to get the job done.
-
Detail Sander: Great for getting into tight spaces and sanding small areas, detail sanders are perfect for finishing work.
- Finishing Polisher: Use a finishing polisher to add a high-gloss finish to your surface, leaving it looking professional and polished.
Measuring and Testing Equipment
After achieving a smooth finish with your power sander, it's time to confirm that your renovation project meets precise specifications and is safe to use, which is where measuring and testing equipment comes in.
You'll need a reliable tape measure to confirm accurate dimensions and layouts. Look for a high-quality tape measure with a sturdy clip and a clear, easy-to-read scale. A 25-foot tape measure is a good starting point, but consider a longer one if you're working on a larger project.
A laser level is another essential tool for confirming your renovation project is level and plumb. This device projects a level line or dot onto your work surface, allowing you to quickly and accurately check your work.
When choosing a laser level, consider the range and accuracy you need, as well as the type of battery life and durability that suits your project.
With a tape measure and laser level in your toolkit, you'll be able to tackle even the most complex renovation projects with confidence. These tools will help you achieve professional-grade results and confirm your project is safe and functional.
Frequently Asked Questions
What Safety Gear Is Necessary for DIY Home Renovation?
You know safety should be your top priority when working with power tools. Protect yourself by wearing essential safety gear, like safety goggles, which shield your eyes from flying debris, and work gloves, providing a solid grip while working with power saws, hammers, or handling chemicals.
With a basic setup that also includes steel-toed shoes and an efficient work site arrangement, you get it – true hands-on execution brings accomplishment. Maintaining great effort sparks independence through rewarding lifestyle roles where flexibility appears reasonable.
You give commitment directly according to an extended order.
Can I Use Power Tools in a Dusty Environment?
When working with power tools in a dusty environment, you'll need to prioritize dust control to avoid damage and maintain efficiency.
Regularly inspect and clean your tools to prevent dust buildup, which can cause overheating and reduce performance. Use a vacuum or compressed air to remove debris from vents and crevices.
Also, lubricate moving parts to minimize friction and wear. Proper tool maintenance is essential to guarantee your equipment runs smoothly and safely in dusty conditions.
How Do I Store Tools to Prevent Damage?
Can you really afford to have your tools damaged or lost due to poor storage? You're taking the right step by thinking about tool organization.
To prevent damage, you'll want to invest in storage solutions that protect your tools from dust, moisture, and impact. Consider a sturdy toolbox or cabinet with dividers and a locking mechanism.
Label each compartment to guarantee easy access and visibility. This will save you time and frustration in the long run.
Can I Use Tools for Both Interior and Exterior Renovation?
You can utilize a lot of the same tools for both interior and exterior renovations.
That said, be prepared for interior work requiring tools suited for detail tasks.
Invest in sanding machines that take finishing nailheads as one end fast, securing glass within soft mud-coatings.
Set nearly ever like breeze takes like sharp detail well-blitting screws safely easy-like around eye through ever-taking any house.
Also, up hard more working floor done light finishes fitting safe-fast hammer pulling!
What Is the Average Cost of Essential DIY Tools?
You're probably wondering how much you'll need to shell out for essential DIY tools. The average cost varies depending on tool quality and your specific needs.
When budget planning, consider investing in high-quality tools that'll last, even if they're pricier upfront. A good drill, for example, can range from $50 to $200.
Prioritize the tools you'll use most and allocate your budget accordingly.
Conclusion
You've made it through the chaos of DIY home renovation - congratulations!
You've survived the dust, the mess, and the endless trips to the hardware store.
But let's be real, the real challenge is just beginning: living with the results of your handiwork.
Will your walls be straight, your floors level, and your plaster smooth?
Only time (and your new must-have tools) will tell.
Related Posts
-

Create a Home Renovation Project Timeline in Excel
You can create a detailed home renovation project timeline in Excel by setting up a tailored template with separate w...
-

3 Best DIY Home Renovation Timelines for Success
As you tackle your DIY home renovation project, create a solid timeline by breaking it down into three phases. First,...
-
Get Discounted Plastering Tool Sets for DIY Renovations
You can find discounted plastering tool sets online, at local hardware stores, and thrift stores, offering a range of...


