3 DIY Joint Spacing Must-Haves for Home Renovation
Share
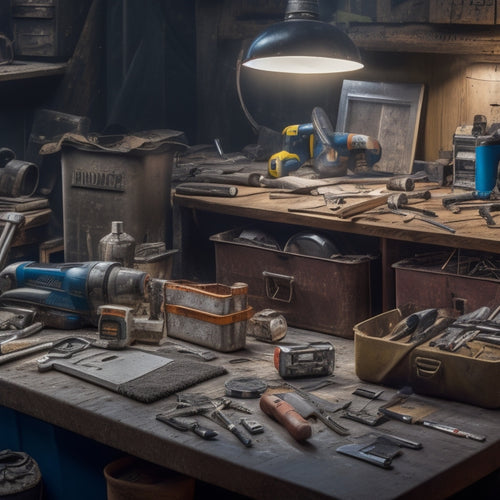
For a successful DIY home renovation project, you'll need to focus on three critical areas: measuring, cleaning, and filling. You'll require measuring tools like a combination square, tape measure, and level to guarantee accurate joint spacing. Next, you'll need cleaning tools such as a scraper, wire brush, and solvent-based cleaner to remove old adhesives and debris. Finally, for filling, you'll need joint fillers, a high-quality trowel, and sandpaper to achieve a smooth finish. By mastering these three essential categories, you'll be well on your way to achieving professional-looking joints that will elevate your renovation project to the next level.
Key Takeaways
• Ensure accurate measurements with a combination square, tape measure, and level to achieve precise joint spacing.
• Clean joints thoroughly with a scraper, wire brush, solvent-based cleaner, and heat gun to remove old adhesives and debris.
• Fill joints with a suitable filler type (epoxy-based, polyurethane-based, or acrylic-based) using a high-quality trowel and scraper.
• Protect yourself with gloves, safety glasses, and a mask when working with joint spacing materials and tools.
• Keep a notepad and pencil handy to record measurements, calculations, and notes during the joint spacing process.
Essential Joint Spacing Measuring Tools
You'll frequently find yourself reaching for a few essential tools to accurately measure joint spacing in your home renovation project. To guarantee precise measurements, you'll need a combination square, a tape measure, and a level. These tools will help you master joint spacing techniques, assuring your renovation project turns out flawless.
When it comes to measuring joint spacing materials, such as grout or caulk, a precision scale or measuring cups will come in handy. You'll also appreciate having a notepad and pencil nearby to record your measurements and calculations.
Don't forget to invest in a quality joint spacing gauge, which will help you achieve uniform spacing throughout your project.
Must-Have Joint Spacing Cleaning Tools
A few essential cleaning tools are necessary to remove old adhesives, dirt, and debris from joint surfaces, ensuring a strong bond between new materials.
You'll need a scraper or putty knife to scrape off old adhesives and debris. A wire brush will help remove dirt and grime from the joint surfaces. For tougher adhesives, consider using a solvent-based cleaner or a heat gun to loosen them.
Don't forget to wear protective gloves and safety goggles when working with these tools.
Effective cleaning techniques are vital for successful joint spacing maintenance.
Start by scraping off large chunks of debris, then move on to wire brushing the surface. Once you've removed the bulk of the dirt and grime, use a solvent-based cleaner to wipe down the surface.
Remember to always follow the manufacturer's instructions when using cleaning products.
Critical Joint Spacing Filling Tools
Fill gaps and cracks in joint surfaces with the right filling tools to guarantee a strong and durable bond between new materials. When it comes to joint spacing filling, you'll need the right tools to get the job done efficiently.
You'll require a variety of joint filler types, such as epoxy-based, polyurethane-based, and acrylic-based fillers, each suited for specific joint spacing applications.
To verify a seamless finish, master spacing application techniques like troweling, scraping, and sanding. Invest in a high-quality trowel for applying fillers, a scraper for removing excess material, and sandpaper for smoothening out the surface.
Don't forget to wear protective gear, including gloves, safety glasses, and a mask, to avoid exposure to harmful chemicals and dust.
Frequently Asked Questions
Can I Reuse Old Joint Spacing Materials for a New Renovation?
When considering reusing old joint spacing materials for your new renovation, you'll want to think twice.
While it might seem like a great way to save on costs, incompatible materials can lead to costly repairs down the line.
Before making a decision, assess the joint material compatibility to guarantee it meets your new project's requirements.
Reusing old materials can offer renovation cost savings, but only if it's done wisely.
How Do I Deal With Uneven Joint Spacing in My Walls?
Imagine you're a master puzzle solver, and your walls are the tricky pieces that need to fit together.
Dealing with uneven joint spacing can be frustrating, but don't worry, you've got this!
To tackle this challenge, you'll need to employ some clever joint spacing techniques. Start by identifying the uneven areas and then use uneven wall solutions like shimming or adjusting the studs to get everything aligned.
With patience and persistence, you'll be able to create a seamless joint that will make your walls look like a perfect puzzle.
Are There Any Eco-Friendly Joint Spacing Materials Available?
You're looking for eco-friendly joint spacing materials, and you're not alone! Many homeowners are opting for sustainable materials that reduce their carbon footprint.
Luckily, there are plenty of green alternatives available. You can choose from recycled plastic spacers, bamboo or reclaimed wood options, or even natural fiber-based products.
These innovative solutions not only benefit the environment but also provide a unique aesthetic to your walls.
Can I DIY Joint Spacing for a Load-Bearing Wall?
You're taking a stab in the dark by considering DIY joint spacing for a load-bearing wall. But, can you hack it?
Load-bearing considerations are vital, as any mistake can compromise the entire structure. You'll need to master joint spacing techniques, ensuring accurate measurements and precise cuts.
Don't risk it; consult a pro or take the time to thoroughly research and understand the process before attempting this essential task.
How Often Should I Inspect Joint Spacing in My Home?
You should inspect your joint spacing regularly to guarantee your home remains safe and secure.
Aim for a joint spacing frequency of every 6-12 months, or after any major renovation or natural disaster.
Create an inspection checklist to track your progress and identify potential issues early on.
Conclusion
As you wrap up your home renovation, remember that joint spacing is the unsung hero of a polished finish.
It's the difference between a DIY disaster and a professional-looking triumph.
Don't let sloppy joints sabotage your hard work - arm yourself with the right tools and take control of the details.
By mastering joint spacing, you'll be the master builder of your own domain, and your finished project will be the envy of all who lay eyes on it.
Related Posts
-

Smart Guide to Buying Second-Hand Renovation Tools
When buying second-hand renovation tools, you'll want to set clear renovation goals and a realistic budget to priorit...
-

Renovation Tool Checklist for Smooth Finishes
When tackling a renovation project that requires a smooth finish, you'll need a thorough tool checklist to guarantee ...
-

Streamline Your Exterior Renovation Timeline
To streamline your exterior renovation timeline, you'll need to approach the process strategically. Start by planning...


