
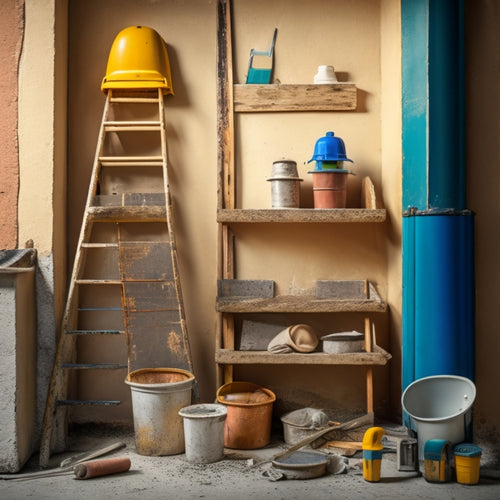
3 Best Tools for DIY Renovation Success
You'll need a solid arsenal of tools to guarantee your DIY renovation project stays on track and yields professional-looking results. For demolition, a sledgehammer, pry bar, and utility knife are must-haves for breaking through walls, removing old flooring, and cutting drywall and tiles. When it comes to measuring and marking, a tape measure, chalk line tool, and laser level will guarantee accurate room measurements and precise layouts. Finally, for finishing touches, microfiber cloths, tack cloth, and synthetic bristle paintbrushes will help you achieve a smooth, even finish. Now that you've got the essentials covered, you can focus on perfecting your renovation strategy.
Key Takeaways
• A sledgehammer is essential for breaking through walls and other demolition tasks in DIY renovation projects.
• A tape measure is crucial for accurate room measurements and material calculations to avoid costly mistakes.
• Invest in a good quality oscillating multi-tool for precision in demolition tasks and flexibility in various renovation projects.
• Safety gear, including sturdy work boots, safety glasses, and dust masks, is vital for protecting yourself from injury and harm.
• Microfiber cloths and tack cloths are must-haves for dusting and surface preparation before painting to ensure a smooth finish.
Essential Tools for Demolition
Tear into your DIY renovation project with confidence, knowing you've got the essential tools for demolition, starting with a reliable sledgehammer to smash through walls and a pry bar to rip out old flooring.
Next, grab your utility knife and oscillating multi-tool to tackle more precise demolition tasks, like cutting through drywall and removing old tile.
Don't forget to prioritize safety - invest in a pair of sturdy work boots, safety glasses, and a dust mask to protect yourself from debris and hazardous materials.
Speaking of debris, make sure you have a plan for disposal. Rent a dumpster or designate a specific area for collecting waste to keep your workspace organized and safe.
With these tools and a clear plan, you'll be well on your way to a successful demolition phase.
Remember to always follow safety guidelines and take regular breaks to avoid fatigue.
Measuring and Marking Tools
With your demolition phase underway, you'll soon need to shift your focus to measuring and marking tools to guarantee accurate layouts and installations. These tools are vital in ensuring that your renovation plans are executed flawlessly.
A good tape measure is essential for taking precise room measurements, marking stud locations, and calculating material quantities. Invest in a high-quality tape measure with clear markings, a sturdy hook, and a comfortable grip.
Next, you'll need a reliable chalk line tool to create straight, level lines on walls, floors, and ceilings. This will help you identify where to install fixtures, mark cut lines, and create a level reference point. Look for a chalk line with a durable reel, a consistent chalk flow, and an adjustable line tension.
Additionally, consider a laser level, which projects a level line or dot onto surfaces, making it easier to mark precise layouts. By having these measuring and marking tools in your arsenal, you'll be able to create accurate, professional-looking results that will elevate your DIY renovation project.
Finishing Touches With Precision
As you near the final stages of your DIY renovation, precision takes center stage, and having the right tools becomes essential to achieving a professional-looking finish.
You've put in the hard work, and now it's time to focus on the details that will make your project shine.
To guarantee a flawless finish, you'll need tools that can help you with surface preparation and paint application. Here are some must-haves to add to your arsenal:
-
Microfiber cloths: For dusting and wiping down surfaces before painting
-
Tack cloth: A sticky cloth that picks up dirt and debris, guaranteeing a smooth paint finish
-
Paintbrushes with synthetic bristles: For smooth, even paint application
-
Roller extension poles: For reaching high ceilings and corners
-
Paint tray with a grid: For even paint distribution and reduced mess
With these tools, you'll be able to achieve a finish that's worthy of a professional.
Remember, it's all about attention to detail and using the right tools for the job.
Frequently Asked Questions
How Do I Stay Organized and on Schedule During a DIY Renovation Project?
To stay organized and on schedule during your DIY renovation project, you'll need to master project planning and time management.
Start by breaking down your project into smaller, manageable tasks, and create a realistic timeline.
Set specific deadlines for each task, and prioritize them based on importance.
Use a planner, app, or tool to stay on track and make adjustments as needed.
What Safety Precautions Should I Take When Working With Power Tools?
You're about to enter a lion's den of whirring blades and flying debris, so gear up!
When working with power tools, safety is paramount. Don't be a statistic - wear personal protective equipment like safety glasses, earplugs, and gloves.
Make certain your power tool safety by reading manuals, following instructions, and maintaining a clean workspace.
Stay focused, and never operate tools when tired or distracted.
You got this, but only if you prioritize caution.
Can I Reuse or Repurpose Old Materials From My Existing Space?
When renovating, you'll likely encounter old materials worth repurposing.
Before tossing them, take stock of what you have and think creatively.
Consider repurposing old wood for shelving or flooring, or turning vintage hardware into unique decorative pieces.
Smart material sourcing can save you money and reduce waste.
Take the time to assess what's worth keeping, and get creative with your repurposing ideas – it'll pay off in the end.
How Do I Handle Unexpected Issues That Arise During the Renovation Process?
When unexpected issues arise during renovation, you'll need to think on your feet.
First, assess the problem and prioritize a solution. Be prepared to make budget adjustments, and don't be afraid to seek expert advice.
Contingency planning is key, so have a backup plan in place.
Stay calm, and remember that it's normal for unexpected things to come up.
What Are Some Common DIY Renovation Mistakes to Avoid?
When tackling a DIY renovation, you'll want to steer clear of common mistakes that can derail your project.
One major pitfall is poor budgeting, where you underestimate costs or fail to pad your budget for contingencies.
Another error is inadequate planning, which can lead to costly rework or even safety hazards.
Avoid planning errors by creating a detailed scope of work and timeline, and budgeting wisely to guarantee a successful renovation.
Conclusion
You've made it to the final stretch of your DIY renovation. With the right tools, you've successfully demolished, measured, and marked your way to a beautiful new space.
Now, it's time to put the finishing touches on your project. Remember, precision is key to a professional-looking finish.
By investing in these three essential tools, you'll be able to tackle your renovation with confidence and achieve the results you've always envisioned.
Related Posts
-
7 Crucial Tools for a Successful Stucco Renovation
To guarantee a successful stucco renovation, you'll need a range of essential tools. First, invest in a stucco mixer ...
-

DIY Plastering Supply Checklist for Home Renovation
To tackle a DIY plastering project for your home renovation, you'll need a solid checklist of supplies. Start with es...
-

3 Best Planter Shopping Timeline Tips for Renovators
When incorporating planters into your renovation project, you'll want to plan carefully to avoid delays and guarantee...


