
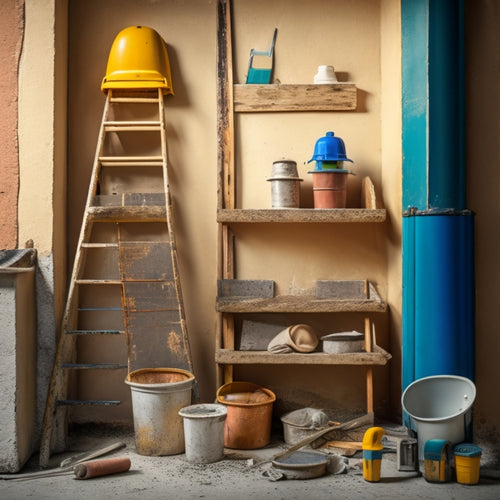
10 Must-Have Tools for Stucco Renovation Success
When tackling a stucco renovation project, you'll need a solid arsenal of tools to guarantee success. Start with safety gear essentials like respirator masks, safety glasses, and gloves to protect yourself from hazards. Then, gather stucco removal tools like hammers, chisels, and pry bars to break up existing stucco. You'll also need crack detection equipment like magnifying glasses and crack detection sprays to identify imperfections. Additionally, stock up on surface preparation tools, patching material applicators, texture matching tools, waterproofing application tools, and cleaning and protection tools. With these must-haves at your disposal, you'll be well-equipped to tackle even the most complex stucco renovation projects – and that's just the beginning of your expedition to a flawless finish.
Key Takeaways
- Invest in high-quality personal protective equipment (PPE) like respirator masks, safety glasses, and gloves to ensure safety on site.
- Utilize essential cleaning and surface preparation tools like power washers, scrapers, and sanding blocks to remove dirt and prepare surfaces.
- Stucco removal tools like hammers, chisels, and pry bars are necessary for breaking up and removing old stucco layers.
- Crack detection and inspection tools like magnifying glasses, crack detection sprays, and infrared thermography help identify and assess damage.
- Patching material and application equipment like stucco patching guns, trowels, and floats are crucial for making precise and effective repairs.
Safety Gear Essentials
When tackling a stucco renovation project, you're bound to encounter a multitude of hazards, from airborne silica particles to falling debris. To protect yourself from these dangers, it's vital to prioritize safety gear essentials that meet strict safety standards.
First and foremost, invest in personal protective equipment (PPE) that includes a high-quality respirator mask, safety glasses, and gloves. These will shield you from inhaling hazardous particles and prevent eye and skin injuries.
Next, consider a hard hat and steel-toed boots to safeguard against falling objects and heavy materials.
Don't forget to wear a dust-resistant coverall or jumpsuit to prevent skin contact with stucco dust and debris.
Additionally, guarantee you have a reliable first aid kit on site, stocked with essentials like bandages, antiseptic wipes, and pain relievers.
Stucco Removal Tools
With your safety gear in place, you're ready to tackle the messy business of removing old stucco. For this, you'll need the right stucco removal tools. A hammer and chisel are essential for breaking up the stucco, and a pry bar can help you remove large chunks.
To avoid damaging the underlying structure, use a scraper or putty knife to gently pry off the stucco. For more efficient stucco removal techniques, consider investing in a stucco scraper or a rotary hammer with a stucco removal bit. These tools can help you remove stucco quickly and with minimal effort.
If you're dealing with a particularly stubborn area, you may need to use alternative removal methods, such as applying a stucco remover or using a pressure washer to loosen the stucco.
Whatever tools you choose, make sure you're comfortable using them and take regular breaks to avoid fatigue. Remember to work in small sections and remove debris as you go to keep your workspace clean and safe.
Crack Detection Equipment
You've removed the old stucco, and now it's time to inspect the underlying surface for cracks and damage. This vital step helps you identify areas that need repair, ensuring a strong and durable stucco finish. Crack detection equipment is essential for this task, and there are various tools to choose from, each with its own strengths.
| Tool | Description | Crack Detection Capability |
|---|---|---|
| Magnifying Glass | Handheld lens for close-up inspection | Minor cracks and surface imperfections |
| Crack Detection Spray | Reveals cracks and damage with a colored dye | Hairline cracks and surface defects |
| Infrared Thermography | Uses temperature differences to detect moisture and damage | Deep-seated cracks and water damage |
When selecting crack detection equipment, consider the type of stucco you're working with, the size of the area to be inspected, and your budget. By using the right tools, you'll be able to assess cracks accurately and develop effective crack repair strategies. Remember, a thorough crack assessment is key to a successful stucco renovation.
Surface Preparation Tools
You'll need to strip away old stucco and clean the surface to guarantee a strong bond between the old and new layers.
That's where power washing equipment comes in, capable of blasting away dirt and debris.
Next, you'll use scraping and sanding tools to smooth out the surface, creating a uniform base for your renovation.
Power Washing Equipment
Before diving into the renovation process, it's vital to remove dirt, grime, and old stucco layers from the surface. This is where power washing equipment comes in.
As you prepare to power wash, make certain you're using the right techniques and pressure settings to avoid damaging the stucco. You'll want to adjust the pressure settings according to the type of stucco and its condition. For example, older or more delicate stucco may require lower pressure settings to prevent damage.
When choosing a power washer, opt for one with a wide range of pressure settings and a variety of nozzles. This will give you the flexibility to adjust your technique as needed.
It's also important to use the correct nozzle angle and distance from the surface to avoid damaging the stucco. Remember to always test the power washer on a small, inconspicuous area first to verify you're using the right settings.
Scraping and Sanding
With the surface clean, it's time to remove loose or damaged stucco and smooth out the area using scraping and sanding tools.
You'll need a putty knife or stucco scraper to remove any loose or damaged stucco, taking care not to gouge the surrounding area. For more aggressive removal, consider using a stucco chisel or hammer.
Next, switch to sanding tools to smooth out the surface. Start with a coarse-grit sandpaper (about 80-100 grit) to remove any remaining rough spots, then progress to finer grits (120-150) for a smoother finish.
Effective sanding techniques involve working in small circular motions, applying moderate pressure, and frequently changing direction to avoid creating scratches.
Don't forget to wear a dust mask and safety glasses to protect yourself from stucco dust and debris.
Patching Material Applicators
When it comes to applying patching materials, you'll need the right tools to get the job done efficiently and effectively.
For smaller repairs, you'll likely reach for a stucco patching gun, which allows for precise application and minimal mess.
For larger areas, you'll want to contemplate trowel application methods, which provide greater control and coverage.
Stucco Patching Guns
You'll be reaching for a trusty stucco patching gun (also known as a patching material applicator) when tackling those pesky cracks and holes in your stucco surface. This essential tool allows you to efficiently apply patching material, guaranteeing a strong bond and a smooth finish.
When selecting a stucco patching gun, consider the type of patching material you'll be using, as well as the size and shape of the areas you need to repair.
For successful stucco patching, it's vital to excel in the correct stucco application techniques. Hold the gun at a 45-degree angle, and apply steady pressure while moving in a continuous motion. This helps to fill the area evenly and prevents air pockets from forming.
Remember to follow stucco maintenance tips, such as cleaning the area thoroughly before applying patching material, to guarantee a lasting repair. With a stucco patching gun and the right techniques, you'll be able to achieve professional-looking results and extend the life of your stucco surface.
Trowel Application Methods
Stucco patching guns are just one part of the equation; for more extensive repairs, it's time to break out the trowel.
You'll need to become proficient in various trowel techniques and application strategies to achieve a seamless finish. When it comes to applying patching material, you'll want to focus on the following:
-
Load control: Make sure to load the trowel with the right amount of material to avoid excess or insufficient coverage.
-
Trowel angle: Adjust the angle of your trowel to achieve the desired texture and finish. A steeper angle creates a rougher texture, while a shallower angle produces a smoother finish.
-
Stroke direction: Pay attention to the direction of your strokes, as they can affect the final appearance of the repair. Generally, work in sections, applying material in one direction and then blending it in with perpendicular strokes.
- Feathering techniques: Use feathering techniques to blend the repair with the surrounding stucco, creating a seamless flow.
Finishing and Smoothing Tools
Get ready to perfect the surface of your stucco renovation with the right finishing and smoothing tools. These tools are essential in achieving a smooth, even finish that will make your renovation stand out.
Finishing techniques require precision and control, and the right tools can make all the difference. You'll need a variety of tools to achieve a smooth finish, including taping knives, putty knives, and sanding blocks.
| Tool | Description |
|---|---|
| Taping Knife | Used to apply and smooth out joint compound |
| Putty Knife | Ideal for filling small imperfections and holes |
| Sanding Block | Helps to smooth out the surface, removing any excess material |
| Edger | Used to create a clean edge around windows, doors, and corners |
When it comes to smoothing methods, the key is to work in small sections, using light, even strokes to achieve a smooth finish. Remember to always work in the direction of the stucco's texture, and avoid applying too much pressure, which can create imperfections. With the right tools and techniques, you'll be able to achieve a professional-looking finish that will make your stucco renovation shine.
Texture Matching Tools
Achieving a seamless blend between old and new stucco requires perfecting the art of texture matching, and that's where the right tools come in handy.
You'll need the right tools to replicate the exact texture, whether it's a smooth finish, a rough dash, or a Spanish lace pattern.
To guarantee a flawless match, you'll want to have these essential texture matching tools in your arsenal:
-
Texture samples: Collecting samples of the original stucco texture will give you a reference point for your renovation. This will help you identify the exact texture, pattern, and color of the original stucco.
-
Texture guns and hoppers: These tools allow you to apply stucco with varying textures and patterns, giving you the flexibility to match the original design.
-
Trowels and floats: These hand tools will help you achieve the desired texture and finish, whether it's smooth, rough, or somewhere in between.
- Texture design inspiration resources: Having access to resources like design books, online tutorials, or even social media can provide useful inspiration and guidance for your texture application techniques.
With these tools, you'll be well-equipped to excel in the art of texture matching and deliver a stunning stucco renovation that looks like it was meant to be.
Waterproofing Application Tools
Now that you've perfected the art of texture matching, it's time to focus on the next vital step in your stucco renovation: applying a waterproofing layer. This step is essential to prevent water damage and guarantee the longevity of your stucco surface.
To get it right, you'll need the right tools for the job. When it comes to applying waterproofing membranes, you'll want to invest in a high-quality roller extension pole. This will allow you to reach those hard-to-access areas with ease, assuring a seamless application.
Additionally, a waterproofing membrane brush is necessary for cutting in around corners, edges, and other tight spaces.
Mastering application techniques is also key. You'll want to work in sections, applying the membrane in a consistent, even layer. Use a level to confirm the surface is straight, and a notched trowel to spread the membrane evenly.
Don't forget to follow the manufacturer's instructions for drying times and recommended thickness. With the right tools and techniques, you'll be able to achieve a waterproofing layer that's both effective and long-lasting.
Inspecting and Testing Tools
You'll need to inspect the stucco surface to identify potential issues before starting the renovation.
This involves conducting visual stucco inspections to look for signs of damage, using moisture detection tools to identify hidden water damage, and employing crack analysis methods to determine the severity of cracks.
Visual Stucco Inspections
Conducting a thorough visual stucco inspection is essential for identifying potential issues and prioritizing repairs. As you inspect the stucco, you'll want to use various visual inspection techniques to assess the condition of the exterior façade. This includes looking for signs of damage, such as cracks, holes, and water stains.
To perform a detailed visual damage assessment, make sure to:
-
Examine the stucco surface: Look for any visible cracks, holes, or damage to the stucco finish.
-
Check for water stains: Identify any water stains or discoloration on the walls or ceilings, which can indicate water intrusion.
-
Inspect window and door flashings: Verify that flashings are securely fastened and not damaged, as they play a critical role in preventing water intrusion.
- Evaluate the condition of exterior trim and molding: Check for signs of rot, decay, or damage to trim and molding, which can compromise the stucco system.
Moisture Detection Tools
When stucco damage is suspected, one of the most important steps in the renovation process is detecting moisture intrusion, which can lead to further damage and even structural issues.
You'll need reliable moisture detection tools to identify potential problems before they escalate.
Infrared thermography cameras are useful tools for detecting moisture behind stucco surfaces. These cameras capture temperature differences, indicating potential moisture intrusion.
Another important tool is a moisture meter, which measures the moisture levels in stucco materials. This helps you determine the extent of moisture damage and identify areas that require repair or replacement.
Using a combination of these tools, you can pinpoint areas where moisture barriers may have failed or were improperly installed, leading to leak prevention issues.
By detecting moisture intrusion early, you can prevent further damage and guarantee a successful stucco renovation.
It's vital to choose the right moisture detection tools for your specific project, as this will greatly impact the accuracy of your results and the effectiveness of your renovation.
Crack Analysis Methods
Identifying and analyzing cracks in stucco surfaces is an essential step in the renovation process, as it helps determine the severity of damage and guides the repair strategy.
You'll want to inspect the cracks closely to determine their type, size, and location. This information will help you decide on the most effective repair techniques.
To analyze cracks effectively, you'll need the following tools:
- Crack gauges: These tools measure the width and depth of cracks, helping you track changes over time and determine the best repair approach.
- Magnifying glasses or loupes: These tools allow you to examine cracks up close, identifying subtle signs of damage or deterioration.
- Crack classification charts: These charts help you identify the type of crack you're dealing with, such as hairline cracks, structural cracks, or shrinkage cracks.
- Digital imaging tools: These tools, like cameras or drones, capture high-quality images of cracks, enabling you to document and analyze them more effectively.
Cleaning and Protection Tools
Get ready to tackle the dirty work of stucco renovation by gathering the essential cleaning and protection tools.
You'll need a range of cleaning solutions to remove dirt, grime, and old finishes from the stucco surface. Choose solutions that are specifically designed for stucco to avoid damaging the material. You may also need to use a pressure washer to blast away stubborn dirt and debris.
Protective coverings are also vital to prevent damage to surrounding areas, such as windows, doors, and landscaping.
Drop cloths, tarps, and plastic sheets can be used to shield these areas from dust, debris, and cleaning solutions. Don't forget to cover your own skin and eyes with gloves, safety glasses, and a mask to prevent injury.
Additionally, you'll need scrub brushes, sponges, and rags to apply cleaning solutions and remove dirt and grime. A putty knife or scraper may also be necessary to remove old finishes or loose stucco.
With these cleaning and protection tools in your arsenal, you'll be well-equipped to tackle even the toughest stucco renovation projects.
Frequently Asked Questions
Can I Reuse Old Stucco Material for Patching and Repairs?
You can't reuse old stucco material for patching and repairs, as it may be degraded or contaminated. Instead, you'll need to properly prepare the old stucco surface using stucco patching techniques, ensuring a strong bond between the old and new material.
How Do I Handle Stucco Waste Disposal During Renovation?
As you tackle stucco renovation, don't let waste pile up like a nagging shadow; instead, shine a light on eco-friendly disposal methods, and you'll find that responsible stucco waste management is the cornerstone of a guilt-free renovation, where sustainability meets success.
Are There Any Specific Licenses Required for Stucco Renovation?
You'll need to obtain renovation permits, ensuring compliance with local stucco codes; check with your city or county for specific licensing requirements, as they vary, and don't assume your contractor's license covers stucco renovation permits.
Can I Renovate Stucco in Extreme Weather Conditions?
You're likely aware that 80% of stucco failures occur due to water damage. When renovating stucco, you shouldn't attempt it in extreme weather conditions, as it can compromise stucco application techniques, leading to costly repairs and safety risks.
How Do I Ensure Color Consistency in New Stucco Applications?
You guarantee color consistency in new stucco applications by carefully controlling color mixing, using a precise formula, and testing samples; then, you'll achieve perfect texture matching by adjusting the mix's sand-to-cement ratio and applying it correctly.
Conclusion
You've got the right tools for the job, now it's time to get to work! Remember, "measure twice, cut once" - it's a stucco renovation mantra for a reason. With these must-haves in your arsenal, you'll be well-equipped to tackle even the toughest projects. Stay organized, stay focused, and you'll be enjoying a beautifully renovated exterior in no time.
Related Posts
-
7 Crucial Tools for a Successful Stucco Renovation
To guarantee a successful stucco renovation, you'll need a range of essential tools. First, invest in a stucco mixer ...
-

5-Step Subfloor Prep Checklist for a Smooth Renovation
You can guarantee a smooth renovation by following a 5-step subfloor prep checklist. First, assess the current subflo...
-

3 Beginner-Friendly Tools for Plaster Renovation Success
You'll be glad to know that the three essential tools you need for a successful plaster renovation are the same ones ...


