
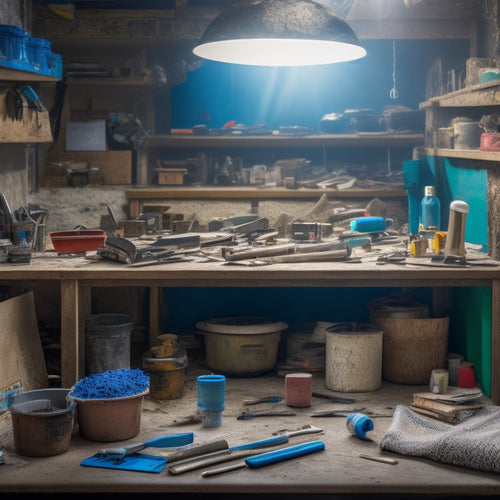
10 Crucial Tools to Buy for Plaster Wall Renovation
You'll need essential safety gear like dust masks, safety goggles, and respirator masks to protect yourself from harmful particles. Dust-reducing vacuum cleaners with HEPA filters and sealed systems are also vital for maintaining a clean workspace. For mixing and applying plaster, you'll require a mixing bucket, drill, paddle, hawk, and trowel. Surface preparation involves scraping and smoothing tools like putty knives, hammers, and sandpaper. Additionally, you'll need measuring and marking tools such as tape measures, laser levels, and chalk lines. With these 10 vital tools, you'll be well-equipped to tackle your plaster wall renovation - and that's just the beginning of what you'll need to know to get the job done right.
Key Takeaways
- Dust management equipment, such as dust-reducing vacuum cleaners and HEPA filters, is crucial for reducing respiratory issues and maintaining a clean environment.
- Essential safety gear, including dust masks, safety goggles, gloves, and respirator masks, protects you from harmful particles and chemicals.
- Plaster mixing and application tools, like mixing buckets, drills, and trowels, ensure efficient and effective plaster application.
- Surface preparation tools, including scrapers, hammers, and sanding equipment, help remove old plaster and prepare the surface for new application.
- Measuring and marking tools, such as tape measures, laser levels, and chalk lines, facilitate accurate measurements and precise markings for a seamless finish.
Essential Safety Gear for Plastering
Three crucial components of essential safety gear for plastering are a dust mask, safety goggles, and gloves. You're about to get up close and personal with dusty walls, so don't even think about skipping these must-haves.
Respirator masks will be your new BFFs, filtering out those pesky particles that can wreak havoc on your lungs. And let's not forget those peepers – protective eyewear is a no-brainer when dealing with flying debris and dust. You don't want to be that guy who ends up with a face full of plaster, do you?
Gloves are the unsung heroes of plastering safety gear. They not only protect your hands from harsh chemicals and rough textures but also provide grip and traction, reducing the risk of accidents.
Don't underestimate the importance of a good pair – you'll be grateful for them when you're scrubbing away at that stubborn stain. Remember, safety gear isn't an afterthought; it's an essential part of your plastering arsenal.
Dust-Reducing Vacuum Cleaners Needed
When you're renovating a plaster wall, you'll need a dust-reducing vacuum cleaner that can capture fine dust particles, reducing airborne debris fast.
This is essential to minimize plaster dust clouds that can spread throughout the workspace, compromising air quality and visibility.
Capture Fine Dust Particles
You'll need to capture fine dust particles effectively to minimize the mess and prevent damage to surrounding areas during your plaster wall renovation. A dust-reducing vacuum cleaner is essential for this task, as it's specifically designed to handle the fine dust generated by plasterwork.
Look for a vacuum with a HEPA filter, which can capture 99.97% of particles as small as 0.3 microns. This guarantees efficient air filtration and prevents the spread of dust throughout your workspace.
When choosing a vacuum, consider the suction power, airflow, and filtration efficiency. A vacuum with a high CFM (cubic feet per minute) rating will help you capture fine dust particles quickly and effectively.
Additionally, a vacuum with a sealed system and dustproof construction will prevent dust from escaping during use. By investing in a high-quality dust-reducing vacuum cleaner, you'll be able to minimize the mess and guarantee a successful plaster wall renovation.
Reduce Airborne Debris Fast
By optimizing your dust-reducing vacuum cleaner's performance, you can reduce airborne debris fast and guarantee a more efficient plaster wall renovation. A high-quality vacuum is essential for dust control, as it prevents dust particles from circulating in the air and settling on surfaces.
Look for a vacuum with a HEPA filter, which captures 99.97% of particles as small as 0.3 microns. This guarantees that even the finest dust particles are trapped, reducing the risk of airborne debris.
Additionally, consider a vacuum with adjustable suction control, allowing you to tailor the airflow to the specific task at hand. This feature is especially useful when working with delicate surfaces or in tight spaces.
Moreover, opt for a vacuum with a built-in air filtration system, which helps to purify the air and minimize the amount of dust that's released back into the environment.
Minimize Plaster Dust Clouds
Minimizing plaster dust clouds is vital to maintaining a safe and efficient work environment during plaster wall renovation. You don't want to breathe in those pesky particles, and your clients won't appreciate a dusty mess.
That's where dust-reducing vacuum cleaners come in – your new best friends for plaster dust containment.
When shopping for the right vacuum, look for one with a HEPA filter, which captures 99.97% of particles as small as 0.3 microns. This guarantees you're not just moving dust around, but actually removing it from the air.
A vacuum with a high CFM (cubic feet per minute) rating will also help you tackle those massive dust clouds.
Air quality management is essential in plaster wall renovation. With a reliable dust-reducing vacuum, you'll be able to maintain a clean and safe workspace.
This means fewer respiratory issues, less mess, and a more efficient renovation process.
Plaster Mixing and Applying Tools
Mixing and applying plaster requires precision and control, and having the right tools for the job is essential.
You'll need a mixing bucket, a mixing drill, and a mixing paddle to achieve the perfect plaster consistency. Invest in a high-quality mixing drill that can handle heavy loads and won't burn out mid-project. A mixing paddle with a sturdy handle and robust blades will guarantee you're able to scrape the sides and bottom of the bucket effectively.
When it comes to applying plaster, you'll need a hawk and a trowel. A hawk is a flat, rectangular tool that holds the plaster, allowing you to scoop and spread it evenly. A trowel, on the other hand, is used to smooth out the plaster and create a uniform finish.
Mastering mixing techniques, such as folding and whipping, will help you achieve a smooth, lump-free consistency. With the right tools and techniques, you'll be well on your way to a professional-looking finish.
Scraping and Smoothing Wall Surfaces
You'll need to remove old, deteriorated plaster to create a solid base for new applications, and this process typically starts with scraping away loose material.
A putty knife or plaster scraper is ideal for this task, as it allows you to pry off large chunks of old plaster.
Once you've removed the bulk of the old material, you'll need to sand the rough edges to create a smooth surface for finishing.
Remove Old Plaster
Removing old plaster requires careful planning and execution to avoid damaging the underlying wall structure. You don't want to end up with a bigger problem on your hands than you started with!
When it comes to plaster removal techniques, you'll need to be strategic and deliberate in your approach.
To guarantee a smooth wall surface preparation, make sure you have these essential tools in your arsenal:
- A putty knife or plaster scraper for removing loose plaster
- A hammer or pry bar for more stubborn sections
- A dust mask and safety goggles to protect yourself from debris
- A vacuum cleaner or broom to clean up as you go
- A level or straightedge to check for unevenness
Sand Rough Edges
After clearing away the old plaster, your wall surface is likely to be rough and uneven. It's time to break out the sandpaper and get to work! Sanding is an essential step in plaster wall renovation, as it helps create a smooth surface for finishing.
You'll want to focus on the rough edges and corners, where old plaster may have left behind stubborn chunks. Use a combination of sanding techniques to tackle these areas.
Start with a coarse-grit sandpaper (about 80-100) to remove any large imperfections. Then, switch to a finer grit (120-150) for a smoother finish. Don't forget to wear a dust mask and safety goggles to protect yourself from the dust and debris.
When it comes to edge finishing, you'll want to use a specialized sanding tool, like a sanding block or an edger, to get into tight spaces and corners. These tools will help you achieve a seamless finish and prevent any rough spots from showing through your final coat of paint or finish.
Remember to work patiently and methodically, as sanding can be a time-consuming process. But trust us, the end result will be worth it!
Measuring and Marking Wall Areas
Measuring and marking wall areas is an essential step in plaster wall renovation, as it guarantees accurate cutting and fitting of replacement plaster.
You'll need to get precise measurements to facilitate a seamless finish. Don't worry, it's not rocket science, but you do need the right tools for the job.
To get started, you'll need:
- A high-quality tape measure that can reach up to 25 feet to measure large wall areas
- A laser level to facilitate straight lines and accurate verticals
- A pencil and straightedge for marking cut lines and patterns
- A stud finder to locate wall studs and avoid them when cutting
- A chalk line reel for snapping precise lines over large areas
Mastering measuring techniques and using the right marking tools will save you time and frustration down the line.
Sanding and Polishing Equipment
You'll need to equip yourself with the right sanding and polishing equipment to achieve a smooth, blemish-free finish on your renovated plaster wall. Sanding is an essential step in the renovation process, and using the correct tools can make all the difference.
Invest in a range of sandpaper grits, from coarse to fine, to tackle different sanding techniques. A belt sander is ideal for removing old plaster and rough sanding, while an orbital sander is perfect for finer sanding and polishing methods.
Don't forget a sanding block for those hard-to-reach areas and a dust mask to protect yourself from inhaling pesky plaster particles. For polishing, you'll need a polishing compound and a polishing pad. These will help remove any remaining imperfections and leave your wall with a high-gloss finish.
Remember to work progressively through the grits, always sanding with the direction of the plaster's texture to avoid scratching the surface. With the right equipment and a bit of patience, you'll be left with a wall that's as smooth as silk.
Pneumatic and Electric Drills
You'll need to select the right drill bits for your plaster wall renovation, as different bits are designed for specific tasks, such as drilling through plaster or concrete.
When choosing between pneumatic and electric drills, consider the speed and power requirements for your project, as pneumatic drills typically offer more torque and speed, while electric drills provide more control and versatility.
Drill Bit Selection
When tackling a plaster wall renovation, selecting the right drill bit is essential, as it directly impacts the quality and efficiency of the project. You'll be working with different drill types, including pneumatic and electric drills, and each requires a specific bit material to get the job done effectively.
Here's what you need to evaluate when choosing the right drill bit:
-
Material matters: Carbide-tipped bits are ideal for drilling through plaster, as they're more durable and resistant to wear. High-speed steel (HSS) bits are also suitable, but may not last as long.
-
Bit geometry: A twist bit with a sharp point is perfect for drilling pilot holes, while a spade bit is better suited for larger holes.
-
Coatings count: Bits with a titanium nitride coating reduce friction and heat buildup, making them ideal for high-torque drilling.
-
Shank style: A 1/4" hex shank is standard for most drills, but 1/2" shanks provide more stability for larger bits.
-
Specialized bits: Think about investing in plaster-specific bits, like hollow bits or hole saws, for unique tasks like cutting holes for outlets or switches.
Speed and Power
With the right drill bit in hand, it's time to contemplate the power and speed of your drill. You'll need a reliable power source to drive that bit efficiently.
Electric drills are a popular choice for plaster wall renovation, offering speed efficiency and reliability. They're available in cordless or corded options, each with its pros and cons. Cordless drills offer more flexibility, but corded drills provide consistent power.
When choosing an electric drill, consider the motor's power output, measured in watts or amps, and the speed settings, usually ranging from 0 to 1,000 RPM.
Pneumatic drills, on the other hand, are ideal for heavy-duty tasks and provide unparalleled power. They're typically more expensive than electric drills, but their high torque output makes them perfect for drilling through thick plaster or concrete.
However, pneumatic drills require a compressor, which adds to the overall cost and complexity of the setup. Ultimately, your power source choice depends on the scope of your project and your personal preferences.
Whichever you choose, make sure it's compatible with your drill bit and can provide the speed and power you need to get the job done efficiently.
Taping and Jointing Compound Tools
Taping and jointing compound tools are essential for creating a smooth, seamless finish on plaster walls.
You'll need these tools to master taping techniques and jointing tips that'll make your renovation project shine.
-
Taping knives: Straight and angled knives with flexible blades for applying and smoothing out jointing compound.
-
Jointing compound: A specialized paste for bonding and reinforcing joints, available in different setting times and strengths.
-
Taping brush: A stiff-bristled brush for applying jointing compound to large areas quickly and evenly.
-
Mud pan: A container for holding and transporting jointing compound, often with a built-in grid for scraping off excess.
-
Taping spatula: A long, flexible scraper for feathering out jointing compound and creating a seamless finish.
With these tools, you'll be well-equipped to tackle even the most demanding taping and jointing tasks.
Remember to practice your taping techniques and follow jointing tips to guarantee a professional-looking finish.
Ladders and Scaffolding Essentials
Your plaster wall renovation project requires safe and stable access to high areas, and that's where ladders and scaffolding essentials come in.
You'll need a sturdy ladder that provides ladder stability, ensuring you can reach those hard-to-access spots without putting yourself at risk. Look for ladders with non-slip feet, sturdy rungs, and a weight capacity that can handle you and your tools.
When it comes to scaffolding, scaffolding safety is paramount.
You'll want to invest in a scaffolding system that's designed for indoor use, with adjustable height settings and a wide base for stability. Consider a scaffolding system with guardrails and toe boards to prevent falls and dropped tools.
Don't forget to check the weight capacity and make sure it can handle the weight of you, your tools, and any materials you'll be working with.
Cleaning and Disposal Supplies
Cleaning and disposal supplies are essential for a successful plaster wall renovation project, as they enable you to remove debris and dust efficiently, ensuring a clean working environment and minimizing health risks.
You'll need the right tools to keep your workspace tidy and prevent messes from getting out of hand. This is especially important when working with plaster, which can be notoriously messy.
- Heavy-duty vacuum cleaner with a HEPA filter to capture fine dust particles
- Industrial-grade brooms and dustpans for sweeping up large debris
- Microfiber cloths and cleaning solution for wiping down surfaces
- Disposable dust masks and respirators to protect yourself from airborne particles
- Heavy-duty trash bags and a dumpster or disposal bin for efficient waste management
Frequently Asked Questions
Can I Reuse Old Plaster or Do I Need to Buy New?
You're wondering if you can reuse old plaster or need to buy new? First, assess the material's condition - if it's crumbling, say goodbye! Otherwise, consider plaster restoration, but be prepared for a tedious process that'll leave you questioning your DIY skills.
How Do I Remove Old Plaster From Wall Studs?
You'll need to master plaster removal techniques to strip old plaster from wall studs; start by scoring the surface, then use a pry bar or hammer to gently pry it off, taking care not to damage the studs during wall stud preparation.
What Is the Best Way to Dry a Newly Plastered Wall?
You'll want to master drying techniques to prevent moisture control issues; use a combination of fans, dehumidifiers, and heating to speed up the process, ensuring a strong bond between plaster and wall studs - no soggy surprises!
Can I Plaster Over Existing Drywall or Should I Remove It?
"Measure twice, cut once" - don't rush into plastering over existing drywall without considering compatibility. You'll need to assess the drywall's condition and guarantee it's suitable for your chosen plastering techniques; if not, removal is likely your best bet.
How Long Does It Take for Plaster to Fully Harden and Set?
You'll be waiting patiently for plaster to fully harden and set, and here's the deal: it takes around 24 to 48 hours for initial plaster drying, but the full curing time can stretch up to 28 days, so plan accordingly, friend!
Conclusion
As you commence your plaster wall renovation journey, remember that having the right tools is vital to achieving professional-looking results. With these 10 essential tools in your arsenal, you'll be well-equipped to tackle even the most intimidating tasks. Don't let the dust settle – get to work and reap the rewards of a job well done, where every surface is smooth, every joint is seamless, and every wall is a reflection of your craftsmanship.
Related Posts
-

Crack Repair Inspection Checklist for Home Renovation
When creating a crack repair inspection checklist for your home renovation project, you'll want to identify crack typ...
-

Stucco Patching Material Checklist for Home Renovation
You'll need a range of essential tools, including a putty knife, wire brush, hawk or flat trowel, level, and straight...
-
Get Discounted Plastering Tool Sets for DIY Renovations
You can find discounted plastering tool sets online, at local hardware stores, and thrift stores, offering a range of...


