
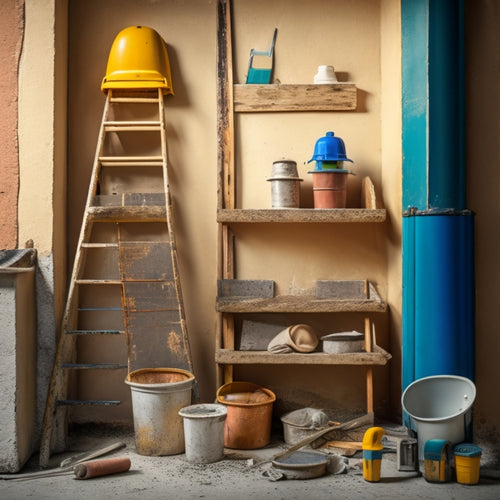
10 Best Tools for Home Renovation Wall Plastering
As you begin your home renovation wall plastering project, it is crucial to have the right tools to achieve a professional-looking finish. Start with the essentials: a sturdy trowel, mixing bucket and drill, putty knife, and bonding agent. For smooth finishes, choose from pointed, square-edged, or rounded trowels, and pair them with high-quality sanding equipment, such as cordless or orbital sanders. Don't forget must-have safety gear, like impact-resistant goggles and reliable respirators. With the right tools and techniques, you'll be well on your way to a polished look - and by exploring further, you'll discover even more insights to elevate your project's success.
Key Takeaways
• A sturdy trowel with a rust-resistant blade and comfortable grip is essential for applying and finishing plaster efficiently.
• A mixing bucket with a drill and paddle attachment ensures efficient plaster mixing and saves time.
• A putty knife is necessary for scraping and cleaning surfaces before plaster application, ensuring a smooth finish.
• A bonding agent is crucial for promoting adhesion on surfaces, especially if old adhesive or debris is present.
• Safety guidelines, including wearing protective gear and following manufacturer instructions, are vital for a safe and successful plastering project.
Essential Plastering Tools for Beginners
You'll need a sturdy trowel, preferably with a rust-resistant blade and comfortable grip, to scoop, spread, and smooth plaster onto walls and ceilings. This vital tool will be your go-to for applying and finishing plaster.
Next, invest in a mixing bucket and drill with a paddle attachment for efficient plaster mixing. A mixing stick or trowel will also come in handy for smaller batches. Don't forget a putty knife for scraping and cleaning surfaces before applying plaster.
Before you start plastering, it's important to prepare your walls and ceilings. Make certain they're clean, dry, and free of old adhesive or debris. Sand any rough surfaces to create a smooth base for the plaster. If necessary, apply a bonding agent to promote adhesion.
With these essential tools and a well-prepared surface, you'll be ready to tackle your plastering project with confidence. Remember to always follow safety guidelines and manufacturer instructions when working with plaster and power tools.
With practice and patience, you'll achieve a professional-looking finish.
Best Trowels for Smooth Finishes
Selecting the right trowel is essential for achieving a smooth, even finish in plastering, as it directly impacts the quality of the final result.
You'll want to choose a trowel that suits your plastering style and the specific finish you're aiming for. There are several trowel types to evaluate, including pointed, square-edged, and rounded trowels.
Pointed trowels are great for creating sharp edges and fine details, while square-edged trowels are better suited for flat, smooth surfaces. Rounded trowels, on the other hand, are ideal for curved or irregular shapes.
When it comes to finish techniques, you'll need to decide on the level of smoothness you're after. Do you want a high-gloss finish or a more textured, rustic look?
Different trowels are designed to achieve specific finishes, so it's vital to select the right one for your project. For a smooth, even finish, look for a trowel with a high-quality, flexible blade that can be easily maneuvered across the surface.
Top-Notch Sanding Equipment Options
When you're preparing to tackle a sanding project, you'll want to contemplate the best tools for the job.
You'll need to decide between electric sander options, whether to invest in dustless sanding systems, and which hand sander essentials to keep in your toolkit.
Electric Sander Options
Sanding surfaces to a high gloss or smooth finish requires deploying an electric sander that's tailored to your specific project needs.
You'll want to take into account the surface area, material, and desired finish when selecting the right electric sander for the job.
Cordless sanders offer maximum portability and flexibility, ideal for small to medium-sized projects or when working in tight spaces. They're also great for detail work, such as sanding corners or edges.
On the other hand, orbital sanders are perfect for large, flat surfaces, providing a high-speed, aggressive sanding action that gets the job done quickly.
When choosing an orbital sander, think about the orbit pattern, speed, and grit range. A higher orbit pattern (e.g., 12,000 OPM) is ideal for aggressive sanding, while a lower pattern (e.g., 8,000 OPM) is better suited for finer finishes.
Additionally, look for features like variable speed control, dust collection systems, and ergonomic design to guarantee comfortable operation and best results.
Dustless Sanding Systems
You can achieve a dust-free sanding experience with superior dustless sanding systems that capture up to 99.97% of dust particles, leaving your workspace clean and your lungs clear. These systems utilize advanced dustless technology, ensuring maximum sanding efficiency and minimizing the risk of respiratory problems. By investing in a high-quality dustless sanding system, you'll enjoy a cleaner, healthier work environment and improved overall performance.
Here are some exceptional dustless sanding systems to evaluate:
| System | Key Features |
|---|---|
| Festool CT 26 | Advanced dust collection, 99.97% efficient, compact design |
| Bosch Airsweep | Variable suction control, reduced dust emission, lightweight |
| Makita XCV07Z | High-performance motor, 3-stage filtration, increased airflow |
| DeWalt DCS570B | Brushless motor, reduced maintenance, improved runtime |
When choosing a dustless sanding system, evaluate factors such as suction power, filter quality, and overall build quality. By selecting the right system for your needs, you'll be able to work more efficiently, reduce cleanup time, and focus on achieving professional-grade results.
Hand Sander Essentials
In your pursuit of a flawless finish, equipping yourself with high-quality hand sanders is essential, as they provide the precision and control necessary to tackle intricate tasks and fine-tune surfaces.
When selecting a hand sander, consider the type best suited for your project. There are three primary hand sander types: block sanders, detail sanders, and orbital sanders. Block sanders excel at smoothing large, flat areas, while detail sanders are perfect for tight spaces and intricate details. Orbital sanders offer versatility and are ideal for general-purpose sanding.
To get the most out of your hand sander, it's vital to master proper hand sander techniques. Start by using the correct grip, firmly holding the sander with both hands. Next, apply gentle to moderate pressure, depending on the surface and grit. Move the sander in a consistent, controlled motion, following the wood grain or surface pattern.
Don't apply too much pressure, as this can lead to scratches or swirl marks. By combining the right hand sander with expert techniques, you'll achieve a professional-grade finish that showcases your attention to detail.
Must-Have Safety Gear for Plasterers
When you're working with plaster, you're constantly exposed to airborne particles and debris that can cause serious harm to your eyes and respiratory system.
That's why you need to prioritize safety gear that's specifically designed for plastering tasks.
You'll want to focus on essential eye protection and respiratory safety measures to guarantee you're well-equipped to handle the demands of this job.
Eye Protection Essentials
Wearing impact-resistant goggles or safety glasses with a scratch-resistant coating is essential for protecting your eyes from flying debris, dust, and plaster particles that can cause serious injuries during plastering tasks.
When choosing safety goggles, look for ones with a high-impact rating and a comfortable, snug fit. You should also consider goggles with ventilation to prevent fogging.
Additionally, consider using face shields for added protection, especially when working with power tools or handling heavy materials. Face shields provide an extra layer of protection against larger debris and can be worn over your safety goggles.
Respiratory Safety Measures
You'll need a reliable respirator or dust mask to protect your lungs from inhaling harmful particles like silica, lime, and cement dust that are commonly encountered during plastering tasks.
Without proper respiratory protection, you're at risk of developing serious health issues, including respiratory diseases and lung cancer.
To guarantee your safety, don't forget to:
-
Choose the right respiratory mask: Select a mask that's specifically designed for plastering tasks, with a filter that can capture 99.97% of particles as small as 0.3 microns.
-
Wear it correctly: Make sure the mask fits snugly on your face, and adjust the straps for a comfortable and secure fit.
-
Use ventilation systems: Whenever possible, work in well-ventilated areas to reduce the concentration of airborne particles.
- Replace filters regularly: Follow the manufacturer's instructions for replacing filters to guarantee your mask remains effective.
Finishing Tools for a Polished Look
To achieve a polished look in your home renovation, incorporate finishing tools that help refine surfaces, edges, and joints, ensuring a professional-grade finish. These tools will elevate your finishing techniques and offer various texture options to suit your design preferences.
You'll want to invest in a high-quality trowel, perfect for applying and smoothing out plaster. A putty knife will come in handy for filling in small gaps and imperfections. For a seamless finish, use a joint knife to feather out joints and create a smooth connection between plaster and drywall.
Don't forget a sanding block or sandpaper to remove any excess material and achieve a silky-smooth finish. When it comes to texture options, consider a stomp brush or a texture scraper to add some visual interest to your walls.
These tools will help you achieve a unique, bespoke look that sets your renovation apart. By incorporating these finishing tools into your arsenal, you'll be well on your way to achieving a polished, professional-grade finish that will make your home renovation shine.
Heavy-Duty Mixers for Large Projects
When tackling large-scale renovation projects that require mixing massive quantities of materials, such as concrete, mortar, or plaster, a heavy-duty mixer is vital for expediting the process and guaranteeing consistent results. You'll want a mixer that can handle the workload without breaking a sweat.
Here are some key considerations to keep in mind:
-
Mixer capacity considerations: Choose a mixer with a capacity that matches your project's demands. A larger mixer may be necessary for large-scale projects, but it'll also take up more space and require more power.
-
Motor power: A powerful motor is essential for mixing heavy materials. Look for a mixer with a robust motor that can handle the workload without overheating.
-
Drum material: A durable drum material, such as steel or heavy-duty plastic, is important for withstanding the rigors of heavy mixing.
- Mixer maintenance tips: Regularly clean and maintain your mixer to prevent material buildup and guarantee peak performance. This includes lubricating moving parts, cleaning the drum, and storing the mixer in a dry area.
Precision Cutting Tools for Clean Edges
When you're working on a renovation project, you know that clean edges are essential for a professional-looking finish.
To achieve this, you'll need precision cutting tools that can help you make accurate cuts and remove excess material.
You'll be using tools like straight edge guides, precise angle cutters, and clean edge scrapers to get the job done.
Straight Edge Guides
Achieve precise cuts with confidence using straight edge guides, precision cutting tools designed to deliver clean edges and eliminate errors in your home renovation projects. These guides provide you with the straight edge benefits you need to take your plastering skills to the next level.
By using a straight edge guide, you can guarantee that your cuts are accurate and consistent, reducing the risk of mistakes and rework.
Here are some key advantages of using straight edge guides:
-
Improved accuracy: Straight edge guides help you make precise cuts, guaranteeing that your plastering work is accurate and professional-looking.
-
Reduced errors: With a straight edge guide, you can eliminate errors and mistakes, saving you time and money in the long run.
-
Leveling techniques made easy: Straight edge guides make it easy to implement leveling techniques, guaranteeing that your plastering work is smooth and even.
- Increased efficiency: By using a straight edge guide, you can work more efficiently, completing your plastering projects faster and with greater confidence.
Precise Angle Cutters
By incorporating precise angle cutters into your toolkit, you'll be able to make precise angle cuts with ease, ensuring clean edges and professional-looking results in your home renovation projects. These cutting tools are designed to provide accurate angle measurements, allowing you to achieve precise cuts that fit together seamlessly.
With precise angle cutters, you can master various angle measurement techniques, such as miter cuts, bevel cuts, and compound cuts, to name a few.
When selecting a precise angle cutter, consider the cutting blade options available. Do you prefer a diamond-coated blade for durability and accuracy, or a carbide-tipped blade for longevity and resistance to wear? Perhaps a high-speed steel blade is more suitable for your project, offering a balance of precision and affordability.
Whichever option you choose, rest assured that precise angle cutters will deliver clean, precise cuts that elevate the overall quality of your home renovation project. By investing in these tools, you'll be able to tackle complex cuts with confidence, resulting in a professional-looking finish that exceeds your expectations.
Clean Edge Scrapers
You'll obtain crisp, clean edges on your renovation materials with the help of clean edge scrapers, precision cutting tools specifically designed to remove excess debris and produce a smooth, even finish.
To master clean edge techniques, you'll need to choose the right scraper for the job. Here are some essential tips to get you started:
-
Select the right blade: Opt for a high-carbon steel or stainless steel blade for durability and rust resistance.
-
Maintain your scraper: Regularly clean and sharpen your scraper to guarantee peak performance and prevent damage to your materials.
-
Use the correct angle: Hold your scraper at a 20-30° angle to achieve a smooth, even finish.
- Apply gentle pressure: Avoid applying too much pressure, which can cause scratches or damage to your materials.
High-Quality Floats for Even Surfaces
Smooth finishes demand precise control, and that's where high-quality floats come in, allowing you to effortlessly spread and level materials like concrete, plaster, or stucco across even surfaces.
When choosing a float, consider the float materials that suit your project. For instance, resin floats are ideal for scratch coats, while metal floats are better suited for finishing coats. Additionally, the float techniques you employ can greatly impact the final result. You'll want to master techniques like 'floating off' and 'floating on' to achieve a smooth, even finish.
As you work with your float, remember to keep it clean and well-maintained. This will guarantee that it glides smoothly across the surface, leaving behind a uniform layer of material.
By combining the right float materials with expert float techniques, you'll be able to achieve professional-looking results with ease. Don't settle for anything less than perfection – invest in a high-quality float that will help you deliver exceptional results every time.
With the right tools and techniques, you'll be well on your way to creating stunning, smooth surfaces that will elevate your home renovation project.
Innovative Plastering Accessories
With a high-quality float in hand, it's time to explore the innovative plastering accessories that will take your project to the next level, streamlining tasks and guaranteeing exceptional results.
As you refine your plastering techniques, you'll appreciate the benefits of these cutting-edge tools.
Here are four must-have accessories to elevate your game:
-
Fiberglass mesh tape: Reinforce your plastering with this durable, self-adhesive tape that guarantees a strong bond and reduces cracking.
-
Plastering edging tools: Achieve crisp, clean edges with these precision tools, designed for smooth shifts and professional-looking finishes.
-
Innovative mixing paddles: Say goodbye to lumps and uneven mixes with these high-tech paddles, featuring advanced materials and ergonomic designs.
- Plastering spray nozzles: Control your plaster application with precision, thanks to these adjustable nozzles that deliver the perfect flow and pattern.
These innovative materials and accessories will revolutionize your plastering process, allowing you to work more efficiently and achieve superior results.
Specialized Tools for Cornice Work
Four specialized tools are essential for mastering the intricate art of cornice work, where precision and control are paramount.
You'll need a cornice profile gauge to accurately measure and mark the intricate curves and profiles of your decorative cornice materials.
A cornice running rule helps you maintain consistent spacing and alignment during installation, guaranteeing a professional-looking finish.
For more complex cornice installation techniques, a mitre box or cornice miter saw is a must-have for precise angle cuts.
Finally, a cornice adhesive applicator guarantees a strong bond between the cornice and the wall, eliminating the risk of gaps or cracks.
With these tools in your arsenal, you'll be able to tackle even the most intricate cornice designs with confidence.
Remember to choose decorative cornice materials that complement your home's unique style, and don't be afraid to experiment with different cornice installation techniques to add a personal touch.
Frequently Asked Questions
Can I Use a Regular Drill for Mixing Plaster?
You're wondering if a regular drill will cut it for mixing plaster? Honestly, it's not ideal; you'll need a drill with a high torque output and a mixing paddle attachment for efficient mixing techniques, or consider a dedicated plaster mixer for best results.
How Do I Prevent Dust When Sanding Plaster Walls?
You'll minimize dust when sanding plaster walls by adopting efficient sanding techniques and investing in a dust extraction system, which captures 99% of particles, ensuring a cleaner, healthier environment and better finish.
What Is the Ideal Thickness for Applying Plaster Coats?
When applying multiple plaster coats, you'll want to aim for an ideal plaster thickness of 1/8 inch to 1/4 inch per coat, ensuring a strong, even finish and minimizing the risk of cracks and unevenness.
Can I Reuse Plastering Tools After Cleaning Them?
'You can definitely reuse your plastering tools after cleaning them, but make sure to follow proper plastering tool maintenance and cleaning techniques to prevent contamination and damage, ensuring peak performance for your next project.'
Do I Need to Prime Walls Before Applying New Plaster?
You'll guarantee a strong bond between old and new plaster by priming walls, which is an essential step in plaster adhesion techniques; proper wall surface preparation is key to a successful, long-lasting finish.
Conclusion
With the right arsenal of tools, you're well-equipped to tackle even the most intimidating plastering projects.
Remember, a master craftsman is only as good as their tools.
As you begin your renovation journey, don't settle for mediocrity - choose the best, and let your walls become a symbol of your skill and precision.
Related Posts
-
7 Crucial Tools for a Successful Stucco Renovation
To guarantee a successful stucco renovation, you'll need a range of essential tools. First, invest in a stucco mixer ...
-

5 Must-Have Plastering Tools for Safe Renovation
You'll need a range of essential tools to tackle your plastering project safely. Invest in a variety of trowels, incl...
-

Trowel Tool Cost for DIY Home Renovation Projects
When it comes to your DIY home renovation project, you'll need to budget for a variety of trowel tools, including stu...


