
10 Best Sanders for Smoother Home Renovation Results
You're on the hunt for the perfect sanders to elevate your home renovation game, and you're in the right place! For a seamless finish, you'll need the right tools for the job. Start with concrete sanders, like belt or orbital sanders, for a smooth base. Edge sanders, heavy-duty sanders, and compact sanders each serve a purpose, whether it's precision, power, or accessibility. Look for features like variable speed control, efficient dust collection, and high-torque motors. With the right sander, you'll be well on your way to a professional-looking finish. Now, get ready to take your renovation to the next level...
Key Takeaways
• Choose the right sander type (concrete, edge, heavy-duty, compact) for your specific project to achieve smooth finishes and efficient sanding.
• Consider key features such as adjustable speed settings, comfortable grip, and efficient dust collection when selecting a sander.
• Selecting the correct grit sequence (coarse to fine) prevents scratches and waste, ensuring high-quality results in home renovation projects.
• Regular maintenance of sanders, including cleaning and replacing worn parts, is crucial for optimal performance and extending tool lifespan.
• Investing in a high-quality sander with a powerful motor, variable speed control, and efficient dust collection capabilities leads to better results and reduced project time.
Top Concrete Sanders for Beginners
When starting your first concrete project, choosing the right sander can make all the difference in achieving a smooth, even finish. As a beginner, you'll want to invest in a sander that's easy to use and maintain.
Look for a sander with adjustable speed settings and a comfortable grip to reduce fatigue. For concrete projects, a belt sander or orbital sander is usually the best choice.
To get the most out of your sander, practice beginner sanding techniques such as working in small sections and applying gentle pressure. Don't forget to follow essential sander maintenance tips like regularly cleaning the sander's surface and replacing worn-out belts or pads.
This will guarantee your sander continues to perform at its best and extends its lifespan. By mastering these basics, you'll be well on your way to achieving professional-looking results.
With the right sander and techniques, you'll be able to tackle even the most challenging concrete projects with confidence.
Best Sanders for Edging and Trimming
When it comes to edging and trimming, you'll want to choose the right sander for the job.
You'll need to decide between edge sander types, such as belt sanders or orbital sanders, each with their own strengths and weaknesses.
As you consider your options, think about the trim detailing tools you'll need to get into tight spaces and achieve a precise finish.
Edge Sander Types
You'll find three primary edge sander types on the market, each designed to tackle specific edging and trimming tasks during your home renovation project.
When it comes to belt sander types, you'll appreciate the aggressive material removal and versatility they offer. They're ideal for removing old finishes, sanding rough wood, and flattening surfaces. Look for belt sander options with variable speed controls and adjustable belts for added precision.
Orbital sander options, on the other hand, are perfect for finer sanding tasks, such as smoothing out wood surfaces and removing minor imperfections. They're also great for sanding curved or irregular surfaces. When choosing an orbital sander, consider the orbit diameter, speed settings, and dust collection features.
The third edge sander type is the detail sander, which is designed for tight spaces and intricate trim work. These sanders are typically smaller and more agile, allowing you to access tight corners and crevices with ease.
With the right edge sander type in your arsenal, you'll be able to tackle even the most challenging edging and trimming tasks with confidence.
Trim Detailing Tools
To achieve professional-looking trim and edging results, invest in a combination of trim detailing tools that work in tandem with your edge sander. This includes precision sanding attachments, specialized sandpaper, and flexible sanding strips. These tools will help you master various trim sanding techniques, ensuring a flawless finish for your decorative trim finishes.
When it comes to sanding intricate trim profiles, you'll need tools that can navigate tight spaces and curved surfaces. That's where precision sanding attachments come in. These attachments can be fitted onto your edge sander, allowing you to sand complex shapes with ease. Specialized sandpaper, such as foam-backed sandpaper, is also essential for achieving a smooth finish.
Additionally, consider the following must-haves for your trim detailing toolkit:
-
Flexible sanding strips for sanding curved or irregular surfaces
-
Sanding blocks for maintaining consistent pressure and preventing uneven sanding
-
Dustless sanding systems to minimize mess and improve visibility
- Sanding sponges for gentle sanding and polishing of delicate trim profiles
High-Torque Sanders for Heavy Duty
When you're tackling heavy-duty sanding projects, you need a sander that can keep up with your demands.
You'll want a high-torque sander that can deliver powerful motor performance, handle heavy-duty sanding capacity, and efficiently collect dust to minimize cleanup.
Powerful Motor Performance
With heavy-duty sanding tasks demanding unwavering reliability, a powerful motor with high-torque output is essential to tackle the most challenging renovation projects. You need a sander that can handle the toughest tasks without bogging down or overheating. A high-torque motor provides the necessary power to efficiently remove old finishes, sand down rough surfaces, and smooth out rough edges.
When comparing motors, consider the following key factors:
-
Motor power comparison: Look for motors with high amps and watts to guarantee sufficient power for heavy-duty tasks.
-
Sander maintenance tips: Regularly clean and maintain your sander's motor to prevent dust buildup and overheating.
-
Cooling system: A well-designed cooling system helps to dissipate heat and prolong motor life.
- Speed control: Variable speed control allows you to adjust the motor's power to suit different tasks and materials.
Heavy-Duty Sanding Capacity
You'll need a sander that can tackle the toughest sanding tasks head-on, and that's where high-torque sanders for heavy-duty applications come into play.
These powerful tools are designed to handle demanding projects, effortlessly sanding through thick, heavy-duty materials like hardwood, metal, and concrete. With their robust motors and advanced sanding techniques, they can tackle even the most challenging tasks with ease.
When working with heavy-duty materials, you need a sander that can maintain a consistent speed and torque, even under heavy load.
High-torque sanders deliver unparalleled performance, allowing you to sand through tough materials quickly and efficiently. Whether you're refinishing a hardwood floor, smoothing out a metal surface, or prepping a concrete wall for painting, these sanders have got you covered.
Efficient Dust Collection
High-torque sanders' impressive dust collection capabilities are the unsung heroes of heavy-duty renovation, allowing you to breathe easy and focus on the task at hand.
When you're tackling a large-scale project, the last thing you want to worry about is inhaling dust and debris. That's why it's crucial to choose a sander with efficient dust collection features.
To maximize dust extraction, look for sanders with:
-
Sealed dust canisters: Preventing dust from escaping and recirculating in the air
-
Efficient filtration systems: Capturing 99.97% of dust particles as small as 0.3 microns
-
Integrated dust extraction techniques: Allowing for continuous suction and minimizing dust clouds
- Easy-to-empty dust containers: Reducing mess and making maintenance a breeze
Variable Speed Sanders for Control
When tackling home renovation projects that require precision and finesse, a variable speed sander gives you the control you need to expertly smooth out surfaces without damaging surrounding materials.
With sanding speed control, you can adjust the speed to suit the specific task at hand, ensuring a flawless finish. Variable speed benefits include the ability to tackle delicate tasks, such as sanding veneer or removing old finishes, with precision and care. You can also crank up the speed for more aggressive sanding tasks, like removing old adhesive or rough-sanding wood.
Having control over the sanding speed also allows you to adapt to different materials and surfaces. For instance, you can slow down for sensitive surfaces or speed up for tougher materials. This level of control enables you to work efficiently and effectively, reducing the risk of errors and rework.
With a variable speed sander, you'll achieve professional-grade results and take your home renovation projects to the next level. By mastering the art of sanding speed control, you'll be able to tackle even the most complex projects with confidence and precision.
Sanders With Dust Collection Systems
Incorporating a dust collection system into your sander guarantees a cleaner, healthier, and more efficient work environment, as it captures dust and debris at the source, preventing them from spreading throughout your workspace.
This feature is particularly beneficial when working with materials that produce high amounts of dust, such as drywall or wood. By reducing the amount of airborne particles, you'll not only breathe easier but also reduce the risk of dust-related health issues.
To maximize dust collection effectiveness, follow these sander maintenance tips:
-
Regularly clean the dust collection system to verify it continues to function effectively
-
Check and replace worn-out dust collection bags or filters as needed
-
Verify a secure connection between the sander and dust collection system to prevent air leaks
- Empty the dust collection container frequently to maintain peak performance
Best Sanders for Polishing Concrete
When you're looking to achieve a high-gloss finish on your concrete floors, you'll need to choose the right sander for the job.
You'll want to start by preparing the concrete surface, which involves cleaning and filling any cracks or imperfections.
Then, you'll need to select the right type of polisher and follow a specific grit sequence to achieve the desired level of shine.
Concrete Surface Preparation
Polishing concrete surfaces to a high-gloss finish requires meticulous preparation, and you'll need the right sander to guarantee a smooth, even substrate for subsequent coatings or finishes. As you commence your concrete finishing project, it's vital to master concrete surface preparation techniques to achieve professional-grade results.
Here are some critical surface preparation tips to keep in mind:
-
Remove old coatings and adhesives: Confirm the surface is free from old coatings, adhesives, or contaminants that might interfere with the polishing process.
-
Repair and fill cracks and joints: Fill cracks and joints with a compatible filler to prevent them from becoming more prominent during the polishing process.
-
Grind the surface: Use a coarse-grit sander to remove imperfections, scratches, and unevenness, creating a uniform surface.
- Clean and degrease the surface: Thoroughly clean the surface to remove dirt, oil, and other substances that might affect the polishing process.
Polisher Types Compared
With your concrete surface properly prepared, you're now ready to choose the right polisher to achieve the desired level of shine and smoothness.
When it comes to polisher materials, you have three main options: metal, resin, and diamond. Metal polishers are cost-effective and suitable for small areas, but they can leave scratches. Resin polishers offer a balance between performance and price, making them a popular choice. Diamond polishers, however, are the most effective and durable, but also the most expensive.
When selecting a polisher, consider the power rating, which typically ranges from 500 to 2,000 watts. A higher power rating doesn't always mean better performance, as it depends on the specific task and surface. For example, a 1,000-watt polisher might be sufficient for small areas, while a 2,000-watt polisher is better suited for larger areas or more aggressive polishing.
Make sure to choose a polisher that matches your needs and the level of shine you want to achieve. By understanding the differences in polisher materials and power ratings, you'll be able to select the right tool for a successful concrete polishing project.
Grit Sequence Matters
To achieve a high-gloss finish, you must carefully follow a specific grit sequence, as skipping or misusing grits can lead to poor results, increased labor, and wasted materials. This is especially vital when working with concrete, as the wrong grit progression can leave unsightly scratches or swirl marks.
When it comes to polishing concrete, mastering the correct grit sequence is key. Here are some essential guidelines to keep in mind:
-
Start with a coarse grit (around 16-20) to remove major imperfections and old coatings.
-
Progress to a medium grit (30-40) for general sanding and scratch removal.
-
Move to a fine grit (60-80) for honing and refining the surface.
- Finish with an ultra-fine grit (100-120) for a high-gloss finish.
Electric Sanders for Indoor Projects
When tackling indoor projects, you'll find that electric sanders are a game-changer for smoothing out rough wood, removing old finishes, and prepping surfaces for painting or staining.
Cordless sanders, in particular, offer the convenience of increased mobility and reduced fatigue, allowing you to work for longer periods without being tied to a power cord.
For indoor projects, it's crucial to reflect on the type of sander accessories you'll need. Dust collection systems, for instance, are a must-have for minimizing mess and maximizing efficiency.
When choosing the right electric sander for your indoor project, think about the surface you're working with and the level of smoothness you need to achieve.
Orbital sanders are great for general-purpose sanding, while belt sanders are better suited for larger, flatter surfaces.
Detail sanders, on the other hand, are perfect for getting into tight spaces and corners.
With the right electric sander and accessories, you'll be able to achieve professional-looking results that will elevate your indoor renovation project.
Pneumatic Sanders for Outdoor Use
You'll likely prefer pneumatic sanders for outdoor projects, as they're built to withstand harsher environments and can tackle heavier-duty tasks, such as sanding down rough decks or stripping old paint from outdoor furniture.
These tools are designed to handle the elements, making them perfect for outdoor applications. One of the key pneumatic advantages is their ability to deliver more power and speed than electric sanders, which is essential for tackling tough outdoor projects.
Some of the benefits of using pneumatic sanders for outdoor use include:
-
Increased power and speed for tackling rough surfaces
-
Ability to withstand harsh weather conditions, such as rain and extreme temperatures
-
Portability and convenience, allowing you to work in remote areas
- Versatility regarding attachment options, such as sanding drums and wire brushes
When it comes to outdoor projects, pneumatic sanders are the clear winner. They can handle the toughest tasks with ease, and their durability guarantees they'll withstand the rigors of outdoor use.
Whether you're refinishing a deck or restoring outdoor furniture, a pneumatic sander is the perfect tool for the job.
Sanders With Long-Lasting Abrasives
While pneumatic sanders excel in outdoor projects, it's equally important to contemplate the type of abrasives used, as they can considerably impact the efficiency and effectiveness of your sanding task. This is where sanders with long-lasting abrasives come into play.
You'll want to opt for sanders that utilize high-quality, durable abrasive materials that can withstand the demands of your project. These abrasives will allow you to sand for longer periods without needing to replace them, saving you time and money in the long run.
When choosing a sander with long-lasting abrasives, consider the type of sanding techniques you'll be using. For example, if you'll be working with rough wood, you'll want an abrasive that can handle the coarse surface.
Look for sanders with abrasives that are specifically designed for your project's unique needs. By investing in a sander with long-lasting abrasives, you'll be able to achieve smoother results with less effort, making your home renovation project a success.
With the right abrasive materials and sanding techniques, you'll be able to tackle even the toughest tasks with confidence.
Compact Sanders for Tight Spaces
Working in tight spaces can be a frustrating challenge, but compact sanders are specifically designed to tackle these areas with ease, effortlessly fitting into small corners and crevices to deliver precise results.
You'll appreciate the compact sander features that allow you to maneuver into tight spaces, making it easier to sand those hard-to-reach areas. When working in tight spaces, it's crucial to master tight space techniques, such as using a gentle touch and making slow, controlled movements.
Here are some key benefits of compact sanders for tight spaces:
-
Improved accuracy: Compact sanders provide better control, allowing you to sand small areas with precision.
-
Increased accessibility: Their compact design enables you to reach areas that larger sanders can't.
-
Reduced fatigue: Compact sanders are typically lighter and more ergonomic, reducing fatigue and strain.
- Enhanced versatility: Compact sanders can be used for a variety of tasks, from sanding small surfaces to detailing intricate carvings.
Frequently Asked Questions
Can I Use a Sander on Freshly Poured Concrete Surfaces?
You're wondering if you can use a sander on freshly poured concrete surfaces? Generally, it's not recommended. Fresh concrete is too soft, and sanding can create scratches or swirl marks. Instead, wait until the concrete has fully cured, usually after 28 days.
Then, you can start with concrete surface preparation using a walk-behind sander or a handheld orbital sander. When choosing a sander, consider the type: belt sanders are ideal for large areas, while orbital sanders are better for detail work and edging.
How Often Should I Replace the Sanding Belts or Pads?
You're probably familiar with the old saying 'a sharp axe is a safe axe.'
Same goes for sanding belts or pads - dull ones can lead to uneven finishes and even damage to your sander. To avoid this, you should replace them every 2-3 months or when you notice a significant drop in performance.
Proper belt selection and sanding techniques, like maintaining consistent pressure and speed, can also extend their lifespan.
Don't be afraid to swap them out regularly to achieve those silky-smooth results you're after.
Are Pneumatic Sanders Suitable for Indoor Projects With Limited Air Supply?
When working on indoor projects with limited air supply, you'll want to contemplate the feasibility of pneumatic sanders.
While they offer advantages like increased power and efficiency, they can also compromise indoor air quality.
Since pneumatic sanders rely on compressed air, they can stir up dust and debris, making them less suitable for indoor projects with limited ventilation.
You'll need to weigh these factors and contemplate alternative sanding options to guarantee a safe and healthy working environment.
Can I Use a Sander to Remove Old Adhesive From Concrete Floors?
Imagine a stubborn sticker refusing to budge - that's what old adhesive on concrete floors can feel like.
But, you can be the hero that saves the day!
You'll need a sander specifically designed for adhesive removal, like a floor scraper or a walk-behind sander with a concrete prep attachment.
These tools will help you scrape, grind, and sand away the old adhesive, leaving your concrete floor smooth and ready for its new finish.
Do I Need to Wear Protective Gear When Operating a Concrete Sander?
When operating a concrete sander, you'll want to prioritize your safety above all else.
You're dealing with heavy-duty machinery that kicks up concrete dust and debris, so don't skip on safety precautions.
Wear a dust mask or respirator for respiratory protection - you don't want to inhale those harmful particles.
Additionally, consider protective gear like goggles, gloves, and a long-sleeved shirt to shield yourself from flying debris.
Trust us, it's better to be safe than sorry!
Conclusion
You've finally made it to the end of this exhaustive list, and you're probably more confused than when you started. Who knew there were so many types of sanders out there?
But don't worry, the good news is that you now have the knowledge to choose the perfect sander for your next project.
The bad news is that you'll probably spend the next hour browsing online reviews and reading up on each model.
Happy renovating!
Related Posts
-
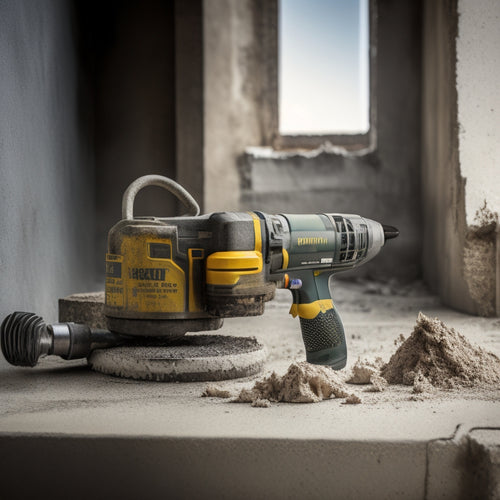
Top Drill for Concrete Wall Renovation
When choosing the top drill for your concrete wall renovation, you'll want to prioritize key features like drill powe...
-

Crack Repair Inspection Checklist for Home Renovation
When creating a crack repair inspection checklist for your home renovation project, you'll want to identify crack typ...
-

Renovation Tool Checklist for Smooth Finishes
When tackling a renovation project that requires a smooth finish, you'll need a thorough tool checklist to guarantee ...


