
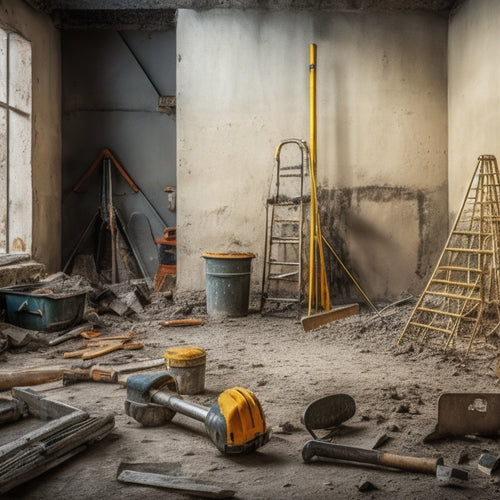
10 Best Plastering Tools for Home Renovation Projects
When it comes to achieving a professional-grade finish in your home renovation project, having the right plastering tools is vital. You'll need a stainless steel or carbon steel trowel for a smooth finish, a hawk to carry and dispense plaster efficiently, and a high-carbon stainless steel putty knife for finishing tasks. A float will help you achieve an even surface, while a darby will smooth out finishes. Edgers, joint knives, scrapers, and rasp tools will also be essential for clean corners, precise joints, removing old plaster, and preparing rough surfaces. With the right tools, you'll be well on your way to a flawless renovation - and the details that follow will show you exactly how.
Key Takeaways
- Essential plastering tools include trowels, hawks, putty knives, floats, darbies, mixing buckets, edgers, joint knives, scrapers, and rasp tools.
- Choose the right trowel material (stainless steel, carbon steel, or fiberglass) for durability, corrosion resistance, and lightweight handling.
- Select a hawk with an ergonomic design and durable material (aluminum, stainless steel, or fiberglass) for efficient plastering and reduced fatigue.
- Floats with rust-resistant coatings and ergonomic handles are crucial for achieving smooth, even surfaces in plastering projects.
- Rasp tools with coarse, medium, or fine teeth are necessary for preparing rough surfaces and ensuring effective bonding of old and new plaster.
Essential Trowels for Smoothing Walls
Your arsenal of plastering tools isn't complete without the right trowels for smoothing walls. Trowels are a vital component in achieving a smooth, even finish. When selecting a trowel, consider the material: stainless steel, carbon steel, or fiberglass. Each has its benefits, with stainless steel offering superior durability and corrosion resistance, while carbon steel provides a more affordable option.
Fiberglass trowels, on the other hand, are lightweight and ideal for larger areas.
Regardless of the material, proper trowel maintenance is essential. Regularly clean your trowel to prevent plaster buildup, and store it in a dry place to prevent rust. Apply a thin layer of oil to the blade to maintain its condition.
When it comes to handling, hold the trowel at a 20-30 degree angle, applying gentle pressure to achieve the desired smoothness. By following these trowel maintenance tips and considering a trowel material comparison, you'll be well on your way to achieving professional-grade results in your home renovation project.
Reliable Hawk for Holding Plaster
As you smooth out the walls with your trusty trowel, it's time to focus on the tool that helps you hold and transport plaster: the hawk. This versatile tool is vital for efficient plastering, allowing you to easily carry and dispense the right amount of plaster to your trowel.
When choosing a hawk, consider the following key factors:
-
Material options: Aluminum, stainless steel, and fiberglass hawks offer unique benefits, such as durability, rust-resistance, and lightweight construction.
-
Size and capacity: Select a hawk that can hold the right amount of plaster for your project, ensuring you're not making too many trips back to the mixing bucket.
-
Ergonomic design: A comfortable, non-slip grip is essential for reducing fatigue and improving control.
- Maintenance tips: Regularly clean and dry your hawk to prevent plaster buildup and rust, extending its lifespan and performance.
High-Quality Putty Knives for Finishing
When selecting a high-quality putty knife for finishing, you'll want to contemplate the blade material, as it directly affects the tool's performance and durability.
A high-carbon stainless steel blade, for instance, will hold its edge longer and resist corrosion better than a lower-grade material.
Additionally, an ergonomic handle design will reduce fatigue and improve control, allowing you to achieve a smoother finish with less effort.
Blade Material Matters
You're likely familiar with the significance of high-quality putty knives for finishing, but have you ever stopped to reflect on the blade material that makes them truly effective? The blade material is essential to the overall performance and longevity of your putty knife. A high-quality blade material will guarantee blade durability and make blade maintenance a breeze.
Here are some key factors to take into account when evaluating blade materials:
-
Carbon steel blades: Offer excellent strength, flexibility, and rust resistance, making them ideal for heavy-duty applications.
-
Stainless steel blades: Provide superior corrosion resistance and are perfect for working with water-based materials or in humid environments.
-
Flexible blades: Allow for more precise control and are ideal for smoothing out small areas or creating intricate details.
- Titanium blades: Offer exceptional strength-to-weight ratio, making them perfect for heavy-duty applications where fatigue is a concern.
When selecting a putty knife, choose a blade material that aligns with your specific project requirements. By doing so, you'll guarantee a high-quality finish and extend the lifespan of your tool.
Ergonomic Handle Design
Selecting a high-quality putty knife involves more than just choosing the right blade material. You also need to evaluate the ergonomic benefits of the handle design. A well-designed handle can make a significant difference in your overall comfort and performance while working on your home renovation project.
When looking for a putty knife with an ergonomic handle, assess the grip size, shape, and material. A contoured grip that fits comfortably in your hand reduces fatigue and allows for better control. Look for handles made from materials that provide a secure grip, even with wet or slippery hands.
Additionally, a handle with a slight curvature or angle can help reduce strain on your wrist and forearm. A putty knife with an ergonomic handle design provides user comfort and reduces the risk of injury. It allows you to work for extended periods without feeling fatigued, enabling you to complete your project efficiently.
Must-Have Floats for Leveling Surfaces
Achieving a smooth, even surface is vital in plastering, and that's where floats come in - literally.
You'll need the right float to guarantee your surface is level and even. When choosing a float, consider the material it's made of. Aluminum floats are lightweight and ideal for larger areas, while resin floats are more durable and suitable for smaller, more detailed work.
- Look for floats with a rust-resistant coating to prevent damage and extend their lifespan
- Consider the handle material and ergonomics to reduce fatigue during extended use
- Floats with adjustable handles allow for customizable comfort and precision
- Regular float maintenance, such as cleaning and storing properly, is essential to extend its lifespan and guarantee peak performance
Best Darby for Smooth Finishes
When selecting a darby for smooth finishes, you'll want to take into account the size of the tool, as larger darbies are better suited for covering large areas, while smaller ones provide more precision.
The material of the handle also plays an important role, with options ranging from durable fiberglass to comfortable, non-slip rubber grips.
Additionally, the edge type of your darby, whether it's a rounded or square edge, will impact the quality of your finish, making it essential to choose the right one for your specific project.
Darby Size Matters
Finishing a wall to perfection requires mastering the art of smooth finishes, and it all starts with choosing the right darby size.
You'll want to select a darby that complements your plastering style and the specific project requirements. With various darby types and techniques available, it's crucial to understand the role of darby size in achieving a flawless finish.
-
A smaller darby (12-18 inches) is ideal for tight spaces, corners, and intricate designs, allowing for precise control and flexibility.
-
A medium-sized darby (18-24 inches) is the most versatile, suitable for general plastering tasks and providing a good balance between coverage and maneuverability.
-
A larger darby (24-36 inches) is perfect for large, open areas, enabling you to cover more surface area quickly and efficiently.
- An extra-large darby (36-48 inches) is designed for massive projects, offering maximum coverage and speed, but requiring more strength and control.
Handle Material Options
You've selected the ideal darby size for your project, now it's time to focus on the handle material that will help you achieve a smooth finish. The handle material you choose can greatly impact your work's quality, particularly when it comes to handle durability and grip.
A durable handle will withstand the rigors of repeated use, while a comfortable grip will reduce fatigue and enhance control.
For handles, you'll typically encounter three material options: wood, fiberglass, and aluminum. Wooden handles are traditional and provide a comfortable grip, but they may not be as durable as other options.
Fiberglass handles offer a good balance between durability and grip, making them a popular choice. Aluminum handles, on the other hand, are extremely durable but can be slippery, so look for ones with textured grips.
When selecting a handle material, consider the specific demands of your project. If you'll be working with heavy coats of plaster or in humid environments, a durable handle like aluminum or fiberglass may be the better choice.
If comfort is your top priority, a wooden handle could be the way to go. Whatever your choice, a well-designed handle will help you achieve a smooth, professional finish.
Edge Type Variations
With the handle material selected, attention turns to the darby's edge type, a critical factor in achieving a smooth finish.
The edge type you choose will directly impact the quality of your plastering work, so it's crucial to understand the options.
Edge types can be categorized into four primary profiles:
-
Rounded edge: Ideal for creating a smooth, even finish, rounded edges are perfect for new plastering projects or when working with lime-based plasters.
-
Square edge: Better suited for scraping and removing old plaster, square edges are more aggressive and effective at removing material.
-
Tapered edge: A hybrid of rounded and square edges, tapered edges offer a balance between smoothness and scraping ability.
- Notched edge: Featuring small notches or serrations along the edge, notched edges are designed for specific tasks, such as applying texture or creating decorative patterns.
When selecting an edge type, consider the specific requirements of your project and the type of plaster you're working with.
The right edge type will help you achieve a professional-looking finish and make your plastering tasks more efficient.
Heavy-Duty Mixing Buckets Required
As you prepare to tackle your home renovation project, having the right tools is essential, and that includes heavy-duty mixing buckets that can withstand the rigors of mixing and hauling heavy plastering materials.
A sturdy bucket is vital for efficient mixing techniques, allowing you to combine materials smoothly and evenly. Look for buckets made from heavy-gauge steel or durable plastic that can handle the weight and abrasion of plastering compounds.
When selecting a mixing bucket, consider the size of your project and the quantity of materials you'll be working with. Bucket sizes range from 2-5 gallons, with larger sizes ideal for bigger projects and smaller sizes suitable for smaller areas or detail work.
A bucket with a non-slip handle and a sturdy lip will make it easier to mix and pour materials without spilling. Additionally, a bucket with a measuring scale or markings can help you achieve accurate ratios of materials, ensuring a smooth and even finish.
Perfect Edger for Clean Corners
To achieve professional-looking results in your home renovation project, perfect edgers are necessary for creating clean corners and precise joints.
You'll need a tool that can handle corner trimming and edge finishing with precision and ease. A high-quality edger will help you achieve a smooth finish and guarantee that your plastering job looks professional.
When choosing an edger, consider the following key features:
- A sturdy, ergonomic design that fits comfortably in your hand
- A rust-resistant, high-carbon steel blade that can withstand heavy use
- Adjustable handles that allow for precise control and maneuverability
- A built-in spirit level that guarantees accurate, plumb edges
With the right edger in your toolkit, you'll be able to achieve crisp, clean corners and precise joints that will elevate your plastering project to the next level.
Don't settle for anything less – invest in a top-quality edger that will help you produce professional-looking results.
Top-Notch Joint Knives for Seams
Your joint knife is the go-to tool for creating seamless joints, making it an essential component of your plastering toolkit.
When selecting a joint knife, consider the materials it's made of. Stainless steel and high-carbon steel are popular choices due to their durability and resistance to corrosion. You'll also need to decide on the size of your joint knife, as they come in various lengths and widths to suit different applications. A 2-inch joint knife is ideal for smaller joints, while a 6-inch or 8-inch knife is better suited for larger areas.
It's vital to choose a joint knife that feels comfortable in your hand, allowing you to maintain control and precision. Some joint knives feature ergonomic handles with non-slip grips, reducing fatigue and improving overall performance.
Additionally, look for joint knives with replaceable blades, which can be easily swapped out when they become dull. With the right joint knife, you'll be able to create smooth, seamless joints that will elevate the quality of your plastering work.
Versatile Scrapers for Removing Old Plaster
Several types of scrapers are available for removing old plaster, each designed to tackle specific challenges. When it comes to plaster removal techniques, having the right scraper can make all the difference. You'll want to choose a scraper that suits the type of plaster you're working with and the surface you're scraping.
-
Use a putty knife scraper for removing old, loose plaster from flat surfaces.
-
A 5-in-1 scraper is ideal for scraping and prying off old plaster from corners and edges.
-
A trowel scraper is best for removing large chunks of plaster from walls and ceilings.
- A razor scraper is perfect for scraping smooth surfaces and removing thin layers of old plaster.
Proper scraper maintenance tips are also essential to guarantee your tool lasts long and performs efficiently. Regularly clean your scraper to prevent plaster buildup, and store it in a dry place to prevent rust.
Additionally, consider applying a rust-resistant coating to extend the life of your scraper. By choosing the right scraper and following proper maintenance tips, you'll be able to remove old plaster efficiently and effectively, setting yourself up for a successful home renovation project.
Specialized Rasp for Rough Surfaces
Rough surfaces require specialized tools to effectively remove old plaster. When dealing with rough surfaces, you need a rasp that can tackle the toughest surfaces. There are various rasp types designed for specific surface preparation tasks.
| Rasp Type | Surface Preparation | Description |
|---|---|---|
| Coarse Rasp | Removing thick layers of old plaster | Aggressive teeth for fast removal |
| Medium Rasp | Smoothening rough surfaces | Balanced teeth for efficient smoothening |
| Fine Rasp | Final surface preparation | Gentle teeth for a smooth finish |
Using the right rasp type guarantees efficient surface preparation. A coarse rasp is ideal for removing thick layers of old plaster, while a medium rasp is perfect for smoothening rough surfaces. A fine rasp is used for final surface preparation, providing a smooth finish for the new plaster. By selecting the appropriate rasp, you'll achieve a professional-grade finish and guarantee a strong bond between the old and new plaster.
Frequently Asked Questions
What Safety Gear Is Necessary for Plastering Projects?
When working with plaster, you'll need protective equipment to mitigate plastering hazards; invest in a dust mask, safety goggles, gloves, and a long-sleeved shirt to prevent skin and eye irritation, and respiratory issues from inhaling dust particles.
Can I Use a Mixer Drill for Mixing Plaster?
When mixing plaster, you'll find that a mixer drill with a slow speed and high torque, like a paddle mixer or a planetary mixer, is ideal for incorporating air and achieving a smooth consistency, using techniques like slow pouring and gentle folding.
How Often Should I Clean My Plastering Tools?
"A clean tool is a happy tool," as the saying goes. You should clean your plastering tools after every use, using gentle cleaning techniques to prevent damage, and perform thorough maintenance weekly to guarantee peak performance and extend their lifespan.
Are There Any Eco-Friendly Plastering Materials Available?
You're likely to find sustainable plaster options that align with your eco-friendly goals, offering natural plaster benefits like reduced carbon footprint, improved indoor air quality, and increased durability, making your renovation project a healthier, more environmentally responsible choice.
Can I DIY Plastering or Do I Need Professional Help?
You're 50% more likely to encounter DIY disasters than a pro, so consider your skills before tackling plastering techniques. Common DIY mistakes, like uneven application and inadequate surface prep, can lead to costly reworks, making professional help a wise investment.
Conclusion
You've finally got the ultimate arsenal of plastering tools to transform your walls from messy to mesmerizing! With these high-quality trowels, reliable hawks, and precision putty knives, you'll be smoothing, holding, and finishing like a pro in no time. Don't even get us started on the game-changing floats, darbys, edgers, joint knives, scrapers, and rasps that'll take your plastering skills to new heights. Your DIY renovation project just got a whole lot easier - and exponentially more epic!
Related Posts
-

Why Renovation Waste Disposal Harms the Environment
When you undertake a renovation project, you're contributing to a staggering problem: renovation waste disposal, whic...
-
What Tools to Rent for Block Wall Renovation
When renovating a block wall, it's vital to have the right tools for the job. You'll need demolition tools like pry b...
-

Streamline Your Exterior Renovation Timeline
To streamline your exterior renovation timeline, you'll need to approach the process strategically. Start by planning...


