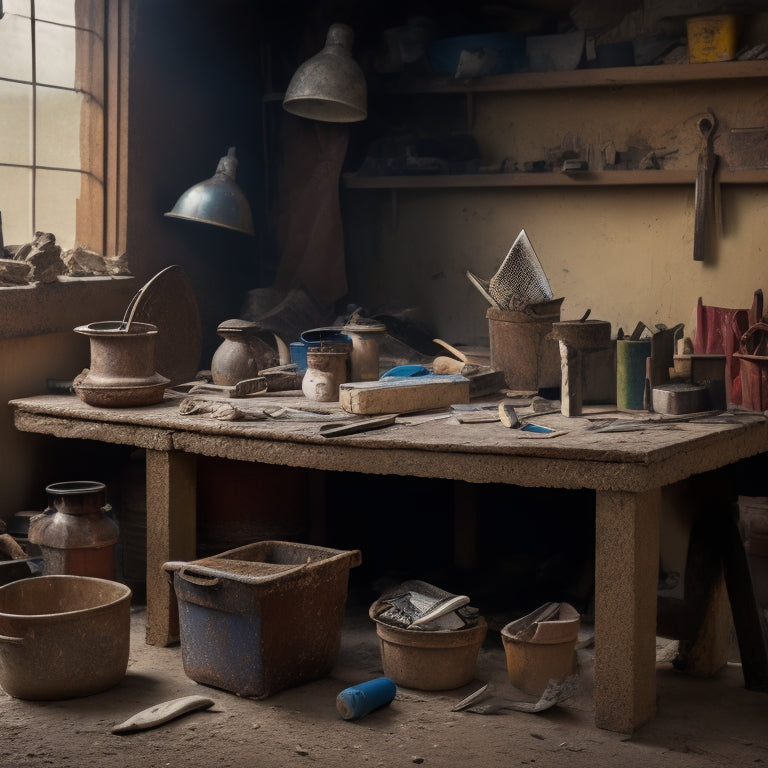
10 Best Plastering Tools for Home Renovation DIY
To guarantee a professional-looking finish in your DIY home renovation, you'll need the right plastering tools. Start with an essential trowel for a smooth finish, a reliable hawk for holding plaster, and a putty knife for efficient scraping. Invest in a heavy-duty mixer for large batches and a precision edger for clean lines. Don't forget a durable float for smooth surfaces, high-quality sandpaper for finishing, and efficient sponges for texturing. Prioritize safety with protective gear, including eye, airborne, skin, and foot protection. With these must-haves, you'll be well on your way to achieving a flawless finish - and that's just the beginning of your plastering journey.
Key Takeaways
- Choose the right trowel type (pointed, square-edged, or rounded-edge) and technique for a smooth finish and professional appearance.
- Select a reliable hawk that is lightweight, rust-resistant, and has an ergonomic design for easy scooping and pouring of plaster.
- Invest in a high-quality putty knife with a sharp blade, ergonomic grip, and durable construction for efficient scraping tasks.
- Use a heavy-duty mixer with a large capacity, robust motor, and efficient gear system for mixing large batches of plaster consistently.
- Don't forget essential accessories like precision edgers, sturdy ladders, durable floats, high-quality sandpaper, and protective gear for a successful DIY plastering project.
Essential Trowel for Smooth Finish
When it comes to achieving a smooth finish in your plastering project, the right trowel is essential.
You'll need to choose from various trowel types, each designed for specific tasks. The most common types are pointed trowels for applying and smoothing plaster, square-edged trowels for finishing and polishing, and rounded-edge trowels for curved surfaces.
Mastering trowel techniques is also vital for a flawless finish. Hold the trowel at a 20- to 30-degree angle, with the blade almost flat on the surface. Apply gentle pressure, using long, sweeping strokes to spread the plaster evenly.
As you work, keep the trowel clean and free of excess plaster to prevent marks and imperfections. For a super-smooth finish, use a finishing trowel with a rubber or plastic blade, which glides smoothly over the surface, removing any imperfections.
With the right trowel and techniques, you'll be able to achieve a professional-looking finish that will elevate your plastering project.
Reliable Hawk for Holding Plaster
As you prepare to apply plaster to your wall, a reliable hawk is vital for holding the right amount of material. A hawk that's durable, easy to clean, and resistant to corrosion will guarantee a smooth application process.
When selecting a hawk, consider the materials it's made of. Fiberglass, aluminum, or stainless steel hawks are popular choices due to their lightweight and rust-resistant properties.
Regular hawk maintenance is important to prolong its lifespan. Clean your hawk after each use with soap and water to prevent plaster buildup. For stubborn stains, use a gentle abrasive like baking soda and water.
Store your hawk in a dry place to prevent moisture buildup, which can lead to corrosion.
Innovative hawk designs now feature ergonomic handles and non-slip grips, reducing fatigue and improving control. Look for hawks with a rounded or beveled edge, allowing for easy scooping and pouring of plaster.
Best Putty Knife for Scraping
When selecting the best putty knife for scraping, you'll want to take into account the blade material, as it directly affects the knife's performance and durability.
A high-carbon steel blade, for instance, will provide a sharper edge and resist corrosion better than a stainless steel one.
Meanwhile, the comfort of the handle is also essential, as it will be the difference between fatigue and efficiency during extended scraping tasks.
Blade Material Matters
How effectively you scrape away old plaster or adhesives depends on the blade material of your putty knife. A high-quality blade can make all the difference in your DIY project.
When it comes to blade durability, you'll want to take into account the type of material used. Carbon steel blades are a popular choice for their flexibility and rust-resistance, making them ideal for scraping and removing old plaster.
Stainless steel blades, on the other hand, offer superior corrosion resistance and are better suited for working with adhesives and other sticky substances. You may also come across blades made from high-carbon steel, which offer a balance between flexibility and durability.
Additionally, some putty knives feature blades with a specialized coating, such as titanium or ceramic, which can enhance blade durability and reduce wear and tear.
Handle Comfort Counts
Your grip on the putty knife can make or break the efficiency of your scraping task. A comfortable handle is essential for reducing fatigue and improving control. Look for putty knives with ergonomic grips that fit snugly in your hand, allowing you to apply even pressure. Extended handles can also provide extra leverage, making it easier to scrape through thick layers of plaster.
| Handle Type | Benefits | Ideal for |
|---|---|---|
| Ergonomic Grip | Reduces fatigue, improves control | Delicate scraping tasks |
| Extended Handle | Provides extra leverage, increases scraping power | Thick plaster layers, large areas |
| Contoured Handle | Fits comfortably in hand, reduces slippage | Precise scraping, detail work |
| Rubberized Handle | Improves grip, reduces vibrations | Heavy-duty scraping, demolition work |
| Adjustable Handle | Accommodates different hand sizes, preferences | Shared tools, varied tasks |
When choosing a putty knife, consider the type of scraping you'll be doing most often. If you're working on delicate surfaces, an ergonomic grip may be the best choice. For thicker plaster layers, an extended handle can provide the extra power you need. Whatever your preference, a comfortable handle is key to getting the job done efficiently and effectively.
Heavy-Duty Mixer for Large Batches
When you're working on large-scale plastering projects, you need a heavy-duty mixer that can handle big batch sizes.
You'll want a mixer that can consistently produce large quantities of plaster, ensuring you have enough material to complete the job efficiently.
Look for a mixer with a high batch size capacity and advanced features that guarantee mix consistency, as this will directly impact the quality of your finished product.
Batch Size Capacity
With large-scale home renovations, you're likely to tackle projects that require massive amounts of plaster, making it necessary to have a mixer that can handle substantial batch sizes. A mixer's batch size capacity directly impacts the efficiency of your plaster mixing process.
When preparing large batches, you need a mixer that can handle the workload without compromising on quality or consistency.
Look for a mixer with a large drum capacity, typically ranging from 150 to 300 liters. This allows you to mix substantial batches of plaster at once, saving you time and effort in the long run. Additionally, consider a mixer with adjustable batch sizes, enabling you to fine-tune your batch preparation according to the specific project requirements.
When choosing a mixer, also evaluate its motor power and gear system. A robust motor and efficient gear system guarantee that the mixer can handle the demands of large batches without overheating or stalling.
Mix Consistency Matters
Achieving consistent mix quality is essential when working with large batches of plaster, as it directly impacts the final result of your renovation project.
You need to guarantee that every batch is mixed to the same consistency to avoid uneven finishes, cracking, or weakening of the plaster. A heavy-duty mixer is a must-have tool for large batches, as it can handle the volume and provide the necessary power to mix the plaster evenly.
To achieve consistency, you should:
- Master various mixing techniques, including the "double-mix" method, which involves mixing the plaster in two stages to eliminate lumps and guarantee a smooth finish
- Pay close attention to water ratios, as excessive water can weaken the plaster and lead to cracks
- Use a mixer with adjustable speed settings to accommodate different types of plaster and mixing techniques
- Regularly clean and maintain your mixer to prevent residue buildup and guarantee consistent results
Precision Edger for Clean Lines
As you tackle the task of creating smooth, even surfaces in your home renovation project, a precision edger becomes an indispensable tool in your arsenal. This tool allows you to achieve clean lines and precise edge finishing, giving your walls a professional look.
With a precision edger, you can master various cutting techniques, such as beveling, chamfering, and rounding, to create unique design elements. Its adjustable angle and depth settings enable you to customize your cuts to suit your project's specific requirements.
When choosing a precision edger, look for one with a durable, high-carbon steel blade and an ergonomic handle designed for comfortable grip and control. This will guarantee precise movements and reduced fatigue during extended use.
Additionally, consider an edger with a built-in spirit level or laser guide to help you maintain accurate alignment and achieve straight cuts.
Sturdy Ladder for High Ceilings
When you're working on high ceilings, you need a ladder that can safely support your weight and help you reach those hard-to-access areas.
You'll want a sturdy ladder that can stabilize on uneven floors, ensuring you don't slip or lose your balance while working above ground.
Reaching High Shelves Safely
Beyond the standard eight-foot ceiling, high shelves can be an intimidating challenge, especially in rooms with vaulted or cathedral ceilings. You'll need a sturdy ladder that can reach those lofty heights while guaranteeing your safety.
When it comes to reaching high shelves safely, you must prioritize safe ladder techniques. Here's what you should consider:
-
Always maintain three points of contact with the ladder, whether it's two hands and one foot or two feet and one hand.
-
Ascertain the ladder is level and securely positioned before climbing.
-
Never lean over the side of the ladder to reach; instead, move the ladder to a position where you can safely access the shelf.
- Consider investing in storage solutions like overhead storage racks or pulley systems to reduce the need for frequent ladder use.
Stability on Uneven Floors
By the time you're tackling high ceilings, you've likely encountered uneven floors, which can compromise the stability of your ladder. To guarantee safety and precision, it's vital to assess the floor's condition before setting up your equipment.
Floor assessment tools, such as a spirit level or a laser level, can help you identify any deviations from the ideal plane. Once you've identified the uneven areas, you can employ plaster leveling techniques to create a stable surface for your ladder.
When choosing a ladder for high ceilings, look for one with adjustable legs or a built-in leveling system. These features allow you to adapt to the floor's unevenness, guaranteeing a sturdy base for your work.
Additionally, consider a ladder with a wide, flat base or a stabilizing bar to further enhance stability.
Durable Float for Smooth Surfaces
Get a grip on your plastering project with a durable float, an essential tool for creating smooth surfaces. You'll be working with a mixture of cement, sand, and water, and a high-quality float will help you achieve a uniform finish.
When choosing a float, consider the material: magnesium floats are lightweight and ideal for large areas, while stainless steel floats are more durable and resistant to corrosion. You may also come across floats made from resin or fiberglass, which offer a compromise between weight and durability.
To get the most out of your float, follow these tips:
- Clean your float regularly to prevent the buildup of dried plaster
- Use a soft brush to remove excess plaster and debris
- Apply a thin layer of oil to the float's surface to prevent sticking
- Store your float in a dry place to prevent rust or corrosion
High-Quality Sandpaper for Finishing
You're now ready to move on to the finishing stages of your plastering project, where high-quality sandpaper plays a critical role in achieving a smooth, even finish. As you move from coarse to fine grits, you'll need to master various sanding techniques to eliminate imperfections and create a flawless surface.
| Sandpaper Grits | Sanding Techniques | Purpose |
|---|---|---|
| Coarse (80-100) | Circular motion | Removing major imperfections |
| Medium (120-150) | Back-and-forth motion | Smoothing out surfaces |
| Fine (220-240) | Light, gentle strokes | Final polishing and finishing |
When selecting sandpaper, consider the grit level and its intended use. Coarser grits are ideal for removing major imperfections, while finer grits are better suited for final polishing and finishing. By following these guidelines and mastering various sanding techniques, you'll be able to achieve a professional-looking finish that will elevate your plastering project.
Efficient Sponges for Texturing
Texturing sponges are an essential tool in your plastering arsenal, allowing you to add subtle patterns and visual interest to your walls and ceilings.
When choosing the right sponge for your project, consider the type of texture you want to achieve. Different sponge types are designed for specific texture techniques.
-
Natural sea sponges are ideal for creating organic, irregular patterns and can be used to create a subtle, textured look.
-
Synthetic sponges are better suited for creating uniform, repeating patterns and can be used to create a more dramatic, textured effect.
-
Cellular sponges are perfect for creating a more subtle, orange-peel texture and can be used to add visual interest to large surfaces.
- Specialty sponges, such as those with built-in texture patterns, can be used to create unique and complex designs.
Protective Gear for Safety First
When working with plaster, safety should always be your top priority, and that starts with wearing the right protective gear. You're not just protecting yourself from minor irritations, but also from serious injuries that can have long-term consequences.
To guarantee you're adequately protected, focus on the following essential items:
| Protective Gear | Purpose | Recommended Features |
|---|---|---|
| Safety Goggles | Protect eyes from debris and splashes | Anti-fog coating, shatter-resistant lenses |
| Dust Mask | Filter out airborne particles and dust | Replaceable filters, adjustable straps |
| Glove Set | Prevent skin irritation and abrasion | Waterproof, durable materials, grip patterns |
| Long-Sleeved Shirt | Cover skin from splashes and stains | Breathable, moisture-wicking fabric |
| Steel-Toed Boots | Protect feet from heavy objects | Slip-resistant soles, ankle support |
Frequently Asked Questions
Can I Use a Trowel for Applying Joint Compound?
You can use a trowel for applying joint compound, but it is crucial to choose the right type, like a 4-6 inch finishing trowel, and master techniques like feathering and layering to achieve a smooth, professional finish.
How Do I Prevent Plaster From Drying Too Quickly?
To prevent plaster from drying too quickly, you'll want to employ humidity control methods, such as misting the area or using a humidifier, and refine your plaster application techniques to maintain an ideal working consistency.
Do I Need to Wear a Mask When Sanding Plaster?
When sanding plaster, you'll stir up clouds of hazardous plaster dust, so you must take health precautions seriously - wear a mask rated for fine particles to prevent respiratory issues and protect your lungs from airborne contaminants.
Can I Reuse a Plaster Mixing Bucket After Cleaning?
As you scrub away the remnants of your last mixing masterpiece, you're left wondering: can you resurrect your trusty bucket? Yes, you can reuse it after a thorough cleaning, but be sure to sanitize and dry it to prevent contamination and compromised mixing techniques.
How Often Should I Clean My Plastering Tools?
When working with plaster, you'll want to clean your tools daily, or after every 2-3 uses, to prevent dried plaster buildup and maintain ideal tool performance, ensuring efficient tool maintenance and extending their lifespan through regular cleaning frequency.
Conclusion
With these high-quality plastering tools in your arsenal, you're ready to tackle that DIY home renovation project head-on. Remember, when it comes to plastering, the devil is in the details - and having the right tools for the job is essential. Don't be caught between a rock and a hard place; invest in quality tools that'll help you achieve a smooth, professional finish that'll make your renovation dreams a reality.
Related Posts
-

5 Best Home Renovation Project Timeline Checklists
You're looking for a clear understanding of the timeline for your home renovation project. A good place to start is w...
-

Trowel Tool Cost for DIY Home Renovation Projects
When it comes to your DIY home renovation project, you'll need to budget for a variety of trowel tools, including stu...
-

3 Beginner-Friendly Tools for Plaster Renovation Success
You'll be glad to know that the three essential tools you need for a successful plaster renovation are the same ones ...


